Jaz avalley
Station cat
I would suggest sticking the backscene to a board and the board to the table as opposed to the wall which will allow little riggle movement

Jaz, I didn't mean those particular scenes, I just put the link in to show the type of backscenes I was looking at, (there's a really nice one of the Rockies tho'), and I do have a rather large cliff face with a nice bridge, which is the diorama I wasn't intending to build behind the stub ends. The backscene that's there, was just to give me a feel for what I could use, and if you notice, the tunnel entrance disappears into some treesI like the backscene but looking at them actually infers you are on flat land, so contouring could be unnecessary, I am not planning to throw my pictures all over your thread, but I can throw some on mine so you can take a look and if you then want to discuss an aspect we will do it here where it is relevant to the thread.

Attaching it to some kind of board yes, that's the intention is, attaching the board to layout nope, it's going on the wall, assuming my landlord let's me drill some more holes in it.I would suggest sticking the backscene to a board and the board to the table as opposed to the wall which will allow little riggle movem
Oh yeah, just see my Flying Scotsman going along with its Pullman coaches, with a backdrop of the Rockies behind it, I love that ideaTo me, any backdrop or image needs to be at the angle of the viewer. Well, some skew is probably ok. How you can justify the scene for you want is the point. To me, the 3ft rule apply's. Do what you need and don't worry about it............. Oh, yes have fun with it and adjust where necessary.

") on the industrial end of the layout, I've got the Walthers Machine shop. I pick up the Walthers Construction site kit on Tuesday, and I have a two storey goods shed and another Signal box (both MDF) BUT, I'm just not happy with the rails going into the site, and it's been bugging me for quite a while.
on the industrial end of the layout, I've got the Walthers Machine shop. I pick up the Walthers Construction site kit on Tuesday, and I have a two storey goods shed and another Signal box (both MDF) BUT, I'm just not happy with the rails going into the site, and it's been bugging me for quite a while. and boring if I'm honest.
That sound's like it could work, the spur to the silo was intended to be a reverse loop, but I couldn't get it to work, so I could run that through to the Ind area as a third independent line, and possibly move the silo, but I don't think I'll gain much track on this side of the board, unless I take out the wye and put a L/H turnout there, that definitely looks possible.Smudge - this might be 'out there'. How about using the spur into the coaling facility ( at least that is what I think it is ) as the start of your planned industry area? Or, you have two possible spur's coming from the curved TO that can be utilized which would give you more length.
The spur along the back of the passenger dock can be stand alone as you will have some car spotted there and need to get to it ... right? In fact, that spur could even come off the main on the other side of the Xover.
Thanks, think it will look better once the structures are done and some scenics, that's plan A for the morning, start on building the structures, but I also want toIt looks awesome to me !
You have done well to avoid the all-to-often hill/mountain in the corner (at least the one of two I can see in the photos). A scenic "construct" like that usually seems like volcano seemingly popping up out of nowhere, when viewed from the side (which is usually from the front edge).Thanks, think it will look better once the structures are done and some scenics, that's plan A for the morning, start on building the structures, but I also want to
fit the new motors,
clean the A2 conrods,
finish the abutment,
finish the wiring for the silo,
add wiring for my spotlight car
Fit the WOW! on the diorama
Sleep.........etc. etc. etc.
Thanks, as most things in MRR it's an ongoing process, the backdrops are just for me, to give me some overall prospective, I'm looking at a more sympathetic scene, there's a link on post#117 with the sort of thing I'm imagining I could use, but attaching such backdrops as you suggest would be problematic as I'm unable to crawl under.You have done well to avoid the all-to-often hill/mountain in the corner (at least the one of two I can see in the photos). A scenic "construct" like that usually seems like volcano seemingly popping up out of nowhere, when viewed from the side (which is usually from the front edge).
Backdrops. and even if your landlord wont let you drill the holes: slide them up from below and fasten them from underneath--fixed to the bottom framing. I will assume you have already considered this option, but if not....
Forum member "Jaz avalley" suggested something very similar in post #121 above. Fasten backdrops to one another rather than to the wall. Brilliant, and I agree. Not to the wall, but to each other. Thus no need to ask your landlord for drilling rights. As to how to do it, I would suggest a support system from underneath--perhaps steel brackets--which would let you bring each additional backdrop section upward...and with JUST enough forward thrust/tension to align it with the proceeding section. With brackets supporting each backdrop from below this should--at least in theory--be possible.
The "block rock" centering the backdrop will need to be shaved down, and, given that the backdrop view supporting it on both sides will be visible almost completely from in front, you will want to paint both sides with rock--or perhaps grassed over on one or both sides--"supporting" earth structure as it were. Doesn't even have to be rising up to that rock wall, and it would be more believable anyway if it was not. But as a rock through cut, it's good.
Overall? This is top-notch work, and particularly given your small space. MUCH better than I ever did with a similar space when I worked with HO.
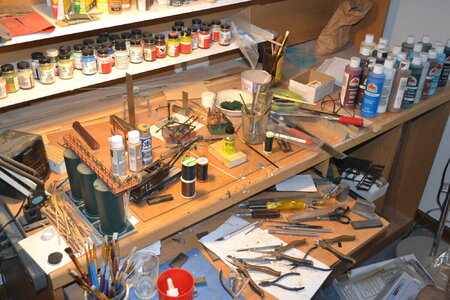
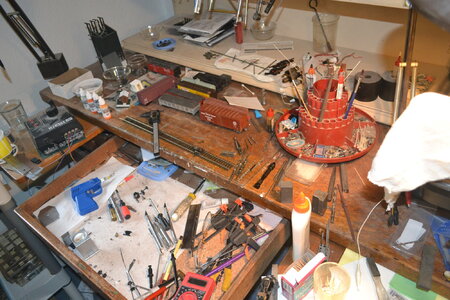
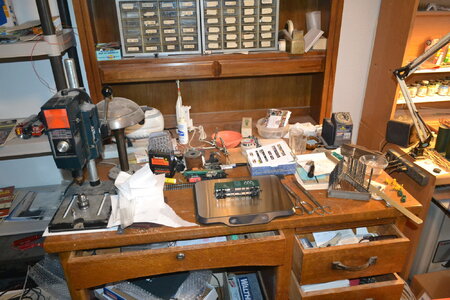
Luckily you can't see the rest of the room that now has all the stuff that was on the table strewn all over it.First Let me say that this is the first time my worktop has ever been so tidy.
I'm uncertain what colour to use, so I've done some samples on the back of the kit to see what works for me, I do have one called Dark Brick, which is only slightly darker than the kit itself, which lends me to the idea of not actually painting the structure, just a highlight wash for the brickwork and painting the window lintels.
I've everything set to start, no matter what I decide to do, I'm just waiting for the samples to dry and see if anything pops for me.
View attachment 153677
View attachment 153679
Nice having so much space.That is one very clean worktable here's mine and you can actually see the table tops
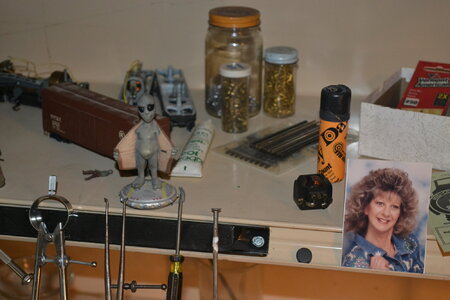
Table one then two then three then my alien helper