Enginehouse in recycling yard out


TLOC

Well-Known Member
I never designed a engine service area for the layout. Just off the entrance to the paper mill yard (PMY) is an area I was neglecting but it was the recycling center for the Steel Company across the tracks. Really just never got to the space. But it did hold 4 spots for an operating session.
36294241-59BA-4FBA-AA97-B6C6420002A1.jpeg

plenty of length and decently wide enough for a single lane enginehouse. Big enough for quick overnight check ups and minor repairs. A place to shove the engines overnight both in an outside the center. I am imaging a 5 spot facility.
589BE9A2-1555-44D1-9413-EE1340E9B10C.jpeg

there is plenty of space and it has easy access to the yard. I envision the CN trains dropping cars in the yard, heading over to the engine service area waiting for their train back to St Point to be assembled,hooking up and leaving town. While the WRVT RailRoad only owns 3 locomotives there would be room on the outside track for visiting power to be serviced if needed.

EE5FE502-3AF2-4172-A132-53469C9DCD57.jpeg

I am looking forward to working on this area. I will be taking a break from the Paper Mill and weathering of pulp wood cars. I am hoping to post after tonight a couple times a week. Fingers crossed

TomO
 
I had purchased before our marriage in 1976 a bunch of Suydam corrugated metal building kits. These kits are soldered together and I had built 3 or 4 and saved the rest. A few years ago (2016) realizing they weren’t going to be built I sold maybe 20 kits but had a bunch left over. I took those kits and combined them into one bigger box. Ok I just dumped them in there!
B104EBAC-6D6E-4083-80BC-41881564C3AB.jpeg


Weighs maybe 5-6#s and within this box lays a metal sided engine house, kitbashed of course
4766F559-9D64-439E-9786-29D8BFEADA64.jpeg

So, I sit in my chair partially under a blanket, on my right side a roaring fireplace and the left side a NHL hockey game with play in the 3rd period.
2B0AA416-FB8A-4BF3-A68A-D21A597CB6C4.jpeg

The cave/train room is very comfortable and my happy place. On the other side of the wall are the trains. Meanwhile I need to determine what parts I want to use.

TomO
 
Last edited:
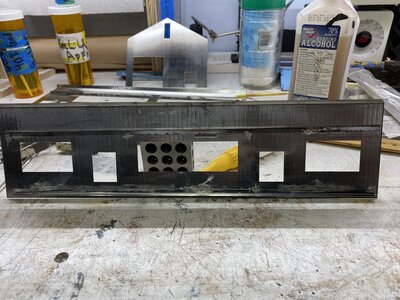
Started playing with the corrugated parts box. Lots of pieces and I haven’t solderEd metal parts together in years, wires yes. Started out with old bit of solder and corrugate parts for practice. Found out my regular solder for wiring seems to work the best.

Started off on a semi clean organized bench top
C14B2A02-6439-418D-B50B-87C95E086288.jpeg

After soldering some supports to 4 walls, I realized I was having fun, tedious fun, but it was fun. Tack soldering got easier after cleaning the area with 70% IPA and letting it dry. Seam soldering was better after I switched the solder.
3DDC93A3-6D29-4DFE-BD97-CADA7A135023.jpeg

Overall, I have soldered the support braces and primed the 4 major walls. The braces are not pretty but looks are deceiving. As I remember how to do this the soldering should get neater, quicker and stronger. Tomorrow the roof.
3AEB1509-216D-4510-A4C4-68D5080EBC96.jpeg


TomO
 

Attachments

  • 32B06EE8-CDFB-4AA4-A7B0-72627F7493A7.jpeg
    32B06EE8-CDFB-4AA4-A7B0-72627F7493A7.jpeg
    673.6 KB · Views: 98
I had forgotten how tough it is to remove ground goop. Reconstruction in the former recycling yard is on going and slower then I had thought
D548BFD7-5C6D-4998-9334-F4E8E7ADCF7C.jpeg
580D51E0-D10D-4754-800C-2D6DA11EA072.jpeg

I need to smooth out the ground next and then build the foundation for the engine shed. It will be 4’ HO scale cinder block. The 4’ height will let the locomotives enter with about 2’ of clearance. I wasn’t going to put a pit in under the engine track but I probably should. I need to layout the servicing track and decide where the fueling, sanding and lubricant stations will be. Final decision is regarding fencing in this area. I had a corrugated fence around the recycling yard but the decision here is do I put a chain link fence between the yard tracks and the service track.

I enjoy these decisions and the planning.

TomO
 
Looks great Tom. I look forward to seeing what you do. I don't think I have ever heard of metal kits before.
Curt, thanks for checking this out. Suydam was a kit manufacturer in the 60’s and 70’s for sure and then sold out to Alpine Models. I had a friend that in 1976, (the year I got married) who owned a hobby shop and was getting a divorce. Very contenious event and instead of selling the shop he called me and said come on and get what you want and we will figure a price out. He did not want the soon to be x to get any money from him. I purchased 20+ brass engines, the PFM sound system, a bunch of Atlas and Athearn locomotives and maybe 40 Suydam structure kits. Most were the corragated metal I am working with here and others were cardstock kits. The metal kits were definitely popular as I saw them on private layouts in Southeastern Wisconsin and the Chicago area. They also made brass Interurban cars.

They are Not the hardest things to build as the instructions were very exact. Soldering was much harder for me back then. with improve skills and the correct solder it went together fairly easy. The building I am putting together is a “major” manufacturing plant. With a foundation added it will work well as a engine shed that does minor work on a Class 3 railroad.

TomO
 
Looks great Tom! I wouldn't have a clue about soldering pieces together like that. I've soldered wire (poorly) but never anything like that. Looks like it's going to be a really neat structure for you layout.
 
I did buy several of the older metal kits by Suydam many years ago and like many back then my soldering wasn't up to finishing the kits. I think I still have one of the unfinished kits.???

Greg
I tossed a few years ago whatever kits didn’t sell into one box and now I just use them for corrugated parts until building the engine house.

TomO
 
Not much done on the layout today. I am waiting for the LHS to receive the Smooth
It I ordered Saturday. Normally he carrys it in stock but my luck someone beat me to the last one.
Just created the hole where the service pit will be located. Then plugged the vacuum cleaner cleaning up all the foam. The pit will be 70’ long within the 100’ shed.

Tom
A121F564-A53D-4E47-BF73-DC9582FF1151.jpeg
BECBBAB3-2DDE-4BBD-865B-7404A0EDC211.jpeg


A121F564-A53D-4E47-BF73-DC9582FF1151.jpeg
BECBBAB3-2DDE-4BBD-865B-7404A0EDC211.jpeg
 
I have been in the train room but not working on the engine service area. I did pick up the Smooth It this afternoon. Thursday the 27th I will mix it and apply to level out the foam again. The removing of the ground goop for ground cover wasn’t the easiest thing to do and the foam is well gouged. Pictures hopefully tomorrow night.

TomO
 
Poured the fueling and sand track cement pad. Problem is, I forgot to embed the track into the pad. Thinking!

TomO
Yup, I’ve done that before!
I’ve never tried smooth it, how does it compare to drywall mud?
I have been using celluclay for scenery, liking it so far!


Back
Top