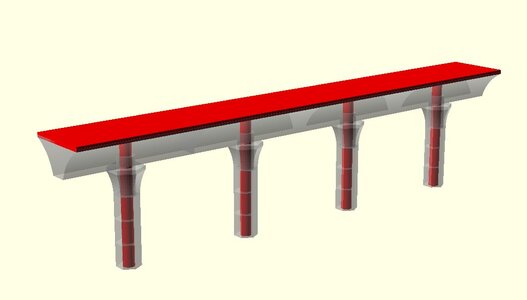
3D printing model train accessories and landscape


Various designs I did for various model train gauges, to be found in:

and a lot more: containers, bridges, a.s.o
 

Attachments

  • GBW-vue.jpg
    GBW-vue.jpg
    16.8 KB · Views: 48
  • Photo1.jpg
    Photo1.jpg
    42.3 KB · Views: 62
  • Vue2.jpg
    Vue2.jpg
    18.9 KB · Views: 54
  • Vue2R.jpg
    Vue2R.jpg
    221.8 KB · Views: 46
  • Vue-struct.jpg
    Vue-struct.jpg
    44.6 KB · Views: 53
Three D printing has great possibilities for RR items. I am straying from the ship building world at the moment where I have built a number of ships in 1:120 and 1:144 scales using mostly 3D SLA printing. Several decades (3?) I started a HON3 small layout to represent Skaguay (old spelling) the seaside terminus of the White Pass and Yukon. I built a roundhouse 2-8-0 outside frame loco and a number of freight cars from the kits available at the time. So.... Currently I have printed a number of boxcars, two cabooses and a gondola, the gondola being in development at the current moment. Unlike the boxcars, the Gondola is currently being printed in pieces to be assembled.

The thing I love about 3D printing is I can proceed without regard to availability of commercial components.

I acquired a United "Mudhen" which I have re motored with a good quality NWSL can motor and will set this up for DCC. The Roundhouse 2-8-0 is being re motored as well. Besides the aforementioned engines I have two Blackstone 2-8-2's. so I should be in decent shape for traction.

Some items haven't been as good to print. I did successfully print HON3 arch bar trucks and wheels and they work, but because of the qualities of the resins used, they just don't roll as well as I would like so they won't see service. Maybe they could be used with wheel sets, but right now I am going to use the Microscale trucks.

I use a free design program, "Design Spark Mechanical" which is quite capable for other than ship hulls.

The track work on my original start of a layout needs to be re done, I had originally hand laid a number of the turnouts and they also need overhaul. Apparently White Pass decals are no longer available but I was able to cut the large flying "White Pass" as stencils and masks using my stencil cutter. Individual freight car smaller lettering should be adaptable. My stencil work is a WIP.

Roundtuits are in short supply but I'll try to take some photos so one can see what 3D work looks like, at least in my modest hands!

Cheers: Tom
 
Being an Alaskan and having ridden on the WP&YR back in the day, it is sort of a natural for me to be interested in. Unlike say the D&RGW etc it's not well documented but i did find a useful roster of locos and rolling stock. Some items were repurposed form EBT, D&RGW etc so one can pattern after those rolling stock items. So far I have printed cars researched from those items but the line also ran a number of the ubiquitous EBT steel hopper cars so that is another to recreate. Boxcars are generally printed in one piece for the top and one for the bottom though I have found it more effective to add ladders, brake wheels, truss rods and turnbuckles and such separately. I have used the traditional monofilament for truss rods, though I might go to the ship modelers standby of stretched sprue. Small items such as turnbuckles, stirrups, hand wheels etc print very well. The Cabooses also print like the boxcars, complete with end rails and grab irons. I did modify a work car from a boxcar, somewhat freelanced at the moment though similar to some of the D&RGW examples. For the brake shafts I use thin piano wire and fit the printed hand wheels on top.

For any car builder weight is an issue, this especially true with narrow gauge because of the diminutive size. For boxcars not a problem as I can recover practice rounds from the bank at my shooting range. Even new bulk lead bullets are much cheaper than fishing weights. For Gondolas and flatcars weighting the cars seems problematic without a load. The boxcars have a some heft from thicker walls, but the prototypical thin stake sides of the gondolas make them feathery light. My gondolas are a copy I made of a kit purchased may years ago, I have no idea whom. Maybe I can use some fine shot between the bottom ribs? Not enough I am guessing. For flatcars some plausible loads are possible. I am leaning toward modeling the road during WWII when much interesting equipment was added. I have for a ship project created a large number of printable military vehicles from Armor to jeeps and DUKW's, artillery pieces etc. The armor pieces are really the only easy ones to weight. Sort of the boxcars of vehicles.

Cheers: Tom

 
A while back I printed some HON3 Arch Bar Trucks but was disappointed in their rolling characteristics, after all they are printed form a resin not optimal (It's not Delrin!) but just playing around with a set on the desk I found that after a break-in period they roll pretty well, So I will try some more examples. One can think of 3D printed items as being comparable to real life castings without the final machining. The most important part is probably the axels, which might benefit from some minor machining. I did try making brass axels but that turned into major PITA (Not the wildlife rights group). The batch I printed last night is ready for rinsing and curing so we shall see!

Cheers: Tom
 
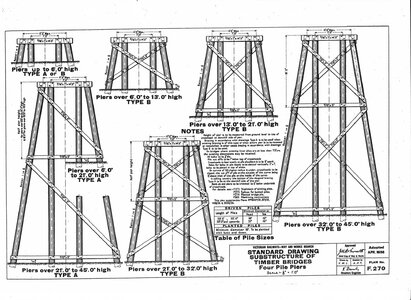
Ah, now I see how your jig idea works! As to design of trestles, though SE Alaska has some tall trees, how are taller trestles designed if they exceed the structural length of the trees available? WP&YR certainly had some tall trestles. A train creeping across a very tall narrow treacle is always a scenic focal point! Though I haven't used jigs much previously, the useful assembly jigs are easily created via CAD and printing.
 
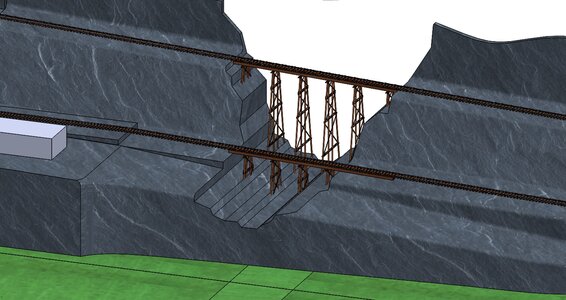
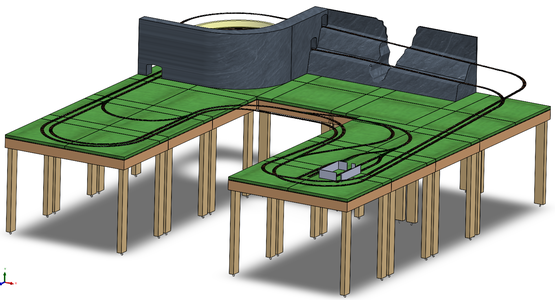
this will be my finished layout, as far as the lumber lengths, I'm not sure. I just went by the drawing I posted above. I used chop sticks.
In stead of buy from hobby shop. gotta save money where you can
 

Attachments

  • TRESTLE.jpg
    TRESTLE.jpg
    344.1 KB · Views: 50
  • MOUTAIN-frame-work.png
    MOUTAIN-frame-work.png
    798.1 KB · Views: 50
Good idea on the chopsticks, one adapts common materials as you can. I used to enjoy wandering around the many square miles of Shanghai's supply areas looking for items that could be repurposed. How the items take stain certainly a consideration. Good ideas!
 
Ah, now I see how your jig idea works! As to design of trestles, though SE Alaska has some tall trees, how are taller trestles designed if they exceed the structural length of the trees available? WP&YR certainly had some tall trestles. A train creeping across a very tall narrow treacle is always a scenic focal point! Though I haven't used jigs much previously, the useful assembly jigs are easily created via CAD and printing.
They are simply a trestle atop another trestle, as I'm sure you have already figured out. :D
 
i'm going to do resin much better end product I do Ho and some 1/35 custom military I'm going to sell customed posed 1/35

have myself scanned in uniform with weapons
 
As to Trestle on top of a trestle doesn't really answer my question as with the stepping of topmasts on ships there is some engineering involved to accomplish to get a useable extension. The problems are different as with a trestle the construction items can be lowered from above whereas on a ship unless in port that's not possible with a raise from below system.

Just another item to research, maybe I can find some good photos to glass carefully!

Cheers: Tom
 
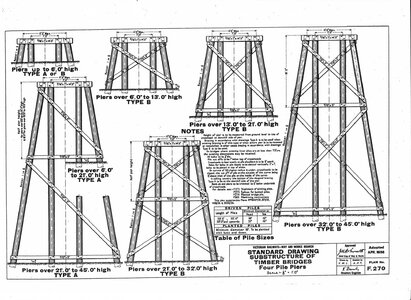
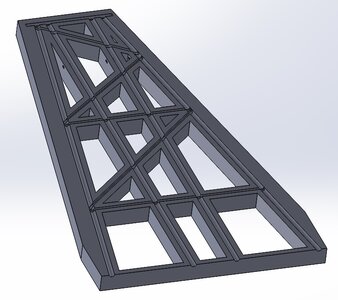
The jig is to lay the timber in, to glue it all together, (?? Trestle on top of trestle ?) not sure what that is about did you see the trestle drawings
 

Attachments

  • TRESTLE-PLANS.jpg
    TRESTLE-PLANS.jpg
    519.3 KB · Views: 48


Back
Top