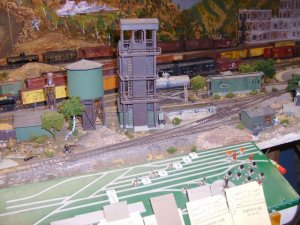
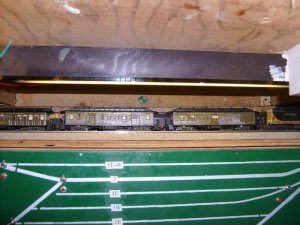
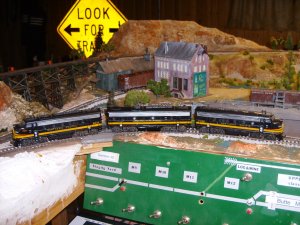
My Northern Pacific Butte Montana Layout.


That was a nice series of photos on the trestle build. Well done.

Interesting that you should bring up R/C aircraft. I have been flying since I was 16 and when my kids were growing up they loved to go flying and then insisted on having an R/C plane for them to fly. We did go the ready to fly route and after a few minor mishaps, the became quite good at flying them. Never wrecked one that wasn't a quick fix to get back into the air. Yers back there was a hobby shop of sorts in the area and they did carry some model railroad supplies such ads RTR freight cars and locomotives along with some Woodland Scenic products, but the R/C aircraft and R/C cars soon took over the shop and away went anything for model railroad.

Enjoying your layout photos.
 
I have simply stated my opinion. I, like all of us, have a right to my opinion. I'm glad that we can talk about this and express what we think. Like I said, you make time for the things you want to do

Chet, my closest hobby shop is almost 90 miles from me in a direction I don't have much interest in heading. My go to hobby shop is online and M.B. Klein, ModelTrainStuff.com When I was involved in R/C, I was a good customer of Tower Hobbies and when the internet started up, I shopped at various R/C online hobby shops. So, I am completely used to not having a hobby shop near by.
 
Last edited by a moderator:
HPIM6782.jpg

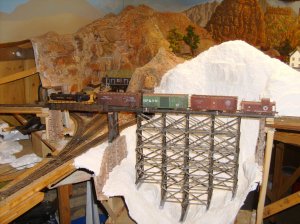
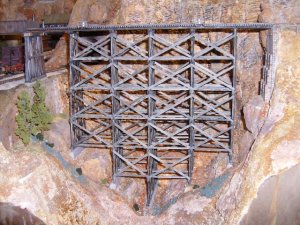
In this photo, the Woodland Scenics plaster impregnated cloth has been applied. With Sculpt-a-mold, I have attached one rock casting in the face of the hill above the trestle and some if not all the rock work has been completed. My rock work is made from Sculpt-a-mold, I love this product and have used many bags of the stuff on my layout. In essence, how I use it, is pretty easy; but somewhat time consuming to do. How I do it is to apply a batch of Sculpt-a-mold to a small area, maybe 8 inches by 8 inches. Once the place being sculpted is applied, I then take a putty knife; or, a table knife and carve strata and grooves in it. Generally in a patch as big as I've described the strata pretty much all goes in one direction. When I say carve, the Sculpt-a-mold is still wet and mold-able so maybe it's mold as opposed to carved. I actually find that as the Sculpt-a-mold starts to dry-out it becomes better for doing this detailing; however, once I have applied it, I am constantly working it. I would suggest using this process on small out-crops first, before tackling a large area such as what I am showing. I mold cracks, crevices, gobs and strata. The strata is made with a chopping motion and like I said, all of it going in mostly one direction. Between the 8 X 8 patches I've described, slight changes in the direction the strata is oriented adds interest and looks realistic. Like I said, the best way to attempt this process is to do it to a small out-crop; or, rock face. Take your time, take a breath and step back and look at what you've done. Do it a few times and eventually it will come to you.
 
Last edited by a moderator:
HPIM7346.JPG

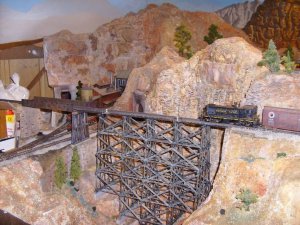
Here we go with the original photo showing the Hoodoo Gulch trestle, with the fascia board installed and the scenery filled in at the front of the scene. Some trees, shrubbery and sage brush has been added. The rock and land forms have been stained using washes of acrylic paint. I thin the colors in a finger pump spray bottle (409, etc.) and squirt them on the scene. The colors I've used are Burnt Sienna, Raw Sienna, Yellow Ochre, Burnt Umber, Raw Umber and any Earth tones that look right. Almost all the books and article on building scenery, list the colors to use. The washes are applied one on top of the other, so might be wet; or, I may let one coat dry, before applying the next.

I find that my rock castings take colors differently than my Sculpt-a-Molded areas and I like this.
 
Last edited by a moderator:
Nice photos Mark. I really like before and after shots. It's interesting to see a layout come together. I don't have many as the majority of my layout was built many years ago. Keep the photos coming. Well done.
 
Control Panels

HPIM7324.JPGHPIM7325.JPG

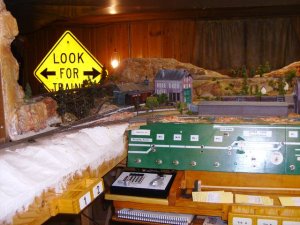
My Control Panels date back to my layout's pre DCC days. I can run my trains either by DCC; or, DC. However, I don't ever run DC anymore and my DC throttle is used to power my turntable. There are 14 blocks on the main control panel that control the main line. This might be a bit of overkill; but, the system seem to work well. The blocks are controlled by Double Pole Double Throw Center off toggles. All of my turnouts are controlled by Atlas Switch machines, most are under table. I control the switch machines with simple Single Pole Double Throw toggle switches. There are also push buttons next to every toggle switch to function as the momentary on part of the circuit. Some of the toggle switches are Double Pole Double Throw allowing indicator lights to show which way the turnout is thrown on the panel and also to power frogs. The main power switch is under the main control panel and there is a circuit breaker incorporated into the DCC side of the panel, I have an RRAMP meter connected to the power supply and a Soundtraxx Programming Track Boster, PTB-100 installed in the RRAmp meter box under the main power switch to the right side of Photo #1. You can see some of my Car Card boxes in the photos. At the left side of the panel (Photo #2) are Digitrax manuals under the Digitrax Zephyr. When I am running in DCC all the block toggles point to the left. My sidings are route controlled. If I flip the toggle to the back track, that powers only the back track, turning off the power to the front track.
 
Last edited by a moderator:
Butte Yard Control Panel

HPIM7322.JPG

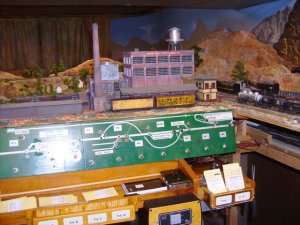
I realize this is not a very good photo of the Control panel; but, you can get the jist of what it is, from it. Some may ask why, if I am running DCC, do I need control panels. For me, the answer is pretty simple, I want to be able to shut the power down to tracks where a train is being stored, so I don't have the sound of locomotives sitting idling; or, having the headlights on. Also, I have remote controlled Turnouts which I want to operate and know which way the turn out is set. The red buttons control turnouts and the cluster of black buttons to the right of the panel turn the power on, on the stall tracks in the roundhouse. Panels also provide a nice schematic of the area they control. The toggle switches controlling power to the track are OFF when the toggle is pointing to the left and ON when the toggle is pointing to the right.
 
Last edited by a moderator:
There is another advantage to having sidings/stubs individually powered. Turn them off, so even if a turnout into it is inadvertently thrown, no other engine can enter (doesn't stop rolling stock though :()
 
Staging Yard Control Panel:
HPIM7329.JPG

This photo is even worse that the one above; but, again you should be able to get the jist of what it is and does. Essentially the purpose of this panel is to control the seven storage tracks here in staging. Again, you can see some of the turnout toggles here in this case, If the toggle is pointing into the storage track, the power is ON. If it is pointing away, the power is OFF. Here you can see, as previously mentioned, the room above the trains is wholly inadequate! If a derailment occurs in the staging yard, all trains in front of the derailed train must be driven out of staging, to gain access. I have to be overly cautious when entering or leaving staging. Where I to do over, I would have staging on drawer slides so I could pull it out to work on; or, just have staging out in the open.

Although the MDC Roundhouse Overland passenger cars don't fit my era, I like them better and since I own the railroad...
 
Last edited by a moderator:
Those are good looking control panels. There is no need to really change them just because you converted to DCC. Using Shinohara turnouts I can park a locomotive in a siding and with the turnouts being power routing, all I have to do is to switch the turnout and there is no power to the locomotive. You did some nice work on the panels.

I also have some of the old Roundhouse Overland cars. Picked them up around 30 years ago and custom painted them and lettered them for my Logan Valley. I'll put them on the track once in a while behind a steamer and run them. Just like the looks of them.

Enjoying the photos. Thanks for the posts.
 
HPIM7335.JPG

A little bit about the weathering I applied to my Hoodoo Gulch Trestle. First of all I did not want the trestle looking like it was made from new creosoted wood beams and lumber. Creosoted wood beams and lumber only looks new for about three/five years, then it starts to turn gray with black streaking. That is what I was trying to portray with my trestle. So, like I said previously, I stained all the wood with my Acrylic Black Wash. This is made up from Black Acrylic paint (Delta Ceramcoat) mixed with water. Sorry, I don't have a mixture ratio for you. I think starting at 1 part paint to 3 parts water would be a good place to start. Add more paint if the mixture is light and add more water if the mixture is to dark. Paint some on the wood you will be staining and change the mixture to suit. Don't worry about the fact that you are experimenting on your beautiful modeling project, in the end you will like how it turns out, anyway. I use a black wash, because creosote is black and that is what we're trying to replicate. After you have covered the whole model with this black wash, go back over it with dabs of full black acrylic paint near where the joints of the Pilings, Sills, Diagonals, Sway Bracing and Girts are located. You want this to be a totally random occurrence. Next you want to dry brush white acrylic in the direction water would wash down on the Diagonals, Sills and Girts. Go lightly with this effect as you can make the trestle look to dilapidated to support your trains! These processes will work well for any creosoted wood used on your layout.
 
The last part to this "Virtual layout Tour" will be a look at my locomotive roster with photos of many of them. When I have found a manufacturer to have produced a Northern Pacific Locomotive, I generally will purchase one. In some instances; however, nobody makes a specific locomotive I would like to add to my roster; or, the loco might only have been produced in brass. In this case if I can find a loco that simply needs a paint job and decals to produce an N.P. version, I will go ahead and purchase one and do a paint and decal job on one.
 
Last edited by a moderator:
HPIM7438.jpg

This is the locomotive I've owned for the longest time. I was 10 years old when I got it for Christmas, I'm 66 years old now; so, I've owned it for 56 years. There was a period of time (maybe 20 years) where my nephew owned it. He gave it back to me, I cleaned it up and repaired the left rear part of the cab roof that was chipped off when I got it back in 1960. It has a Pitman motor in it and it is an original Varney Docksider or "Little Joe" as I always called it. As it sits now it can only be run DC. I have thoughts of converting to DCC with sound. For its' size, it is a danged good puller and is very heavy. Conversion would take a can motor and probably removing some or all of the weight installed in the boiler. This is the later Varney Docksider with a plastic boiler.
 
HPIM7439.jpg
These are the second oldest set of locomotives I own. They are Athearn Blue Box kits. The A unit on the right and the B unit are powered, the A unit to the left is a dummy. This set was a Burlington Northern set I purchased in the late 1980s. When I decided to model the Northern Pacific, I painted these locos black and added a Walther's super detailing set of grabs and windows to each unit. Then I decaled them and gave an over spray of clear gloss. The powered A and B units have been converted to DCC without sound. They are heavy and strong pullers. For some reason the un-powered A unit wants to derails all the time so I have set it aside as I can't figure out why it derails.
 
Last edited by a moderator:
HPIM7442.jpg

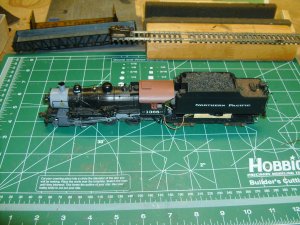
Ten Wheeler 1368 is an MDC Roundhouse kit. This kit closely resembles a Northern Pacific S-4 Ten Wheeler. I did the kit bashing of this locomotive so long ago, following an article in Model Railroader on converting the MDC Ten Wheeler to an S-4, that I don't really recall what was changed to make the loco an S-4.

I started out running while still operating DC. When I went to DCC, the loco was simply stored away. Two years ago, i started the DCC conversion with a SFX064D Digitrax Sound Decoder. This decoder also needs a motor decoder to operate. I built a box for the speaker and installed all the componants. Although I could get sound out of it, I simply could not get the loco to operate. After fooling around with it for several weeks and talking with Digitrax about my problem, no solution was ever found, so I removed the decoder and speaker and sold it on Ebay. The guy who bought it must have been able to get it tio work as I haven't heard back from him. You can see in the photo that the tender shell has only been set atop the tender chassis. This loco is awaiting a TCS WOW 101 sound decoder.
 
Last edited by a moderator:
HPIM7440.jpg

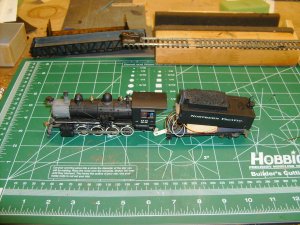
This is my PFM Northern Pacific Y-1 Consolidation, 2-8-0. Again, this loco is in the middle of having a TCS WOW 101 sound decoder installed. The speaker has been mounted in a box and all the connections made. All that is left is installing the back-up light and programming the decoder. It has been tested and found to operate. The locomotive came to me in a natural brass condition with a can motor. I brush painted the loco many years ago with Floquil engine black and placed all the decals. I have installed a Soundtrax DBX-9000 Wiring Harness between the Tender and engine, making disconnecting the two a simple matter of un-plugging them. I think this is a typically good looking Northern Pacific design.
 
HPIM7441.jpg

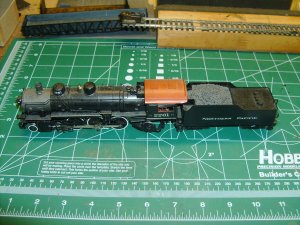
This N.P. Pacific is a Q-6 # 2261, made for Northwest Shortlines. It is fairly new to me and I purchased it from Caboose Hobbies out in Denver. It was painted and decaled when I got it. At this point in time it is set-up for running DC. My planes are to install a TCS WOW 101 Sound Decoder in it at some point. I have gotten tired of installing decoders and need to take a break from doing that.
 
HPIM7447.jpg

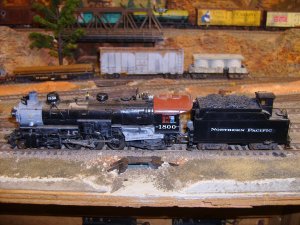
Following an article in the August 1986 issue of Model Railroader, I purchased a brand new Rivarossi Mikado to bash into a Northern Pacific W-3 mike. This article was one of the best I've ever seen on taking a model of something and making it into something else. The article is eight pages long and describes all the parts you needed to buy and/or make. Some of the parts may no longer be available. I ended up cutting off sand dome and filling in the boiler where it had been removed., then I turned a new sand dome shaped like the one that the N.P. actually used. I also added some height to the steam dome to look more like a W-3 locomotive. This loco is 20 years old; or, so and as proud as I am of how it turned out, it really doesn't run all that well and I need to spend some time tuning it up. However, it was a fun project and took a little more than a month to complete. Her number is # 1800.
 
Last edited by a moderator:
HPIM7448.jpg

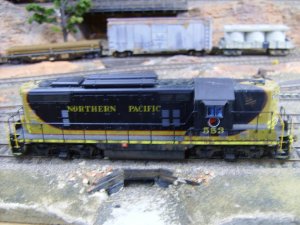
I have two of these, #553, this one and #555. These are Life Like Proto 2000 GP-7 they came stock as N.P. locos and all I have done to them is add a little weathering and added DCC decoders. They run fine; but, #555 has gear noise that makes it sound sound like it is sawing wood. Even with the sound, I am grateful that Life Like produced them.

I have fired up the layout and had to fix a solder joint on the common rail that shut down about 30 feet of my main line. I will be adding another common feeder to this stretch of track. I have GP-7 #553 hooked up to four track cleaning cars, three I made from Athearn Box Cars by using nails to secure Masonite cleaning pads to their bottoms (Per John Allen) and one was a Roco track cleaning Box Car. 10-15 laps around the layout, remove trains from the sidings and run them around some more and the track is good to go! Some stubborn spots will get the Bright Boy treatment. For the most part what I have described with the track cleaning cars takes care of my track, after it sitting idle since last April. So, cleaning my track is an annual event.
 
Last edited by a moderator:
The gear noise is probably cracked plastic gears on the axles, apparently quite common on those early units. They're probably the same gears as the GP38-2's by all accounts the worst affected. Pretty sure you can get new ones from Walthers. I've been informed that Athearn gears will also fit.


Back
Top