jeffrey-wimberly
Dr Frankendiesel
But of course. It will be suitably weathered though. I've never seen a GP38-2 that shiny.Jeffrey, please tell me you're going to leave that locomotive in the Kodachrome paint scheme.")

But of course. It will be suitably weathered though. I've never seen a GP38-2 that shiny.Jeffrey, please tell me you're going to leave that locomotive in the Kodachrome paint scheme.
Zak, for some reason, your #8905 looks brass colored in that picture. I don't lnow if you haven't painted it yet or it's the lighting. Nice looking engines though.
Supurb Pictures everyone!!
Well I have been dreading for a while to begin detailing my locos since I didn't know how to. So for the first time I detail my RTR UP gp38-2. I think It turned out ok.
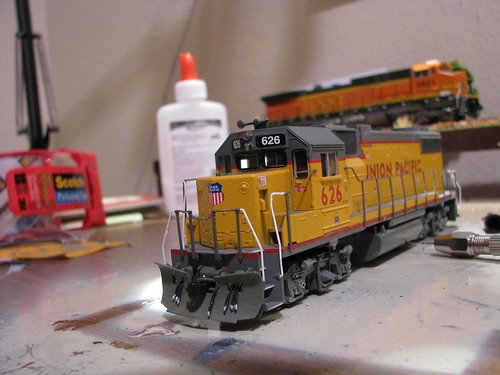
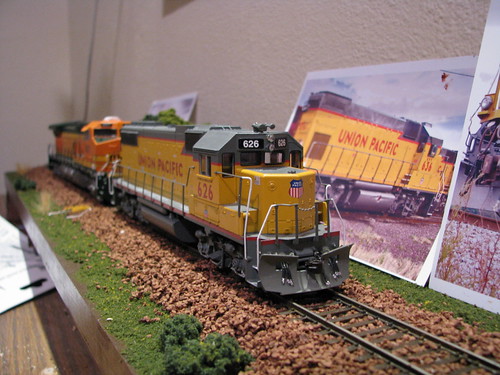
I still have to add the lift bar, ditch lights, and a few others.
Here is a YouTube video of my Tropicana Juice Train in its entirity. Turn your volume up!
http://www.youtube.com/watch?v=cC0r_AXOss4&fmt=18
I like that car holder for decaling car ends how exactly did you make it?Ray, The Tonopah & Tidewater had a similar old combine they used at Silver Lake after a flood in 1916 that was "temporary" and it lasted until the line closed down in 1938.
Here is a YouTube video of my Tropicana Juice Train in its entirity. Turn your volume up!
http://www.youtube.com/watch?v=cC0r_AXOss4&fmt=18
