Weekend Fun!!!! 28-29-30 March


mikeknuckey

Far away in Chile...
Hi Friends, my first time starting this thread, lets see what we got to show!!!

Well, I want to start a new project, any idea of what can I do whit this models???


Last edited by a moderator:
I got two Proto 2000 L&N E6-A's in the mail today from a friend in Texas. They were both converted into dummy locos but the shells won't sit on the frames properly as there are no tabs on the inside of the shells. It'll be a simple matter to make some tabs from scrap. The locos are identical, right down to their numbers, 776.


P1010001-57.jpg
 
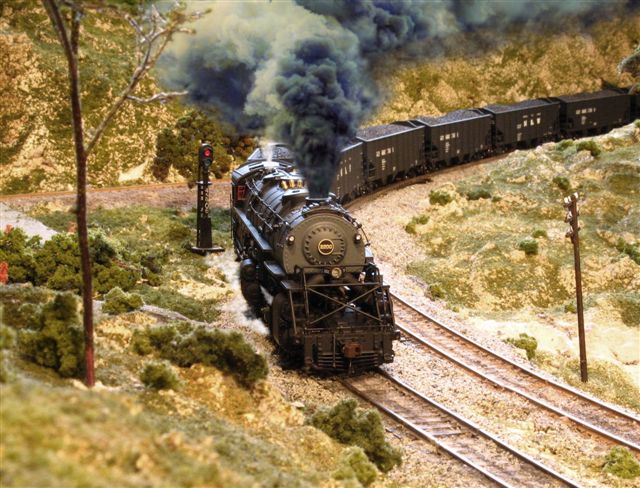
Been playing around with some old photos of mine. Ran them thru an editor and turned them into B&W's. In a couple of cases, doing this also made the photos better!

5025ss1BW.png


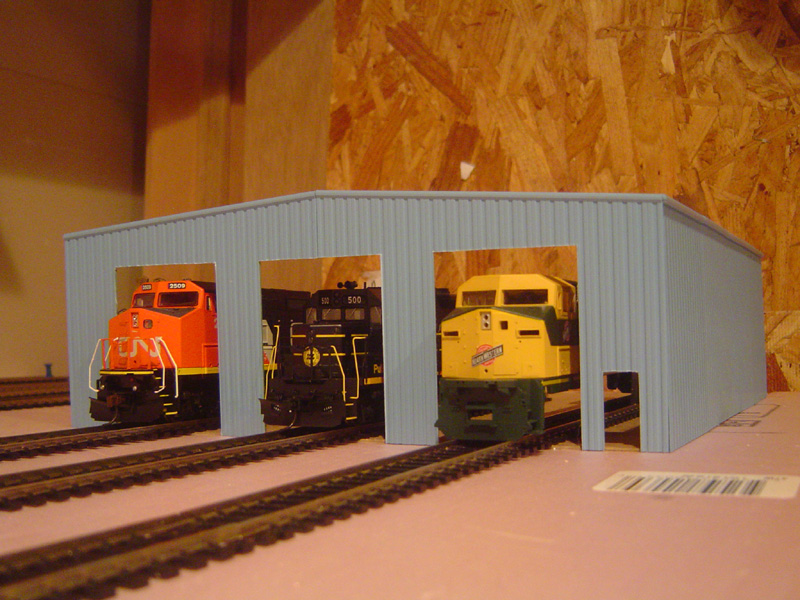
Also, here's another "paint shop" shot of an engine I'm doing for another friend. He's a CB&Q fan. This is an Oriental Limited 65 ton center cab for the CB&Q. The job itself wasn't hard and the weathering was kept light on purpose. The prototype, judging from the pictures of it taken thru the years, didn't see the wash rack but RARELY:). If I had followed those pix, the loco would be black and rust, with a little grey on top!;) I now have a means of "checking" the paint job for mistakes other than by just looking at the loco. Yall have it as well, its your digital cameras.

I can now follow the advice John Allen gave a friend. John took a photo of a loco that the friend built, and enlarged it to an 8x10. Then he told the friend to study the photo and anything on the model that "told" his friend this was a model, or didn't look correct, he should replace. :eek: I think that is still very good advice!

I still need to insert the decoder, couplers, window material, crew and light lenses. Probably get that all done today or tomorrow. Well anyway, here's a couple of shots. First CB&Q unit I've done.


CBQ9123a.png


CBQ9123b.png


Yall think I ought to add some more mud???;)
 
Last edited by a moderator:
If i haven't been so lazy the last few weeks i'de have like 5 projects to show (jordan spreader, 4 bay open hoppers, transfer caboose, and even possibly a flanger).
 
Nice locomotives, Gents.

Jeff, do you intend to motorize those or tow them...make them sound boxes?

Here is an image similar to the one I presented last week, but taken with daylight overhead at a window. The angle is also different.

A fellow Canadian modeler added smoke and steam for me.

mallet_retouchr.jpg
 
Jeff, do you intend to motorize those or tow them...make them sound boxes?
One is in a consist already with two Athearn's, an F7 and a GP50. It's hard to tell it's unpowered. I'm gonna try to repower the other one.

Speaking of Athearn, here's an Alco PA2 peeking out from the engine house.

P1010029-1.jpg
 
Mike, those are two 86 foot boxcars, used mostly for auto parts. as it says on the side of the Santa Fe boxcar. The third is a Minneapolis, Northfield, and Southern 50 foot sliding door boxcar. All are common on US rails today although the 86 foot boxcars are becoming less common. You need a pretty big radius for those 86 footers. They will run on 22" curves (usually) but look pretty bad because of the huge overhang. 28" or 30" radius curves will make them look and run better. The 50 footer will run on any curve from 22" up, even 18" in a pinch.

CJ, that B&W photo does give a nice period feel to that model. I hate even to think of what my models would look like blown up to 8x10. :eek: The CB&Q 65 tonner is a sweet looking model. I think I might try some diluted india ink washes on the rood area to tone down the yellow stripes some but otherwise I think it looks fine unless your customer wants it look like the last years of service. The Burlington was pretty good about keeping yard power reasonably clean until the rot set in during the early 70's and everything ran pretty much as is.

Crandell, that Photoshopped smoke on the Y3b looks spectacular - probably the best I've ever seen on a model. Too bad we can make our models do that wthut creating a toxic haze. BTW, I see that telegraph pole still has the white insulators - you can get rid of those in Photoshop too although a small paintbrush works just as well. :)

Jeffrey, nice engine house shot.

Bob, nice picture and nice critter too. :)
 
CJ, that is some impressive work! I think you should leap into the custom paint business too!

Nice work everyone.
 
CJ, that is some impressive work! I think you should leap into the custom paint business too!

Nice work everyone.

Josh;

It would be a return for me!:D

I did custom work for almost 30 yrs!:) Now I only paint occasionally for myself and a few others. That CB&Q unit is the first loco I've even attempted in almost 5 years.:eek:

I think I've done more painting the past 2 weeks than I have in the past 5 years!!!:D I think I threw away at least 30 bottles of paint that had dried up, separated, or just downright went bad.:eek:

Jim, normally I would go with another wash of grimy black and top that off with a dusty mixture. The guy I'm painting it for doesn't "normally" have any weathered engines, but he wanted this one "slightly dirtied".
 
Last edited by a moderator:
the latest addition, a hornby "shark" ballast plough
10-08-07061.jpg

and a close up of the detailing inside, the wheel is used to lower and raise the plough underneath
10-08-07056.jpg

and at home
10-08-07059.jpg

next job is to weather it
 
Here's another car finished, just waitin'/wantin' to be weathered, (eventually).:D

Its a Westerfield USRA DS Box car. Lettered for my friend's railroad the CB&Q.

Very easy kit. Hardest part is the brake gear and drilling the holes for all those grabs.:rolleyes:

CBQXM1.png
 
Ahh well then! That explains allot. ;) I'll post some pictures later today, working on sorting out good from bad in a lot of scrap shells & chassis's I got from a member here...
 
Well, I finally started getting my enginehouse build under way, this will be my first official structure. :eek: I cut out some of the doors and did a little "test fit" to get an idea of what it will look like. I am leaning towards painting the building a dark tan with grey gutters, downspouts, doors, windows and other such trim pieces. I would also like to add some signage above each bay door and the whole assembly will probably be put on a styrene base.

CN #2509, SCL #500, and CNW # 8627 (just a shell for now, another project to be started soon, I hope :D ) helped me out with the visuals.

2371726921_da21a18ca3_o.jpg
 
:D Here's a few pix from my recent trip down to my Dad's layout.

I finally started to install the Walther's Wooden Coaling tower that I built a few weeks back. This shot is when I first plunked it down on the layout.
View attachment 9273
It sure looks nice with that pretty blue sky behind it.

This is how it is in proximity to the roundhouse and turntable.
View attachment 9274

I also started to mock up the factory building that will hide the 2 holes in the backdrop. I am using a DPM Tera Surplus Window Warehouse. I stretched the whole thing out to cover as much linear space as possible. I think this is going to be an impressive structure after I paint it up and weather it.
View attachment 9275

This is the whole area that I was working on the first night I got down there.
View attachment 9276
It's really starting to look like an engine service facility. I must say, I'm getting pretty excited about the scenery finally getting started.:D

I have a few more to post in a bit for WPF. For all the pix and videos check out my link to the progress posting below.
 
I also started working on a few other areas on the layout.

This is the DPM Powerhouse that I have been working on. I just was test fitting it in the place I belongs. It's far from done, but will have a happy home at the highest point on the layout, when it's done. where you see the arm on the right side of the picture, that spur will be a team track.
View attachment 9281

View attachment 9282

This is the beginnings of the retaining wall for the raised city behind the main yard. You can see on the right side of the picture the mock up of the warehouse I did. I placed blue foam even with he top of the retaining wall, but I forgot to take a picture of it. It will show up in an upcoming video though.
View attachment 9283

I built the risers and platform in the lumber yard and milling operation spur. The tracks are just placed there for fit. Nothing is permanent yet.
View attachment 9284
 
Wow, what a batch of GREAT photos this weekend--

Crandall: Even without the Photoshop smoke, that would be a terrific shot--what a great angle to show off that handsome A of yours. REALLY spectacular! PS--has your Allegheny started to pull better? They usually do after the wheel-treads have been broken in a little. Give it a little time. After mine got broken in, it started to pull the house down, LOL!

CJ: Might that incredibly handsome 2-10-2 of yours possibly have started out life as a Key USRA? If so, I really like the FWH addition you did to it, plus the shorter tender. Love the B&W photography. AND that nice job you did on the Burlington center-cab. Really nice work.

Jeff: Are you going to power up that handsome L&N E-6? Next to the Alco PA's, I think the E-6's were the best looking passenger diesels ever made. That's sure a beautiful little lady, there.

Tom:)


Back
Top