Weathering with Acrylic Paint Washes previous to assembly.


N

NP2626

Guest
I have been using acrylic paint washes to weather my rolling stock and for my purposes I am happy with the results. My acrylic washes are sometimes used as a portion of the weathering process, as I may use other paint types and weathering chalks to complete a model. Sorry, I am not scientific about the ratio of water to paint to make my washes, I simply dilute the paint to a consistency that looks right. The fact that how much water is used varies, seems to make the process change from one batch of cars to the next, something I like. The process is not very controllable. Once the wash has been put on and dried, removing may be difficult; however, I have never wanted to remove the weathering I've applied. Since I very rarely use Ready To Run rolling stock and enjoy building my freight and passenger equipment, the process I'm about to discuss is used on rolling stock kits. Branchline, Proto 2000, Intermountain, Red Caboose C&BT Shops and Accurail kits are the most common freight cars I use. Most where purchased before the RTR craze hit; but, I still find kits of all these manufacturers items on Ebay and at train shows. As the title above states I do much of my weathering previous to applying and I only do this type of weathering to cars that I want to be well weathered. So, if you think railroad equipment should not be weathered to the degree that I like, maybe you should stop reading! The following photos show a Branchline Kit purchased off Ebay:
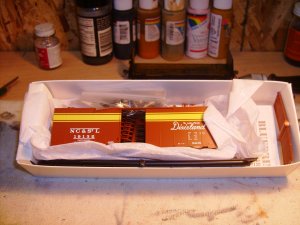
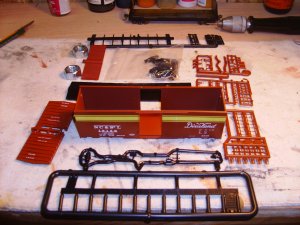
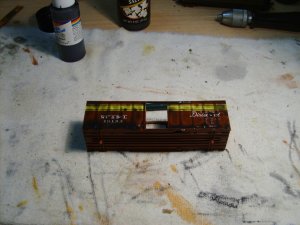
HPIM7414.jpg HPIM7415.jpg
 
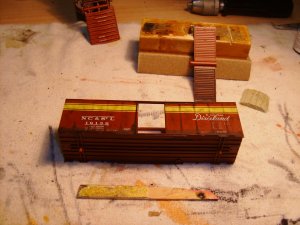
HPIM7416.jpgHere I have applied the first layer of wash to one side of the car. It's not visible; but, there is a popsicle stick under the top edge of the car making the top edge slightly higher than the bottom, this makes the weathering wash flow down the sides to the bottom, where I want the weathering to be heavier. The highlights along the bottom edge of the car show that the wash is very liquid at this point.

View attachment 58433
 
Last edited by a moderator:
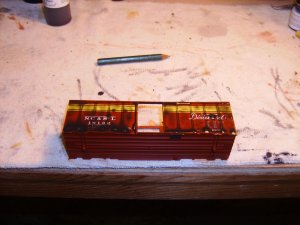
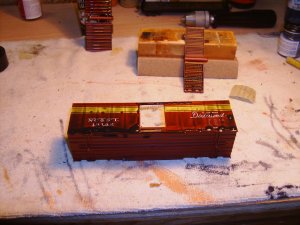
In this photo, the second coat of wash has been applied. In this photo the wetness can readily be seen. To put the wash on, I use a medium brush and simply coat the whole side, it's propping the top of the car up slightly that gets the wash to flow downwards.
HPIM7417.jpg
 
Last edited by a moderator:
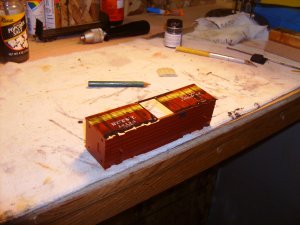
HPIM7418.jpg
Another view of the same side, showing the wet wash. On this car, at this point, I have only used a black wash. In some instances I use a white; or, tan wash and I may do that here, I haven't made up my mind yet. The fact that some of the wash has flowed down onto the car bottom doesn't matter, as the bottoms, truck frames and wheel faces get a coating of Grimy Black with a wash of rust; or splotches of rust.

There was a second insertion of the photo. I hope this one stays!
 
Last edited by a moderator:
When I leave this thread, all my photos are showing, when I come back to it the last one has been removed! What is up with that?
 
Last edited by a moderator:
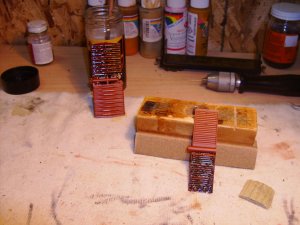
In this photo, I am adding the wash to the doors and car ends. Notice that I have both the end and door being weathered tipped up so that gravity will flow the wash downwards.
 

Attachments

  • HPIM7419.jpg
    HPIM7419.jpg
    489.5 KB · Views: 151
Last edited by a moderator:
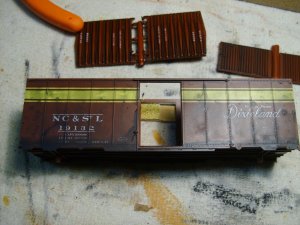
Here is one side which shows the weathering after it has dried.
HPIM7420.jpg
 
Last edited by a moderator:
When I leave this thread, all my photos are showing, when I come back to it the last one has been removed! What is up with that?

The photo in the 4th post is there for me. All seems to be working.
Question.....do you prep the models in any way before starting to apply your washes?
 
Genetk44, After re-inserting the photos, yes, they show up, now. I had to do this to keep the continuity of the thread, so it makes sense!

The models come directly from the manufacturers box and have been handled very little; so, no I don't prep in anyway. I know some people feel it is important to wash the model in a mild solution of soapy water. I've never had a problem with models as the come from the box. However, I do have clean hands when I work with my models; so, I strongly suggest washing up previous to working with your models!
 
Last edited by a moderator:
In this photo the second coat of wash has been applied, note the wet highlights. This Acrylic wet wash weathering system I am describing, is a very simple system to use. I simply wet out the whole side I want weathered, prop the part slightly on the side I want the least amount of weathering to take place and walk away and leave to dry. I like the fact that the weathering is somewhat random in how it takes place, a way that I feel real weathering occurs. I also want to reiterate that this is only a part of the process I may use to weather a car. Sometimes I am happy with the results obtained with this system only and sometimes I may use other paints and chalks to complete the weathering of the model. The fact that this process is performed previous to assembly is also a plus as I don't have to worry about breaking off fine details: Brake rigging, grab irons, roof walk supports, etc.
HPIM7421.jpg
 
Last edited by a moderator:
Thanks Chet! Some information I need to convey about this thread, as it is summer, I am not always home, here. My wife and I have a Travel trailer and sailboat on Leech Lake about 30 miles from home. While at Leech Lake, I am unable to post photos to this thread. As the summer is drawing to a close, I will start spending more and more time at home. So what this means is that this thread will take some time to finish. I will show completed models at the end.
 
HPIM7423.jpg
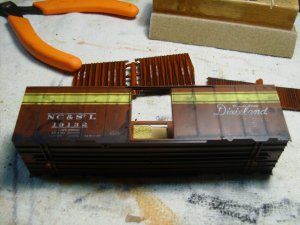
Here is a photo of the car sides, ends and doors (not very clearly) after the wash has dried. As you can see the wash has settled more to the bottom of the car sides that up higher on the car; but, some of the wash is still up higher on the sides. Also notice that the grabs and ladders have not been applied yet.
HPIM7424.jpg
Another view which shows the doors a little better.
 
Looking good. One thing I like when I weather my models is to build them almost all the way before I paint. I figure the weathering was applied on a complete car for real so it must be ok to paint them this way. I do take off or not add the trucks and wheels until after I pain or if a locomotive I will remove the shell and paint it that way.

Dave
 
Dave, I've always found that if I build the model to completion then weather, it's difficult to get my weathering washes to come-out the way I want. The ladders; or, grabs make the wash to concentrated at their locations. I weather the ladders and grabs after they are attached. My way works for me, and I'd guess your way works for you.
 
I have to agree with you on the ladders and such but you have to remember to a point that even if something looks funny on the model it may look that way for real. The first step and best thing you can do to help improve your weathering would be proto photos. I'm not saying you need to copy the proto photos you find but you study them and you can see how the weathering effects the cars. This is the one thing you can do to best improve any weathering (Not saying you must do it. Your stuff looks nice). I know some folks insist the model look just like the picture when it is done. I will admit I like it if they do but I'm also an artist and I like to do what I'm seeing in my head sometimes too.

Keep it up and seeing your work helps me want to get my paints and things out to do mine too.

Dave
 
Dave, I'm only pointing out and explaining a method I use and am very happy with. I don't use photos and therefore don't attempt to copy what a photo shows! Other people certainly can use whatever method they feel produces the best results for them. I will be glad to read about and look at the results they get and because weathering changes from one car to the next may even use their ideas to weather a few of my cars, too.
 
I wasn't saying you need to improve your weathering in any way. I was just pointing out other things I've run into in the past. I will share more of what I've done when I have time. Just share what I've done like you. I'm far from a master or anything so just share what I've learned.
Keep posting I'm enjoying what you've shared.

Dave


Back
Top