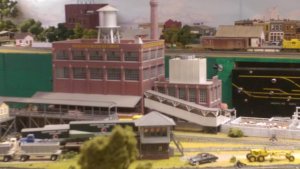
Walthers Champion Packing Plant


I went back and watched the video. I like the way he painted the bed of the water scene. I had been wondering how to get a smooth transition from lighter near the banks to dark in the middle. Now I know! Thanks for posting that!

Don't forget to add stones and sticks or anything else you would like to help make the riverbed seem realistic. The time to do all this is before you add the enviro-tex.

Dave
 
I enjoyed building the kits (packing, ice house and stock pens). However, one needs to plan ahead as there is a large footprint. What I had intended didn't work, so I needed to change some aspects. Otherwise I would have need some three inch radius track (I'm in HO) to make it work.
 
Per southsideandy: "Sheep in Butte, Montana, probably wouldn't be that far-fetched...I don't live anywhere near there, but for work I did visit a sheep rancher in the mountains of eastern Idaho a few years ago. Had HUGE herds of sheep in the mountains. For whatever that's worth".
smile.png


I just figured that Montana was Cattle country and that cattle people wouldn't take kindly to sheep! My statement about sheep was more of a joke than a comment on reality!
 
Last edited by a moderator:
I enjoyed building the kits (packing, ice house and stock pens). However, one needs to plan ahead as there is a large footprint. What I had intended didn't work, so I needed to change some aspects. Otherwise I would have need some three inch radius track (I'm in HO) to make it work.

Agreed! As the kit comes from Walthers, the stock ramp enters the building on the right, looking at the plant from the loading dock side. This puts the stock pens on the left side. I have to change that to make it fit the space I have for it.
 
I just figured that Montana was Cattle country and that cattle people wouldn't take kindly to sheep! My statement about sheep was more of a joke than a comment on reality!

Oh, it wasn't a criticism of your assessment or saying you're wrong. :) I hope it wasn't taken that way. Heck, I figure, I'm such a rookie on the railroad (model and prototype) stuff, if I had seen something that I thought might help somehow, that might be nice, LOL! :) (By the way, you are right about the cattle vs. sheep people...the rancher I visited was grumbling about the cattle that occasionally managed to wander onto his sheep-grazing lands by accident. Ha ha ha!)
 
Oh, it wasn't a criticism of your assessment or saying you're wrong. :) I hope it wasn't taken that way. Heck, I figure, I'm such a rookie on the railroad (model and prototype) stuff, if I had seen something that I thought might help somehow, that might be nice, LOL! :) (By the way, you are right about the cattle vs. sheep people...the rancher I visited was grumbling about the cattle that occasionally managed to wander onto his sheep-grazing lands by accident. Ha ha ha!)

No worries, Mate!
 
I've been working on that loading ramp door. I measured straight across from the insert on the other side. It said that the door bottom should be 4-1/4" from the bottom of the plant wall. I took the upper section of the loading ramp and the upright that goes underneath of it and placed them so that the bottom of the upright was even with bottom of the plant wall. Measuring to the top of the ramp gave me 4-1/4", so I felt confident that that was where the bottom of the door should be. I cut out a section to lower the door height and glued it in upside down, so that the threshold now became the door header. Some trimming with an Exacto knife and careful sanding with my moto tool and a sanding disc gave me the opening for the door. It's not exactly perfect, but a bit of filler and I can make it look OK.
001.JPG


I have also glued all the brick inserts into the walls where I want them to go. There are not enough brick inserts and doors to do all the openings one way or the other, so there has to be a mix. The wall of the boiler house which butts up to the plant got the large brick insert, while the opposite wall will get the large double door.
004.JPG


I used some dark gray Rustoleum Painter's Touch paint to paint the doors. I made a painting stick by attaching some painters tape, sticky side up, to a 1x4 board. I used some tape going around the board to hold the sticky tape in place better. The doors were then stuck to the tape and painted. I think this color will stand out nicely against the bricks. I couldn't leave the doors on the plastic sprues because some of them were on the same sprue as some of the windows, and the windows are going to be a different color.
002.JPG


I actually thought, for a brief moment, about painting the window frames Key Lime green! But I decided to paint them an off white, again Rustoleum spray paint. Here are some of them hanging up to dry. I'll let them hang for a week, and them give them another coat. If some spots get missed, that will just look like paint flaking off the window frames!
003.JPG


When I do the loading ramp, the inside of the ramp walls are going to become the outside. The inside has the wooden beams while the outside has board walls. Since the orientation of the ramp is going to change, the walls will not work as the instructions dictate. But that's a ways down the road yet.
I think I will be able to give the brick surfaces their initial wash of highly thinned light gray acrylic paint tomorrow. That will be an experience I've not had before! Wish me luck! :)
 
Last edited:
I did a little practice with a gray wash on the brick walls of the chimney support. I intentionally went a bit heavy on the color because I know it will fade when the coat of matte finish is applied.
I mixed up the color of gray I was looking for. I use Apple Barrel acrylic craft paints from Walmart. I thinned t down with distilled water and added a few squirts of Windex to break the surface tension. I tried to mix up enough to do the whole project, because I'll never get that shade again! :D
I brushed it on and worked it into the mortar lines. I then let it dry and went back and rubbed the walls down well with a dry paper towel to get what I could off the brick faces. If I tried to wipe it down before it dried, I kept cleaning out the mortar lines, whether the towel was dry or damp. I think it came out looking pretty good, remembering that it will lighten when the matte finish is applied.
What say y'all?

The gray acrylic wash and the untouched wall sections. The wash is in an old baby food jar. The lid is screwed on when not in use.
002.JPG


The finished(?) walls on top of an untouched section so you can see the comparison.
003.JPG


This is turning out to be an enjoyable project! :)
 
Last edited:
The brick work looks good. It's not that hard once you get the hang of it. Looks good.

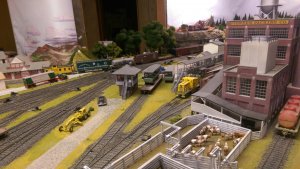
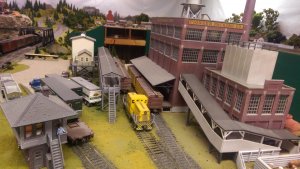
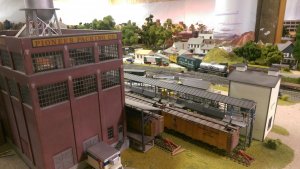
Here's what I ended up doing with my packing house. It is the largest structure on my layout and had to be squeezed into a spot that was really too small. On my layout set here in Montana cattle is an important industry. There was no room for the covered chute for the cattle entering the building to go per the instructions so it was modified, along with the cattle pens for cattle arriving. The pens were downsized using what was in the kit to fit into the space available. With the ice house night next to it, some switching moves were added. I still thing I will add floors to the inside of the building as it is really open and easy to see through.

IMAG1031.jpg IMAG1032.jpg

IMAG1033.jpg IMAG1034.jpg

Waiting to see how yours comes out. It is an impressive structure when completed.
 
I like how you did that cattle chute! That came out really well. I have to ask: How did you make those ice blocks?
I'm not going to get anything done on it tonight. It was a very tiring day at work, and I just don't feel up to it.
 
I thought (which is generally dangerous for me to do) that I would show y'all how I am doing the bricks on this packing plant.
I am using a wash of a bit of white, mostly gray, and just a little black acrylic paint. And yes, it is the dreaded, despised, and much maligned Apple Barrel craft paint from Walmart. The wash is about 10 parts distilled water to 1 part paint, with a few squirts of glass cleaner to break the surface tension and allow the wash to really get into the lines between the bricks. I am just using a cheap model paint brush for this.
The first step is to apply the wash to the surface of the bricks. Don't be stingy here, but you don't need to drown the piece either. Go over the surface in both the vertical and horizontal directions working the wash into the mortar lines.
The panel on the right has been done, the panel on the left is how it comes from the kit:
002.JPG


I did both the side walls of the main plant building as well as the smokestack tonight. Let these dry thoroughly. This is what they look like when dry:
003.JPG


Once the part has dried thoroughly, rub the acrylic paint off all surfaces of the part with a dry cotton ball. This will remove the majority of the wash from the surface, but will leave the wash in the mortar lines. Once finished, clean all cotton fuzzies off of the part.
Again, the panel on the right has been rubbed down, the panel on the left has not.
004.JPG


I think it gives a nice look to the walls. It also takes the plastic shine off, which is important. I have never seen a glossy, shiny brick wall. :)
Tomorrow, I will give one of the smaller pieces a light coat of Rustoleum matte finish. If it tones down the effect too much, I will just leave the walls unsealed. Once this plant is done and in place, it isn't going to get handled too much anyway.
Hope this helps someone! ;)
 
Last edited:
Nothing wrong with Apple Barrel, I use it all the time. Looks good.

Willie

I get good results with it. To spray it, I use 91% isopropyl alcohol thinned 50% with distilled water, and use that to thin the paint down to the consistency of 2% milk. I spray it at 20psi. Works great.
 
After further testing and analysis, management has decided that the brickwork will not be sealed with matte finish spray paint. It just causes to much detail to be lost.
I sprayed the smokestack with a light coat of Rust-Oleum Stops Rust matte clear enamel, and the rear wall of the boiler house with Rust-Oleum Matte Finish in the green can. While the green can finish did not wash out the detail as much as the white can did, the results were still unacceptable to management.
001.JPG


In this pic, the piece on the left has the green can spray on it, while the piece on the right is unsealed.
002.JPG


Here are the same two pieces in the same orientation at what will be normal viewing distance.
003.JPG


You can see how at normal viewing distance the sealed piece has almost no detail at all, while the unsealed piece looks just about right.
 
Last edited:
I finally got all the brick walls painted and rubbed down! I decided to do something else today, so I painted the base, roof, and walls of the cooling tower that sits on top of the boiler house. I wasn't quite sure what color the actual cooling tower of the Dubuque, Iowa packing plant (which this kit is based on) was, so I went looking on the net. No results there. I found a photo of the plant that looked like someone had taken it out of his car window, and another of the plant being demolished in 2006. Neither showed the cooling tower.
Looking on the net for "industrial cooling tower" produced lots of images, but only a few of this type of tower. It seems they could be found in a variety of colors. I found them in yellow, green, and brown.
I have bright yellow spray paint, lime green spray paint, and gloss brown spray paint in those colors. I also have Rustoleum Rusty Metal primer, so that's what color the wall are going to be. I will be hand painting the metal supports. Pray that that goes better than most of my hand painting jobs generally do!
The ring on top of the roof will be getting sprayed a metallic Rustoleum color. It's supposedly aluminum but looks more silver to me.
The base, which is also the boiler house roof, and cooling tower roof got a coat of flat black spray paint. They are molded in flat black, but they still look much better when painted. I'll let these parts dry for a few days to adhere well, then mask off the parts to be painted another color.
I also gave the window frames another coat of off-white paint. It's going to be fun gluing all of THOSE in! :(
001.JPG
 
Last edited:
It seems as though my available time to work on this has been reduced to a few hours on the weekends. But it will get done..... eventually.
I've gotten some painting done, and I have glued together two walls of the cooling tower. I glued the cap on the smokestack, and some .060" styrene around the opening where the stock ramp door used to be, which will now have a window in it. The styrene is needed to properly set the backspacing of the window frame. Without it, the front of the frame would be flush with the outside of the wall.

What I have gotten done this week. I used some aluminum (supposedly) Rustoleum to paint the cooling tower stack. It really just looks more like metallic silver. I painted the top of the smokestack with flat black Testors enamel. Looking back, it would have been better to have done this with some lightly thinned acrylic black. Oh, well...... :eek:
001.JPG


The .060" styrene I used to build back the window framing. This won't show when the window is installed.
002.JPG


How I set the walls square to each other for gluing. I use some magnetic welding clamps and scrap plastic for a spacer. The magnetic attraction of the clamps holds them in place. A piece of painters taper holds the top tightly together while the glue dries.
003.JPG


This is going to be a slow jog, but the results will be worth it. ;)
 
Last edited:
I finished gluing the sides together for the cooling tower. I glued two of them, a long wall and a short wall, together to make two sub-assemblies. Now I am using the base, which has a raised ridge to align the walls, and the roof to square them up while I glue the two sub-assemblies together. Once the glue has dried I will give the upper edges another shot of paint. I think when I do the roof of the main plant I may glue a sheet of black wet/dry sandpaper to it to simulate a gravel texture. I don't want to use too coarse of a grit or it will look like the roof is covered in bowling balls! :D
006.JPG


I also glued in the windows and stock door on the rear wall of the plant. To do this, I scrape the paint off of both edges of each corner for about 3/16". It is not necessary to scrape all the paint off of each edge, although you could do so if you are possessed of masochistic tendencies! While you're torturing yourself, go ahead and do them all in one sitting! I warn you, though: there are a lot of windows and doors in this kit! ;)
(One down, only 364,927 to go!)
001.JPG


All the windows and the stock door ready to glue in.
002.JPG


I prefer to use Testors tube cement for this as it gives me extra working time. I squeeze a blob of it out onto a piece of scrap steel and use a piece of wire as an applicator. I put a small amount of glue on each edge of each corner to match the scraped area of the window or door, and then press them into place. It works very well.
003.JPG


A view of the front. The doorway isn't perfect, but this will be the back wall and the stock ramp will be in front of it anyway, so it will do.
004.JPG


I put a piece of wood across the back and weighted it down. These will be given 24 hours to dry.
005.JPG


I've been using Plastruct Plastic Weld liquid cement on the walls of the cooling tower, and I gotta tell you: So far I'm not real impressed. I've made sure the joints were cleaned of all paint, nice and tight, applied it to the seam to let it soak into the joint, clamped the joint, and given the joint 24 hours to dry. I've had to go back and redo each joint with Testors because that Plastruct cement is producing extremely weak joints. I've read elsewhere that when Walther's moved production to China, the formula of the plastic got changed and liquid cements don't work too well anymore. This kit was produced in Denmark, but The Plastruct cement just isn't doing it. I've had no problems with the Testors cement (liquid or tube), however. Am I doing something wrong? :confused:
People swear by this stuff, but I'm about ready to swear AT it! :mad:
 
Last edited:
I managed to get a little build time in this afternoon, which is rather rare for a weekday.
I finished getting the cooling tower structure glued together. I decided to glue the railings in place on the roof after the roof is in place on the cooling tower, then I will carefully hand paint them Testors steel color. I found all the railing pieces and the ladder. The two long sides were hiding on the sprue! Notice how they are molded bottom to bottom. Pretty sneaky!
001.JPG


I used my #11 Exacto blade and scraped the paint out of the railing mounting holes.
002.JPG


I removed the paint from the bottom of the roof and the molded in ledge on the cooling tower walls. I used a drop of cement between the railing mounting holes and glued the roof into place on the walls. I did the same for the lower inside walls and the base, which is the boiler house roof as well.
003.JPG

This will be weighted down and left to dry overnight.

I couldn't decide how to mount the railings, specifically which corner does the ladder go in. The directions drawing show it going in the lower left corner. I checked the box art, and sooprise, sooprise, sooprise! (As Gomer Pyle, USMC used to say. Those outside the USA will have to look it up.) What do you think the box art does not have? If you said railings or a ladder, you win a free smilie! :)
004.JPG


So the lower left hand corner wins by default!
I also noticed that the clear plastic "glass" has striations in some of the pieces, and most of it is scratched from being bounced around in the box for who knows how long. Remember, this was a train show find. So the clear plastic is unusable. I will have to make a trip to the hobby shop (Oh, shucky darn! ;) ) to see if I can find any clear styrene. If not, I know Menard's has some clear sheet stock. I'm not sure of the thickness or what it's made of, though. This way I can cover all the windows in one wall with just one piece of plastic, though. So I got that going for me, which is nice.
The defects don't show up real well in this pic, but trust me, they're there!
006.JPG


More to come...........
 
Last edited:


Back
Top