Trying out a micro layout (or close to one).


I’ve completed the initial detail work on the main structural components of the Bakery complex, as well as the painting and weathering of the bulk storage tanks. This particular kit comes with many smaller detail parts which will take some time to paint, weather and glue on, so I’ll be tackling that here and there when I have time.

15748F88-3F83-4337-AE38-15F3231F8465.jpeg


My main goal is to complete the primary structures themselves first and come back to the detail work a little later on. Up next is the gas station and auto repair shop:)
 
Another slow week of progress for me unfortunately. Work comes first (even though trains are far more important). I have managed to prime the main components of the auto repair facility/gas station. I would have painted it already but I’m having trouble deciding on a color. The look I’m going for with the scene using this structure is an older, more run down auto repair shop with a brand new gas station under construction. (The owners are hoping it’ll bring in more revenue). I’m sure soon enough something will inspire me!

C179A82C-1DBC-46CB-97DE-123D5CF9A1A3.jpeg


On a different note, I decided I’d spend some time getting the tedious work done of removing the fine detail components for the bakery complex with sprue nippers and sanding/filing the parts. I also went ahead and pre-assembled some of the parts as recommended by the instructions. This Sicken Tire Co. structure kit by Woodland Scenics has A LOT of parts for such a small kit! It’ll look great tho when it’s completed:)

9E839079-3BC7-423A-84A8-0FDA35E8A053.jpeg
 
I decided to paint the auto repair/ gas station a light gray with red trim. I’ll be weathering the auto repair shop and convenience store portion but leaving the gas pumps looking brand new to add variety and set the scene. Touchups required of course:)

F47CAB36-2014-405F-8CF0-77E056724607.jpeg


I’ve also begun work on painting the detail parts for the bakery. Only half are painted so far but it’s a start. I’m hoping by the end of the weekend I’ll have a chance to weather the metallic parts. I plan to do this by applying rust colored acrylic paint with a sponge. (Another technique from Steve’s Trains).

915ECE2E-C3A2-476C-80BF-E69F895CB5A7.jpeg
 
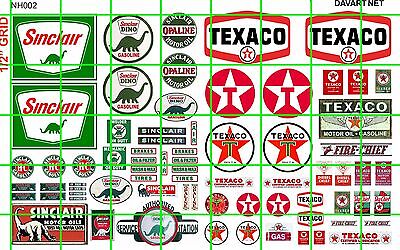
Yep, sounds like a plan. I am wondering if they make decal sheets for gas stations? Would be easier if you could. Keep it up, I may have to add a update to keep up with ya. hehe
Found some Sinclair Dino decals! There are other decal sheets available too.

 
I’ve completed the primary painting of the convenience store/repair shop. Next step is touching up the paint job on the gas pumps and then I’ll move onto weathering and final details.

D3C598CF-28B9-43BB-B353-66E98E323F5A.jpeg


F211CB62-B878-43FF-9260-362DE222818E.jpeg


3DCE46DD-C57A-4EF8-B1CC-CCA79AFB8B01.jpeg


8B194DA1-A140-4580-B89B-638A0D0BDD87.jpeg


As you’ll notice in the photos, I went ahead and added a small piece of strip styrene to one section. This is to aid in supporting the roof. I felt as tho the design of this 3D print was lacking in solid roof support all the way around.
 
I’ve decided to make a change to the layout. Since the original design I have had plans for two industries; the mattress factory and bakery. I decided to change the mattress factory to a small soft drinks bottling plant. With the mattress factory I planned on using tank cars to transport liquid polyurethane resin but I already had a corn syrup tank car from my previous layout. I couldn’t find the exact cars I wanted for the resin but there were plenty of corn syrup tank cars available and for a cheaper price. Therefore, the two industries on the layout are both food industries and I’ve gone ahead and named the layout “Food Town”. The name is reflective of supermarkets I deliver to as a truck driver by the same name.
 
Acquired some new (to me) rolling stock. Picked up two airslide hoppers off Ebay. I’m modeling the late 90’s and 39’ airslides weren’t common anymore at that point according to my research but I liked the idea of using shorter hoppers since my layout is so small.

E48FE66D-513B-43FB-A6F8-8644A0354DD8.jpeg


E913FB64-D37B-4BB1-AE65-50541319F4D5.jpeg
 
While waiting for the glue to dry on parts of the gas station and repair shop, I decided to install the N scale plywood to the store fronts. As mentioned previously, this was a method I came up with to cover up some mistakes I made with the plastic cement and window panes. I will say that it does add some interesting detail work to this little town.

DC8D613C-3DC1-4E1C-8AEB-3BE4F94015D2.jpeg
 
Got another package today:) I found a universal holster for DCC throttles online and figured it would prove quite useful.

DC734FE8-DE6A-43C3-939A-1588FAE65AC2.jpeg


I also received another piece of rolling stock; a UTLX Corn Sweetners tank car for the soft drinks plant. Needed a second one to facilitate operations.

E136BD4B-934E-4C8C-91A4-D82BAB0192F3.jpeg
 
Last edited:
I finally finished the benchwork! My paint cans will do the rest of the work for the evening. I decided to increase the measurements by 1 inch length wise to ensure everything fits well and with a little wiggle room. The final measurements of the layout are 35.5” x 21.5”. I also decided to increase the size of the toggle panel cutout.

View attachment 138850

The only thing I’m not happy with is a portion around the toggle panel that chipped while I was cutting it. I will remedy the situation by utilizing a larger portion of hardboard (or similar material) to cover over the chipped portion when I create the toggle panel itself.

View attachment 138849
Fill that in with some wood putty or spackeling compound or dry wall mud. sand it smooth and paint. You'll never see the blemish again.
 
I’ve applied the first coat of paint. Very happy with how it looks! In the next day or two I’ll apply another coat.

As you can see in the pic, I’ve utilized my “prototype” benchwork as a table to hold up the actual benchwork itself while I paint it haha. That’s about the best use I could come up with for it.

View attachment 139113
Hang on to the proto assembly and use it to make a removable extension of the real layout. Something tells me that this railroad will get bigger.


Back
Top