Beautifully done!

You are using an out of date browser. It may not display this or other websites correctly.
You should upgrade or use an alternative browser.
You should upgrade or use an alternative browser.
The M-K & Eastern RR
- Thread starter Graff
- Start date
Graff
Airbrush artist
Spruce/fir trees 2.0
Faller's fir trees are really not at all good looking, but with a few minutes of work their appearance can be much improved.
I use Polak model turf and some spray adhesive for this project.
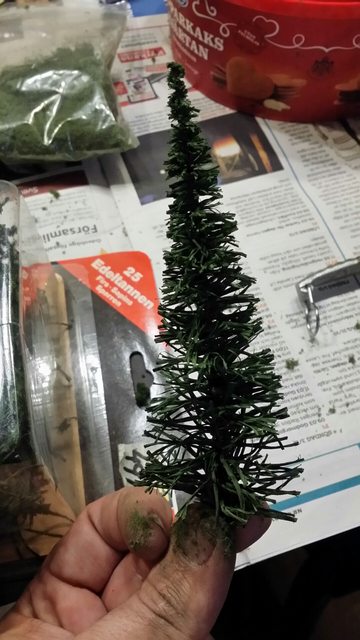
They are very coarse as they are...
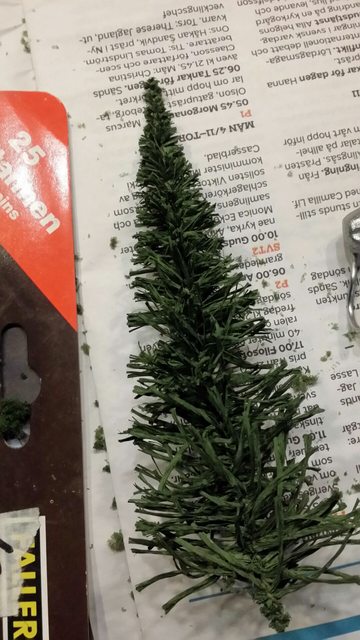
I trim the armatures to avoid the cone shape.
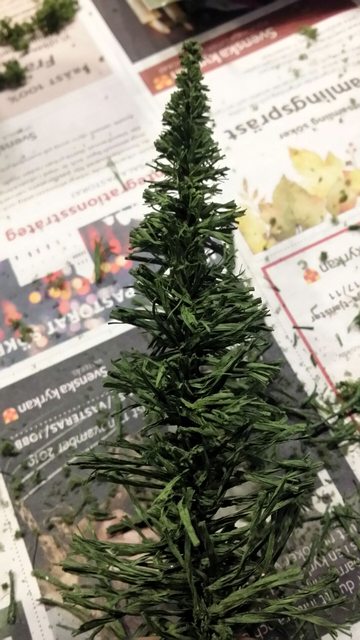
Less is more...
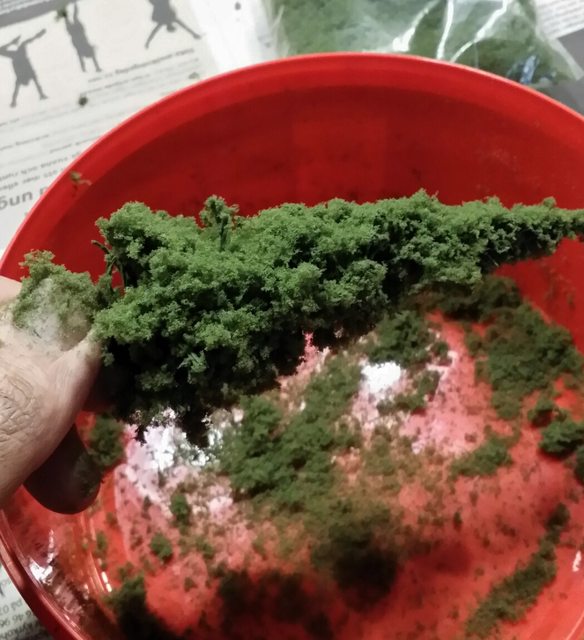
I applied some spray glue and two layers of turf.
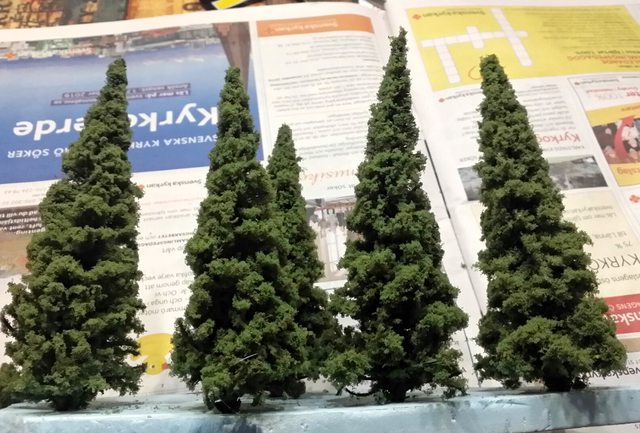
This group of five trees took me 10 minutes to do, a time that can be reduced severely if made in a series.
I have over 1000 trees to do, so any savings of time and money are very welcome.
Faller's fir trees are really not at all good looking, but with a few minutes of work their appearance can be much improved.
I use Polak model turf and some spray adhesive for this project.
They are very coarse as they are...
I trim the armatures to avoid the cone shape.
Less is more...
I applied some spray glue and two layers of turf.
This group of five trees took me 10 minutes to do, a time that can be reduced severely if made in a series.
I have over 1000 trees to do, so any savings of time and money are very welcome.
Graff
Airbrush artist
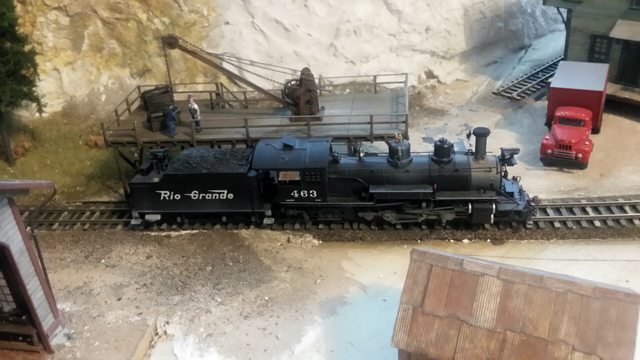
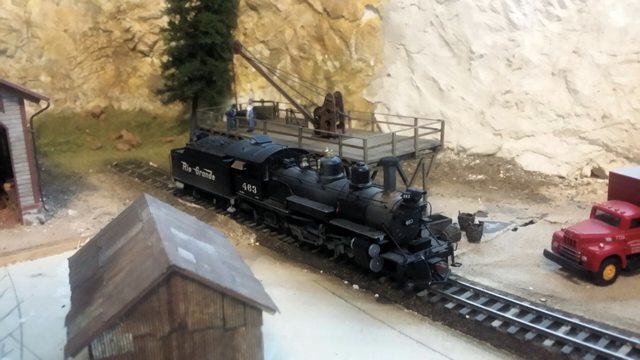
The town of Holy Cross needed a turntable at the engine terminal.
So I decided to build my own 75 foot turntable from plans.
I haven't followed the plans 100%, but almost...
I designed the pit in CAD and 3D printed it in three interlocking parts.
The track around it is in a small trench in the print. I haven't even glued it yet as it fits so good.
The bridge is all wood.
There's some details left to do as the stay wires and the drive system.
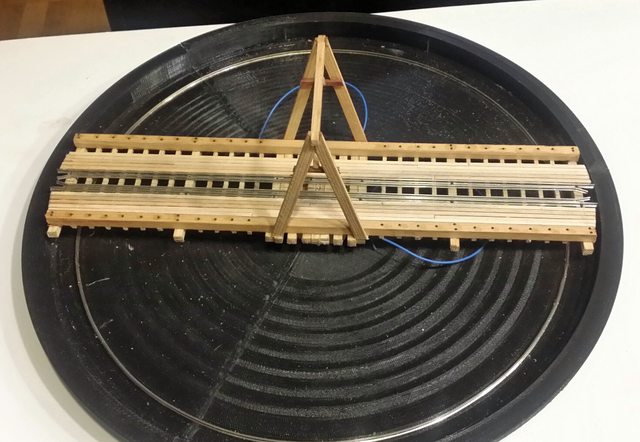

The C-25 looks at home on it.
So I decided to build my own 75 foot turntable from plans.
I haven't followed the plans 100%, but almost...
I designed the pit in CAD and 3D printed it in three interlocking parts.
The track around it is in a small trench in the print. I haven't even glued it yet as it fits so good.
The bridge is all wood.
There's some details left to do as the stay wires and the drive system.
The C-25 looks at home on it.
Graff
Airbrush artist
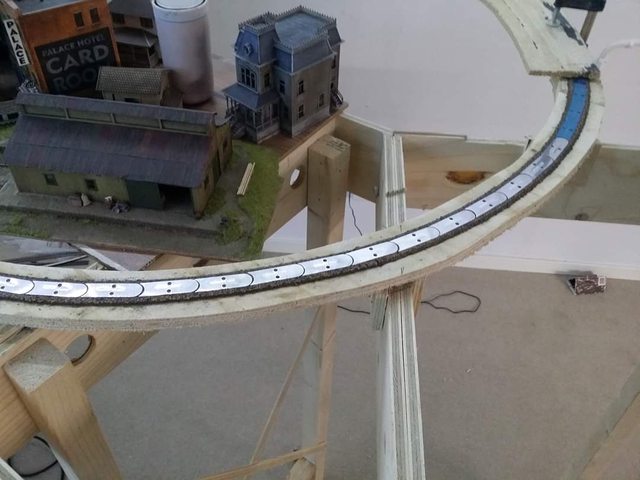
I've started tracklaying again.
8)
All of the dual gauge is finished, now it's HOn3 all the way!
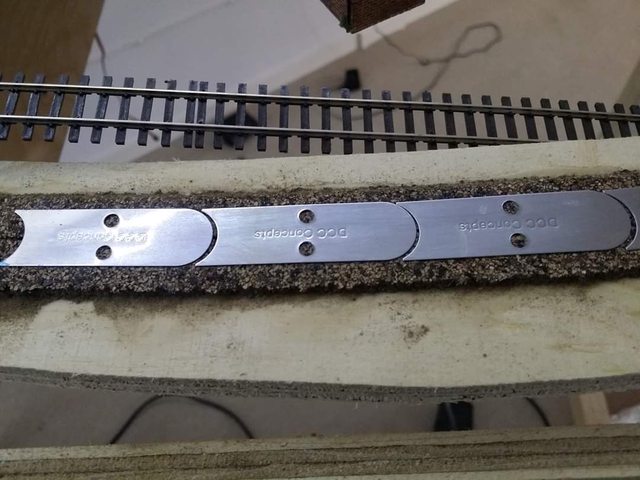
The DCC concepts powerbase plates are being installed on the incline.
It should really help with traction for the lighter locomotives.
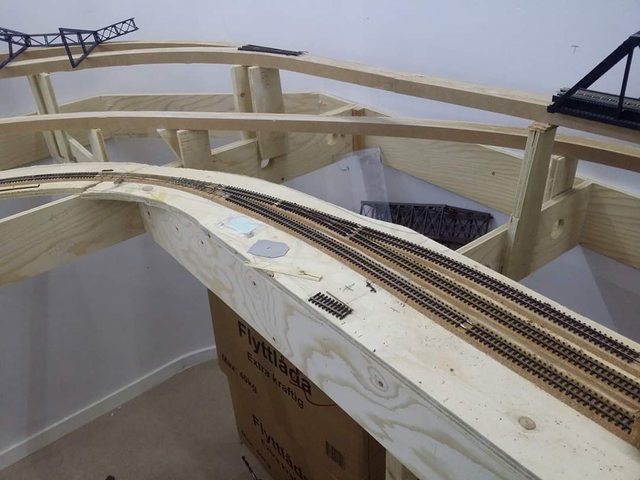
The tracks on the lower level is getting there, this is where the stock pens will be.
Graff
Airbrush artist
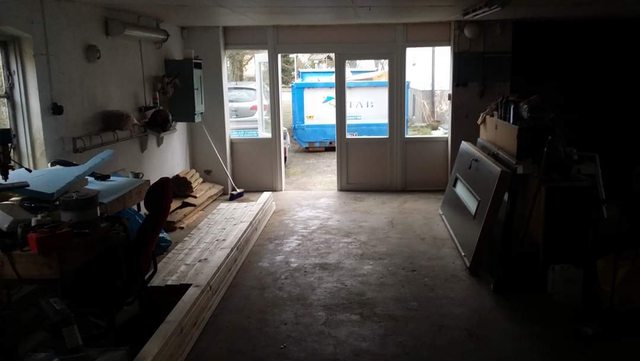
I built a new workshop next to my layout room.
The layout is in the back of my big garage (1700 sq.foot), and I really needed a warm clean space to build models in....
This is how it looked on the 5th of January:
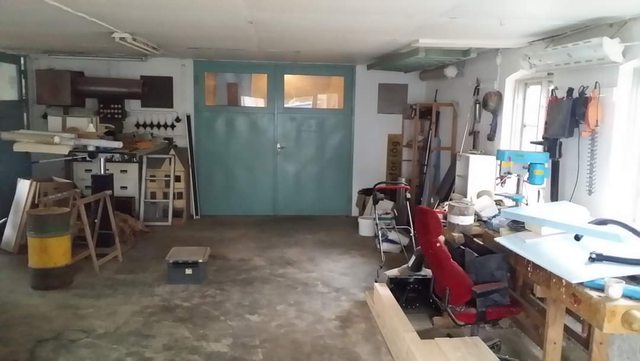
I had new doors installed last year.
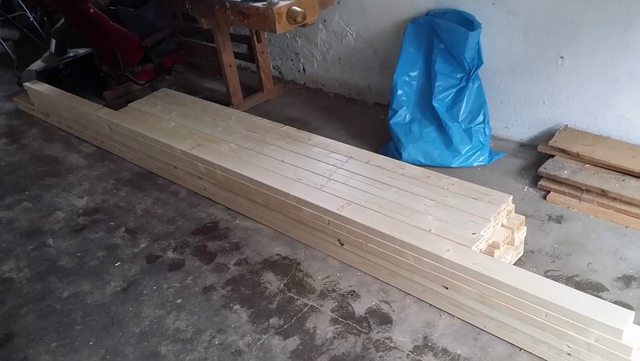
Some of the lumber.
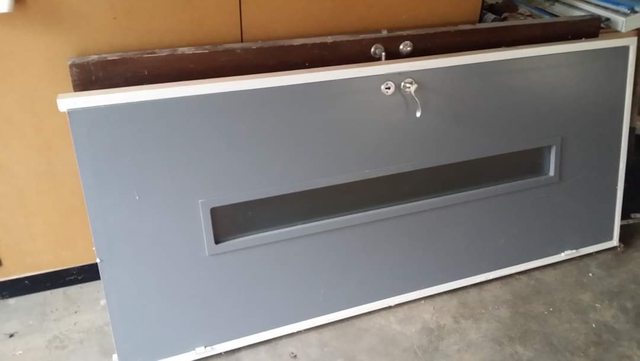
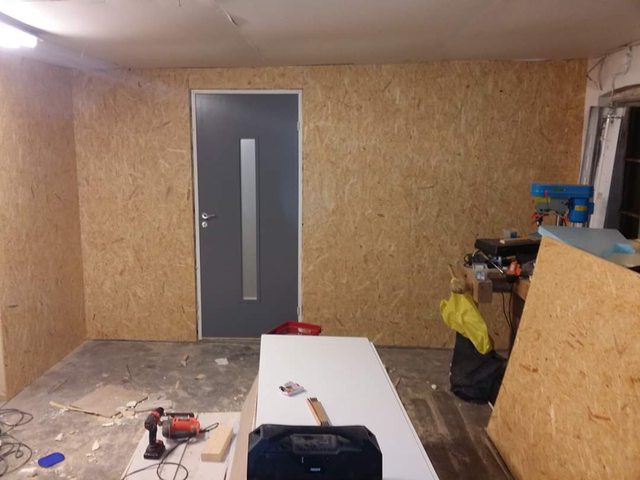
New door to the workshop.
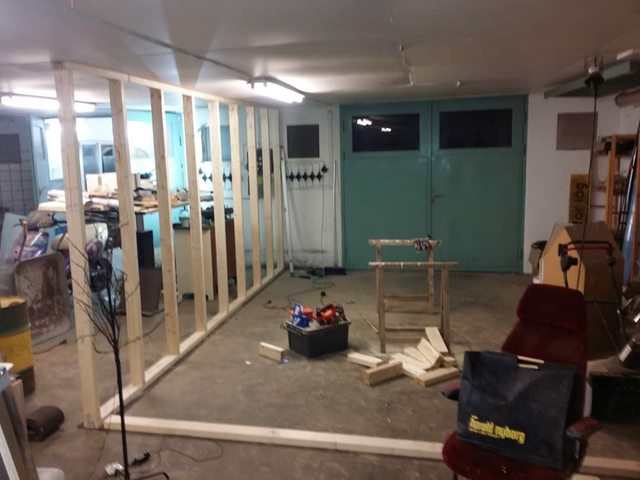
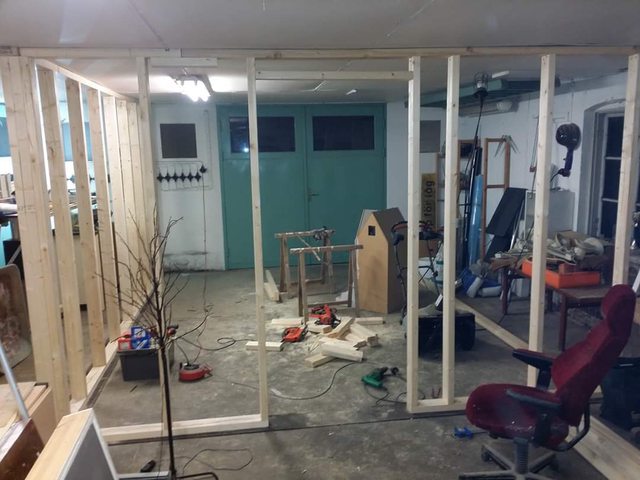
I framed the walls with 2 x 4 lumber.
The room will be 17' x 15'.
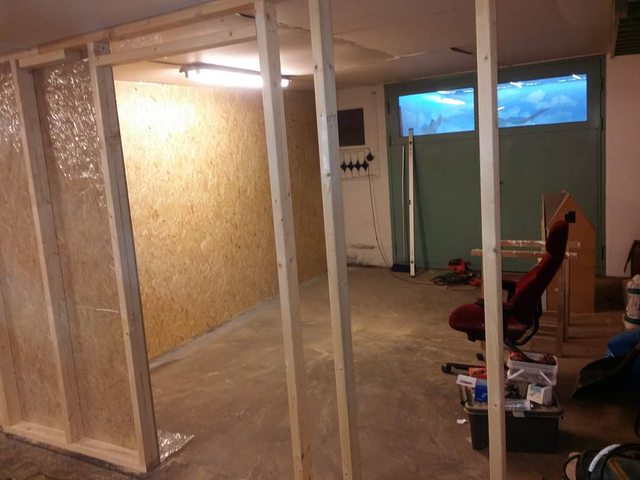
OSB sheets over moisture barrier.
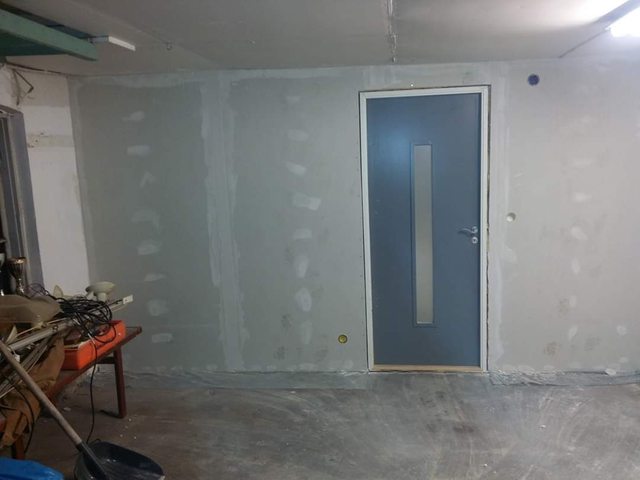
Door installed and sheetrock finished.
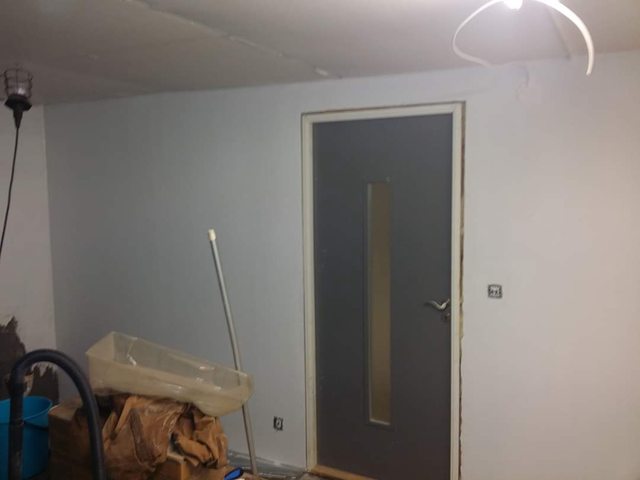
Walls painted and electrical work done.
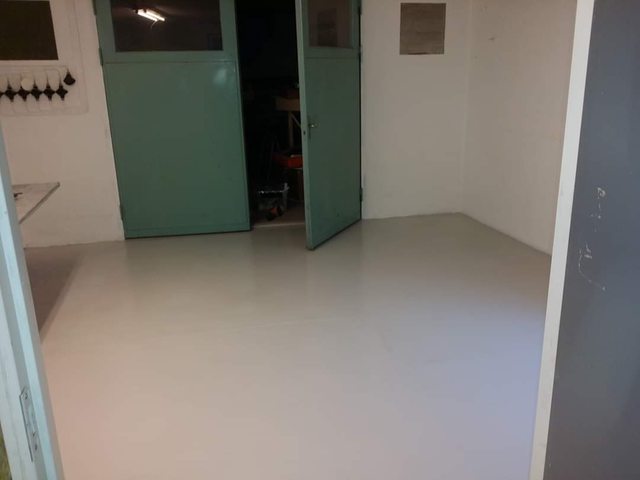
Floor painted with 2-part epoxy.
The room in front is also getting there...
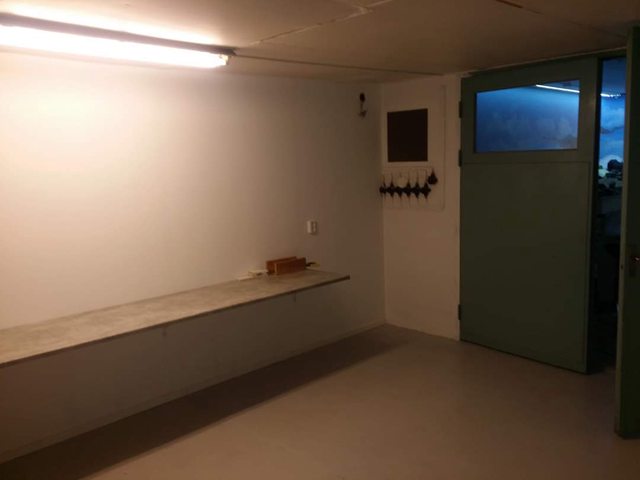
Bench tops are installed on special wall brackets screwed to the wall studs.
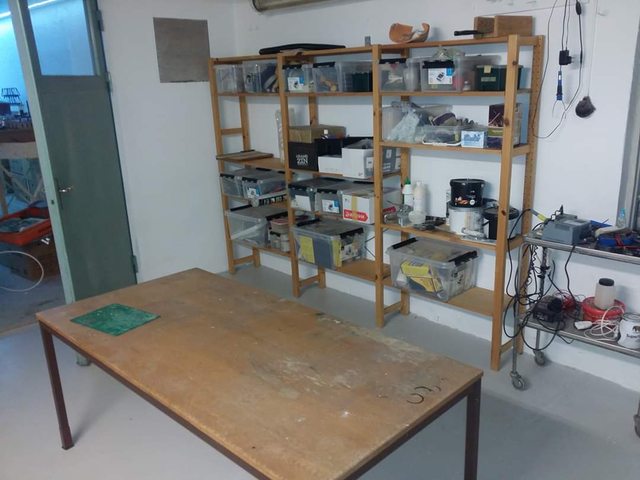
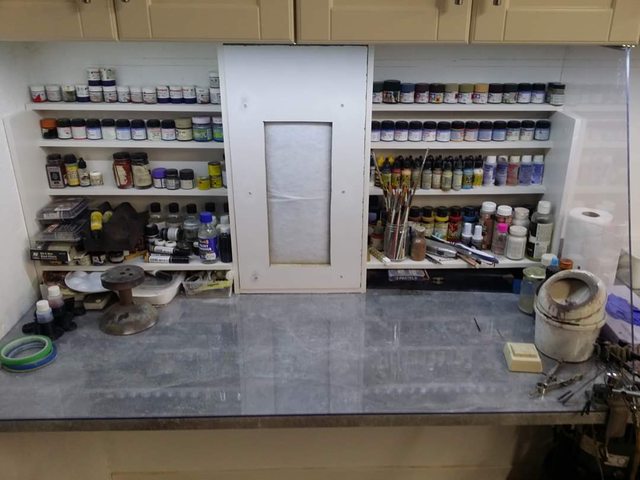
Storage shelves and work table.
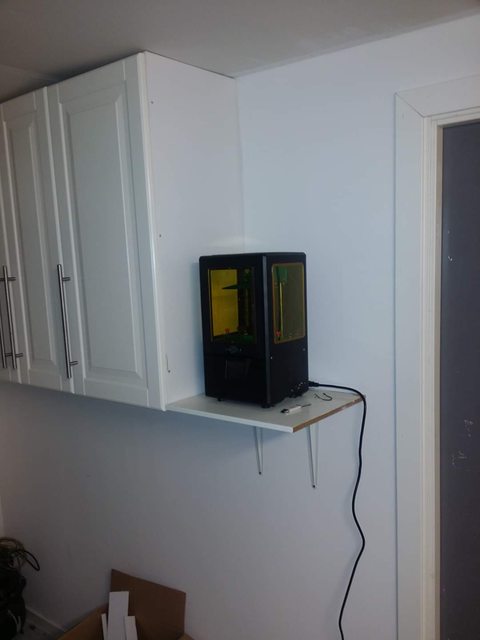
Special place for the Anycubic printer...
Paint booth with filter.
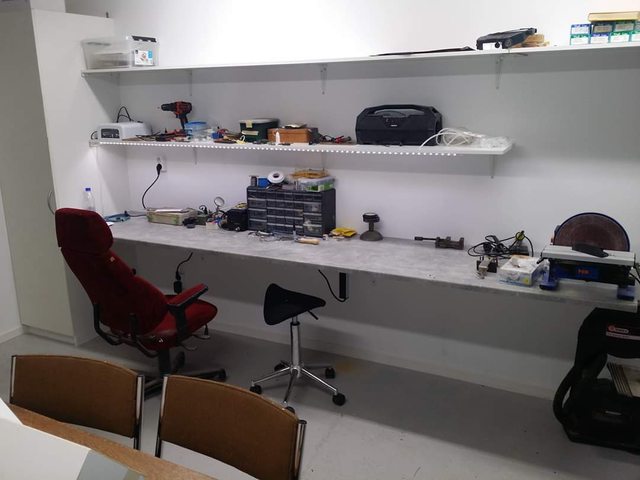
The 14' long workbench getting ready for work.
I use LED armatures all over. LED tubes in the roof and LED strips over the workbenches.
Thanks for watching.
The project didn't take more than 3 weeks from start to finish.
The layout is in the back of my big garage (1700 sq.foot), and I really needed a warm clean space to build models in....
This is how it looked on the 5th of January:
I had new doors installed last year.
Some of the lumber.
New door to the workshop.
I framed the walls with 2 x 4 lumber.
The room will be 17' x 15'.
OSB sheets over moisture barrier.
Door installed and sheetrock finished.
Walls painted and electrical work done.
Floor painted with 2-part epoxy.
The room in front is also getting there...
Bench tops are installed on special wall brackets screwed to the wall studs.
Storage shelves and work table.
Special place for the Anycubic printer...
Paint booth with filter.
The 14' long workbench getting ready for work.
I use LED armatures all over. LED tubes in the roof and LED strips over the workbenches.
Thanks for watching.
The project didn't take more than 3 weeks from start to finish.
Graff
Airbrush artist
I glued the powerbase plates with waterproof carpenters glue.
I weighted it down to dry.
Then I applied the same glue on the plates. The reason for using waterproof glue is that I don't want to risk the plates or track getting loose when I apply ballast...
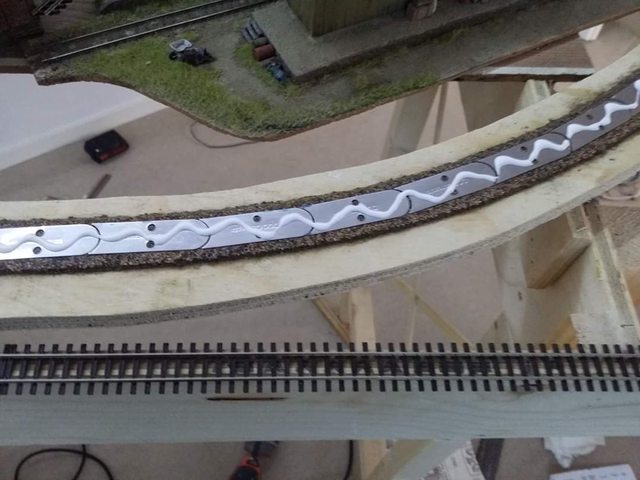
I use my laser cut sweep sticks to both keep the radius and help pressing the track down.
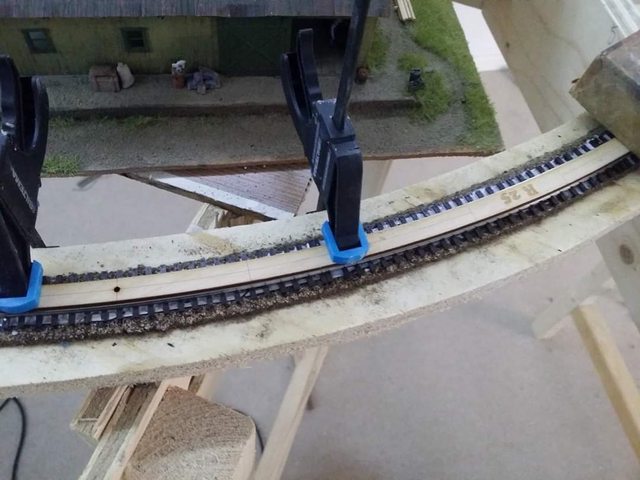
The tracks on the zero level is all laid now!
It's all about going up the mountain now!
I weighted it down to dry.
Then I applied the same glue on the plates. The reason for using waterproof glue is that I don't want to risk the plates or track getting loose when I apply ballast...
I use my laser cut sweep sticks to both keep the radius and help pressing the track down.
The tracks on the zero level is all laid now!
It's all about going up the mountain now!
Graff
Airbrush artist
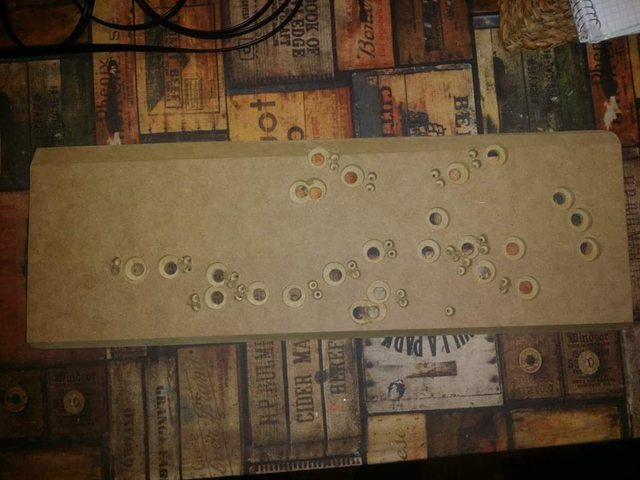
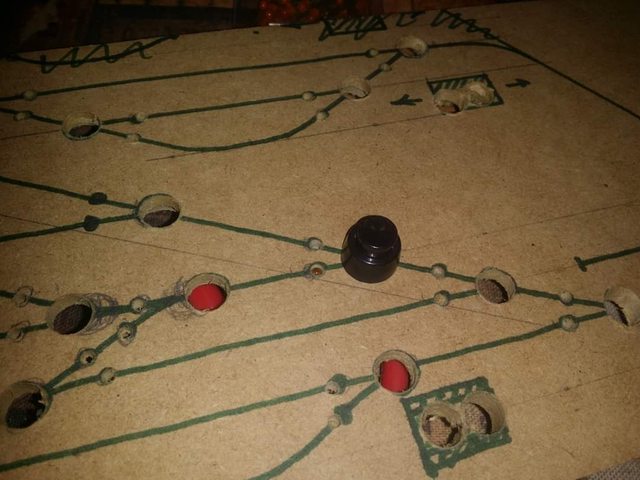
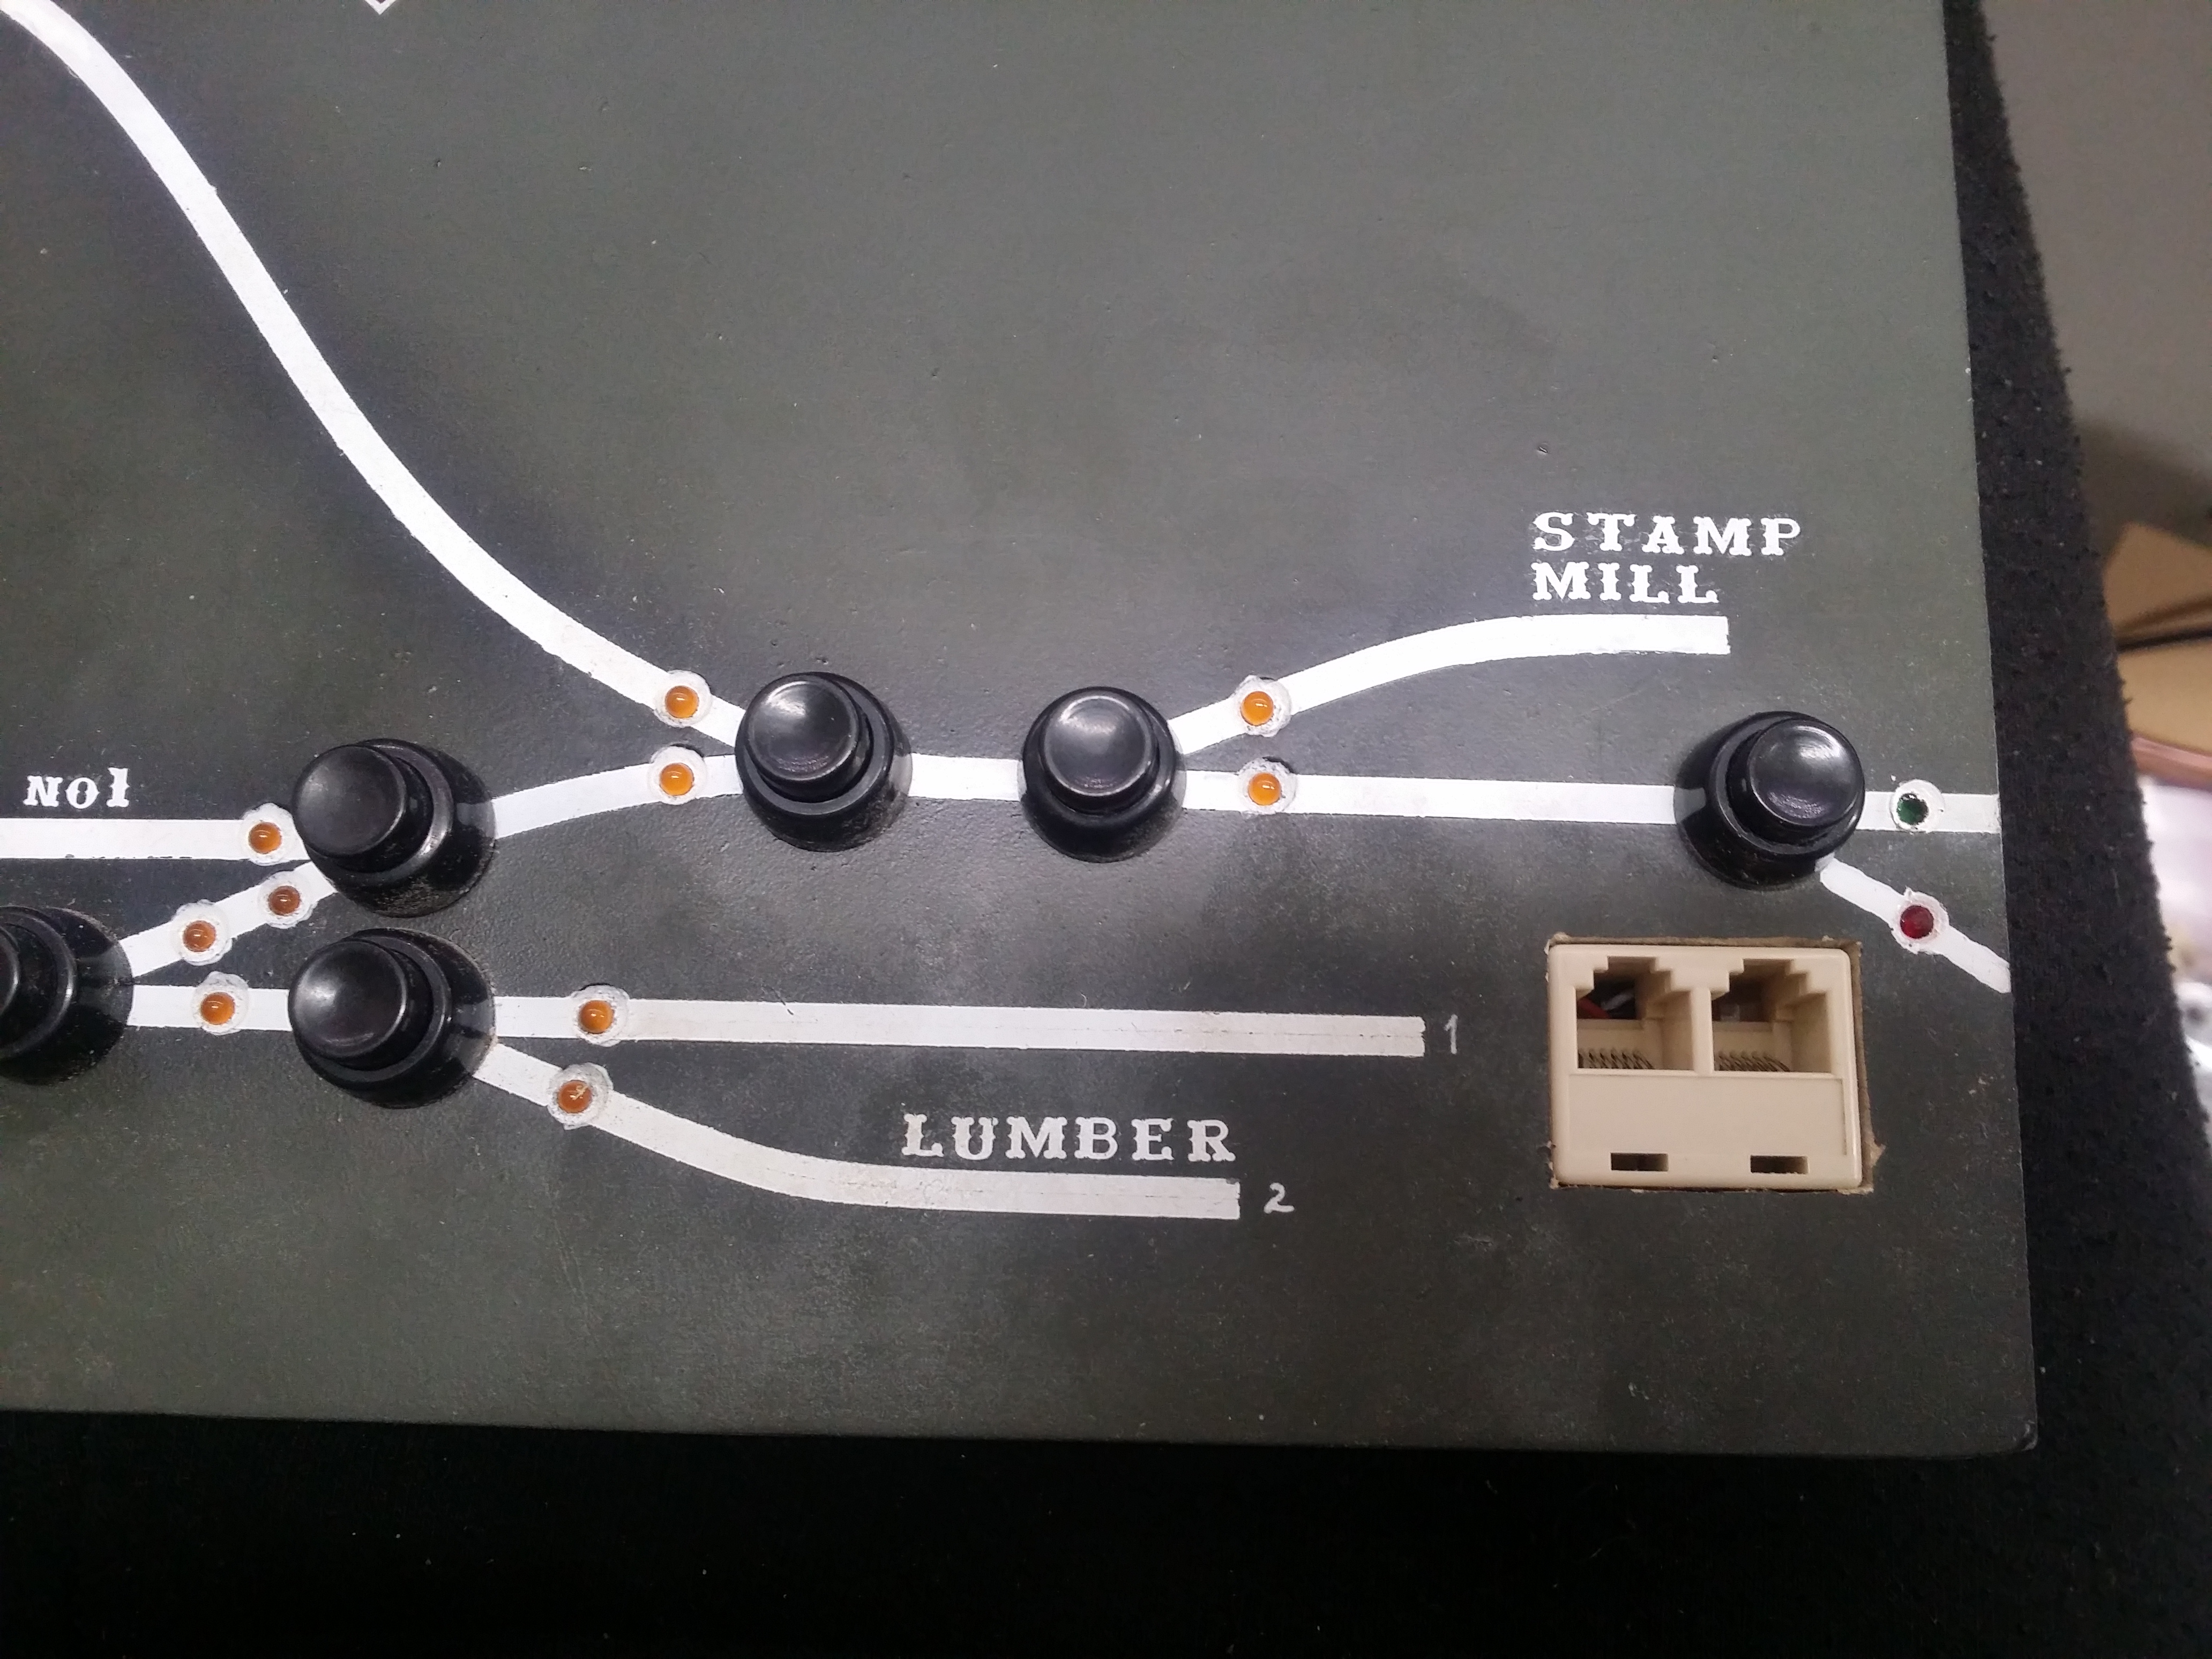
Control panel under construction.
45 x 16 cm made of 10 mm MDF.
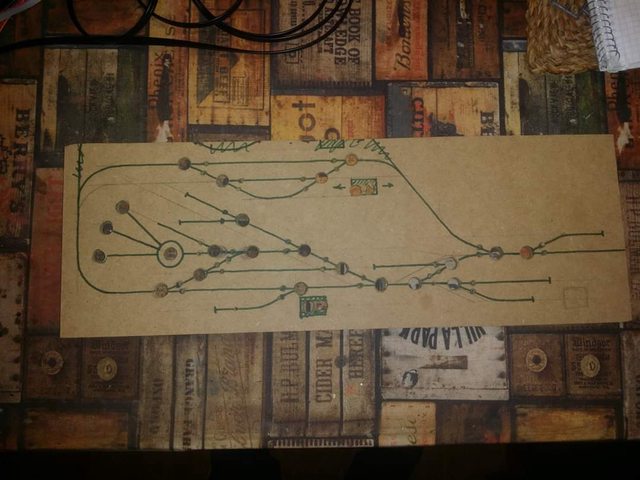
This is the panel for the town of "Holy cross" on my layout.
I recessed the holes on the back for the switches and LEDs.
All the turnouts are switched with servos and are controlled by MGP's electronics (Möllehems GårdsProduktion, a swedish company that a friend has)
I use one panel decoder with 3 LED-12 cards and 4 servo-5 decoders. (And a Bluetooth module and Loconet power termination).
There will also be an outlet for a tethered hand control on it as well.
The panel will be painted black with white track lines and texts.
Then I'll add hinges at the bottom ,so the panel tilts out for easy service.
45 x 16 cm made of 10 mm MDF.
This is the panel for the town of "Holy cross" on my layout.
I recessed the holes on the back for the switches and LEDs.
All the turnouts are switched with servos and are controlled by MGP's electronics (Möllehems GårdsProduktion, a swedish company that a friend has)
I use one panel decoder with 3 LED-12 cards and 4 servo-5 decoders. (And a Bluetooth module and Loconet power termination).
There will also be an outlet for a tethered hand control on it as well.
The panel will be painted black with white track lines and texts.
Then I'll add hinges at the bottom ,so the panel tilts out for easy service.
Graff
Airbrush artist
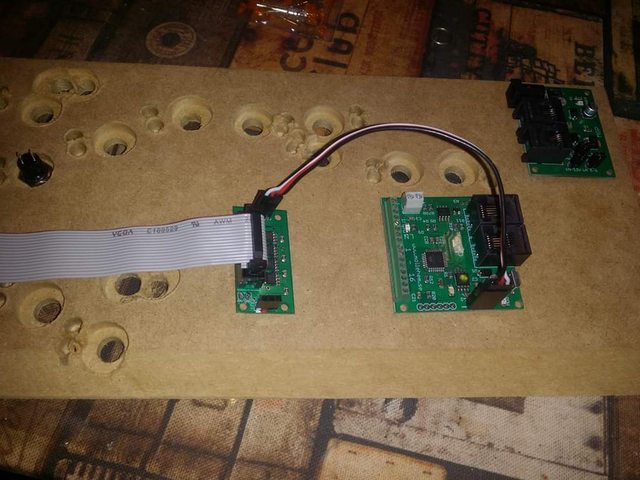
Made some more on the control panel.
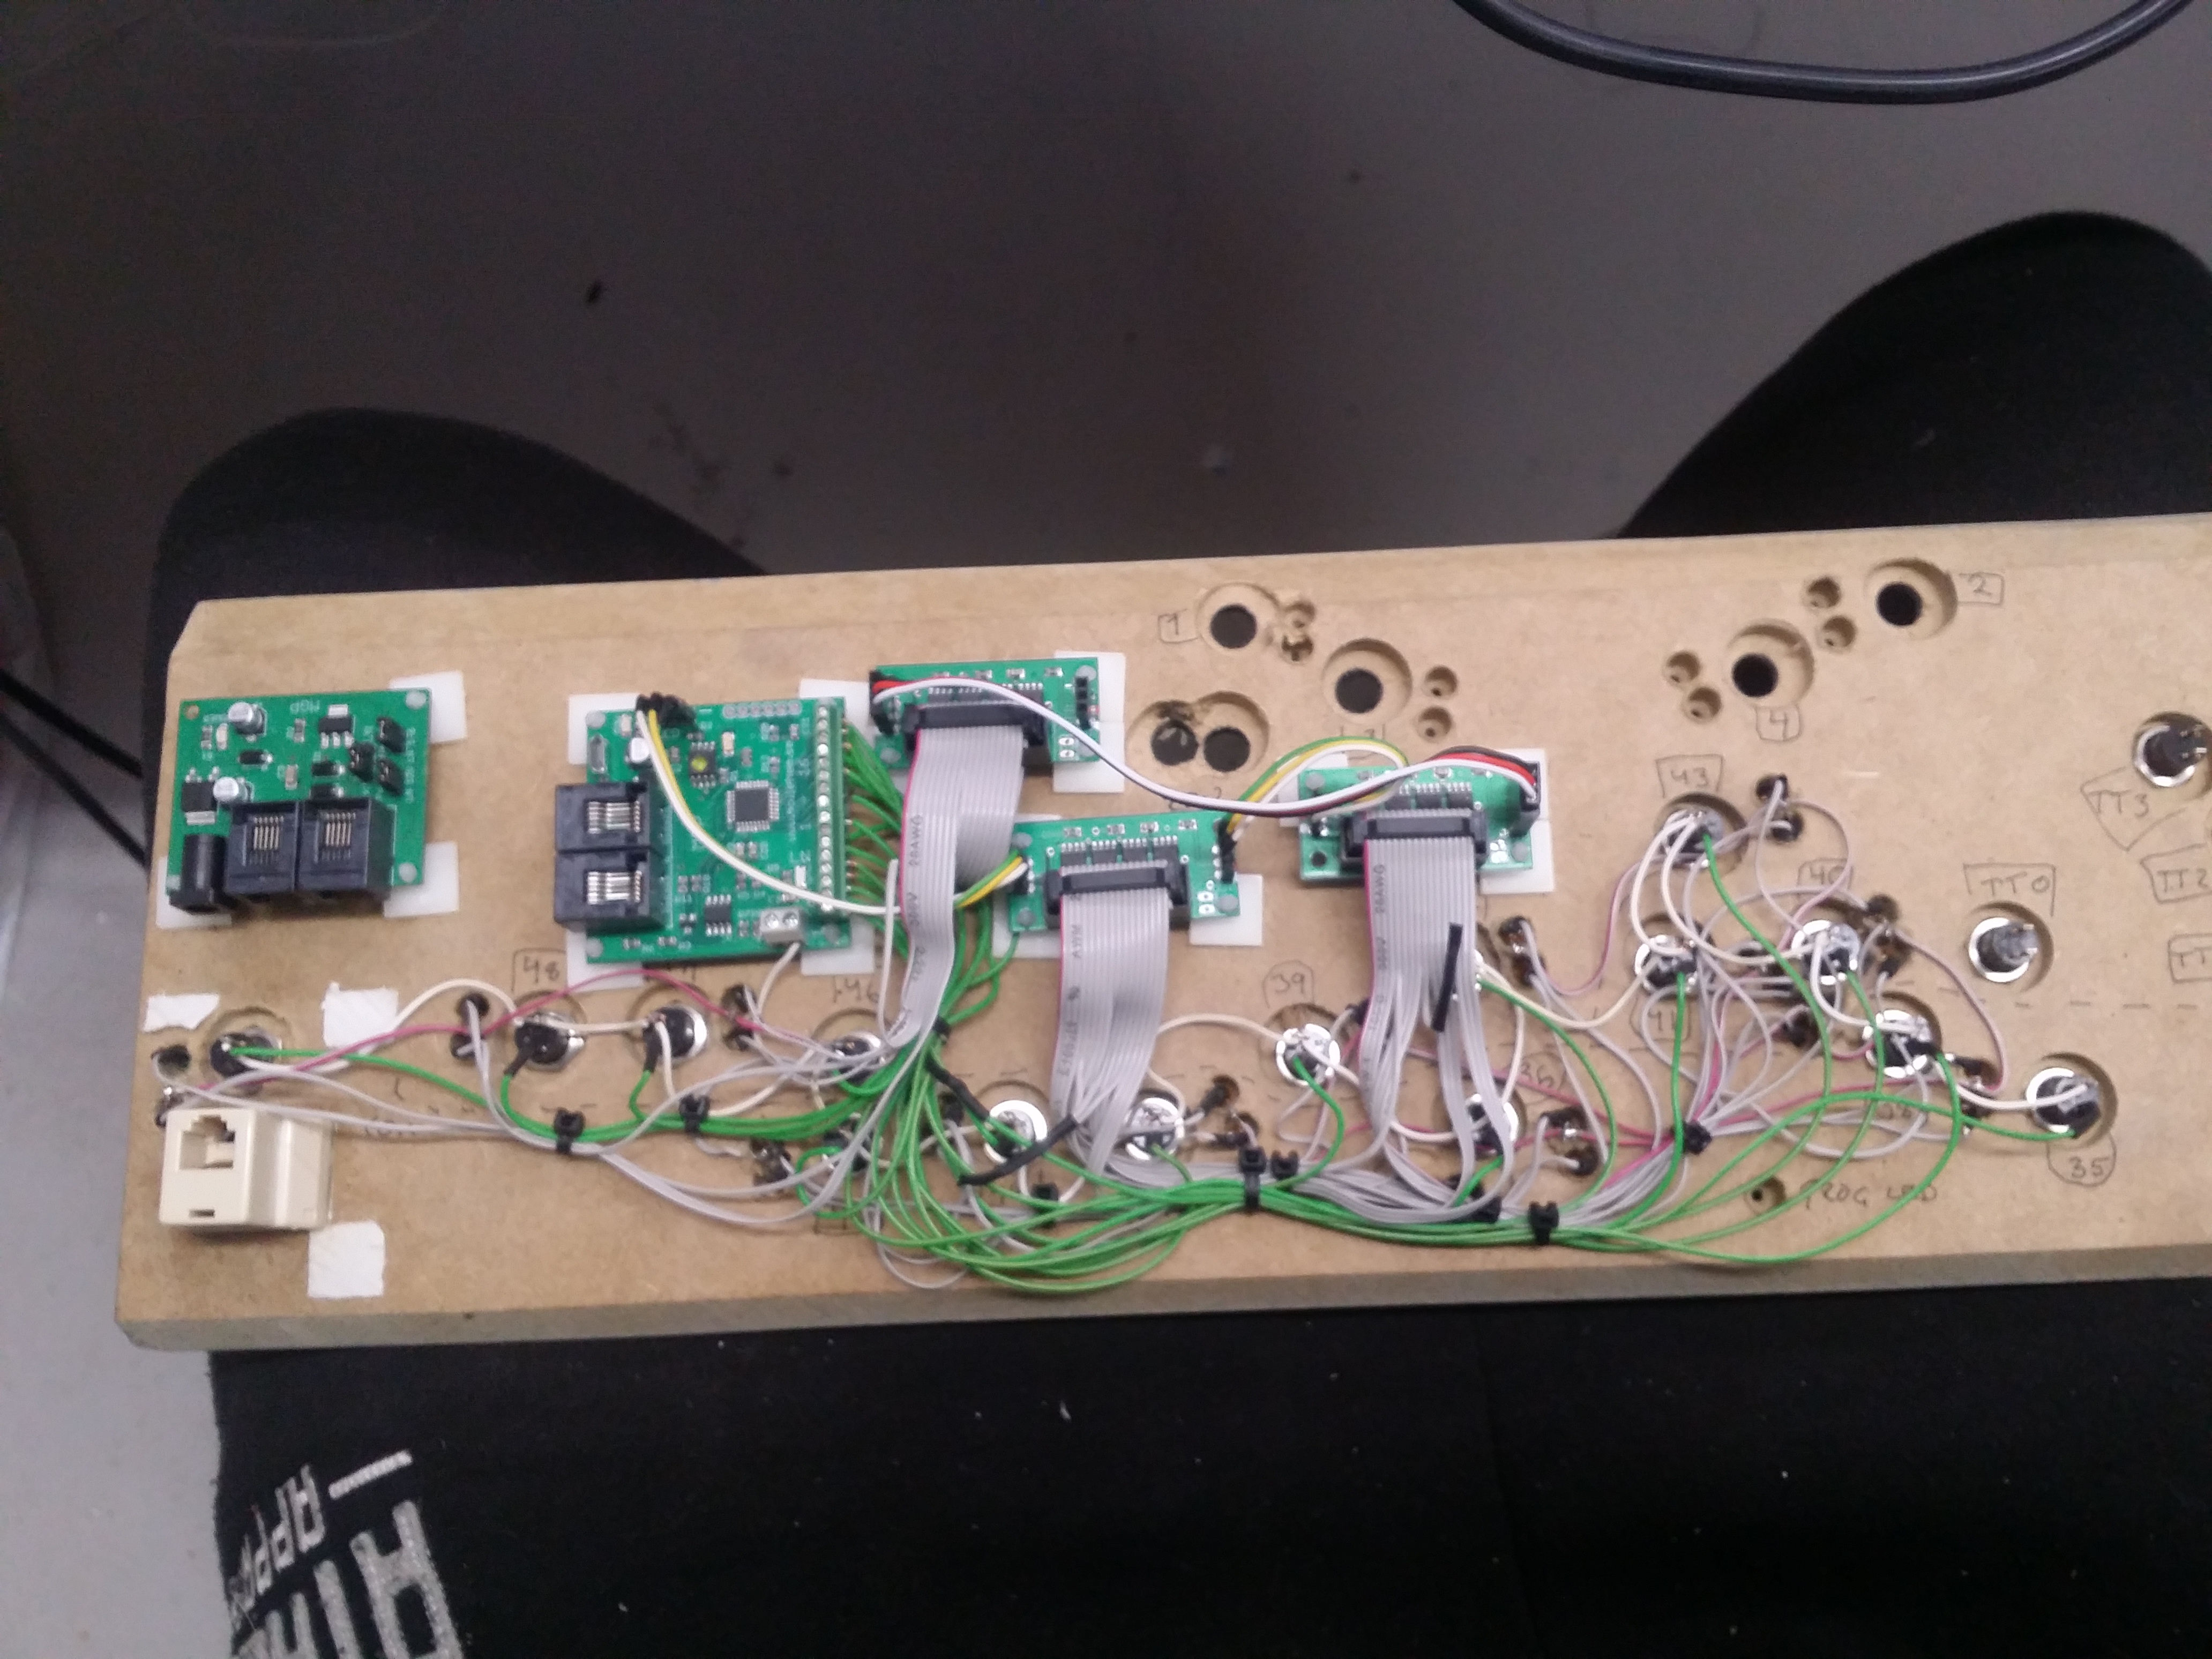
The panel has all the circuit boards installed and tested.
From left to right it is; Loconet power termination, Panel decoder and three LED control boards.
I also installed a connector for the throttles.
Just need to trim the edges.
Now I can install the panel on the layout and install all the servos.
Graff
Airbrush artist
I really like the Rail line kits!
Sure, they have a bunch of miniature parts to be fitted, but the results are so worth it!
I started on this D&RGW 3000 series boxcar the other night.
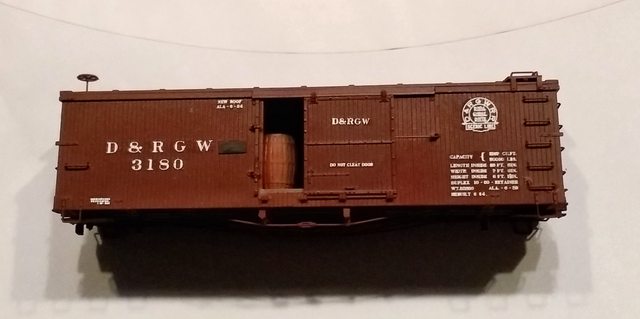
I painted it with Testor DRGW freight car red and then Microscale gloss before adding the San Juan decals.
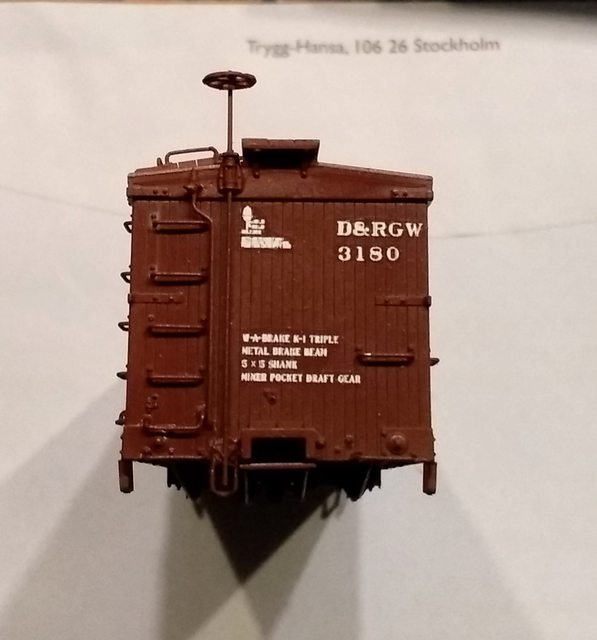
It took a LOT of MicroSol to make the decals conform to the planking.

I used my own designed/printed trucks with Kadee wheelsets. They are very suitable for this car, as the couplers went on at perfect height with no shims.
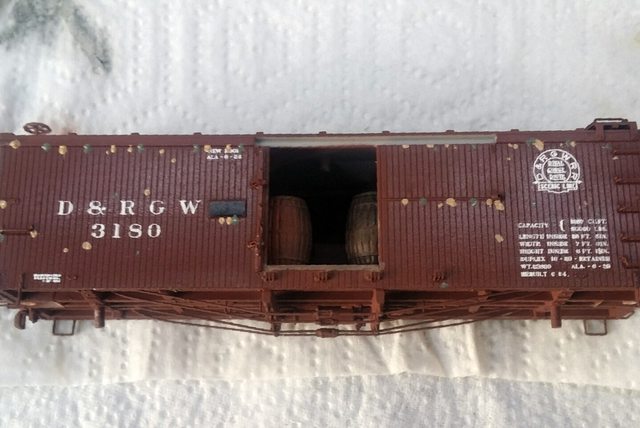
I weather the car with oil paints that I dab on and then streak with a flat brush moistened with turpenoid.
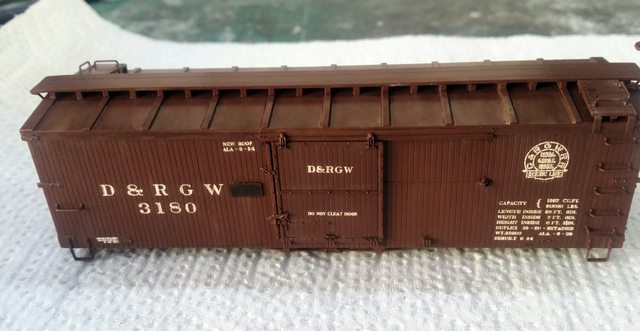
When the oils have dried I add a brownish black oilbased filter all over before the detail weathering. I add some rust with Lifecolor acrylics and then some airbrushed dust.
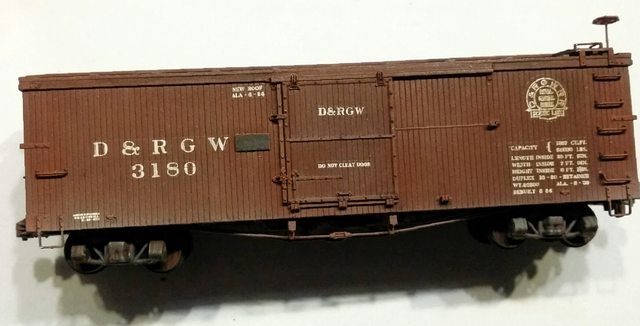
Weathered and finished.
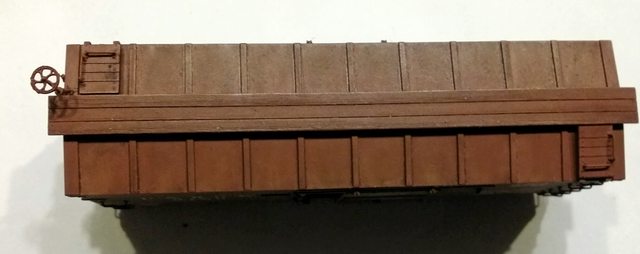
The roof did turn out quite good.
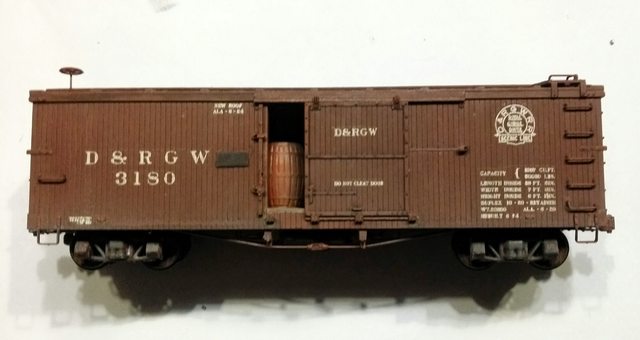
It's always nice to have doors that can be opened.
I use Sergent couplers on my fleet, and they sure look good.
Now I have 4 more to finish.
Sure, they have a bunch of miniature parts to be fitted, but the results are so worth it!
I started on this D&RGW 3000 series boxcar the other night.
I painted it with Testor DRGW freight car red and then Microscale gloss before adding the San Juan decals.
It took a LOT of MicroSol to make the decals conform to the planking.
I used my own designed/printed trucks with Kadee wheelsets. They are very suitable for this car, as the couplers went on at perfect height with no shims.
I weather the car with oil paints that I dab on and then streak with a flat brush moistened with turpenoid.
When the oils have dried I add a brownish black oilbased filter all over before the detail weathering. I add some rust with Lifecolor acrylics and then some airbrushed dust.
Weathered and finished.
The roof did turn out quite good.
It's always nice to have doors that can be opened.
I use Sergent couplers on my fleet, and they sure look good.
Now I have 4 more to finish.
flyboy2610
Loveably weird
Very nice! You even have the era appropriate ribbed-back wheels, I see! I love these old wood planked boxcars. They have a lot of character to them.
Graff
Airbrush artist
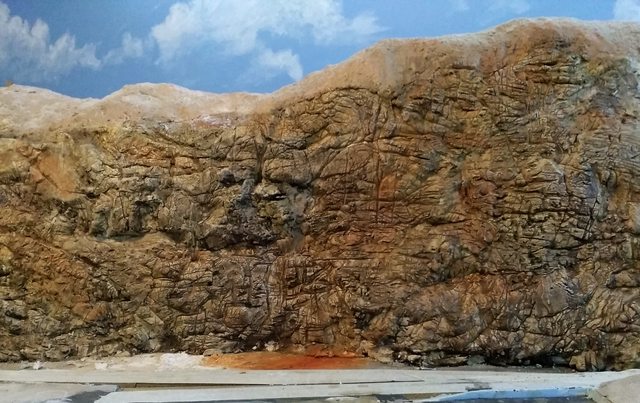
Been busy working on my mountains.
I do have a lot of them to do... In total about 60' long and 1.5' to 2' high.
So, I had started on the mountain behind my town, it also works as a view block for the staging.
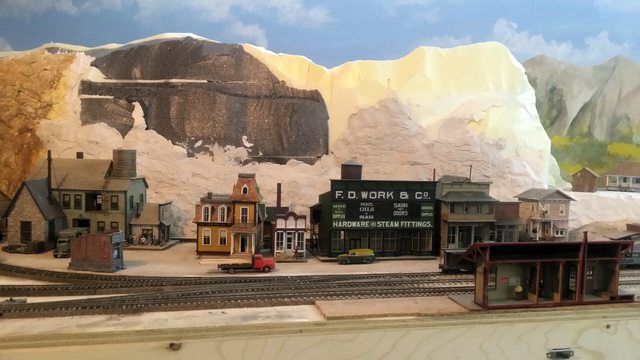
I wasn't sure about the height, so I waited to see how I would like it before finishing it.
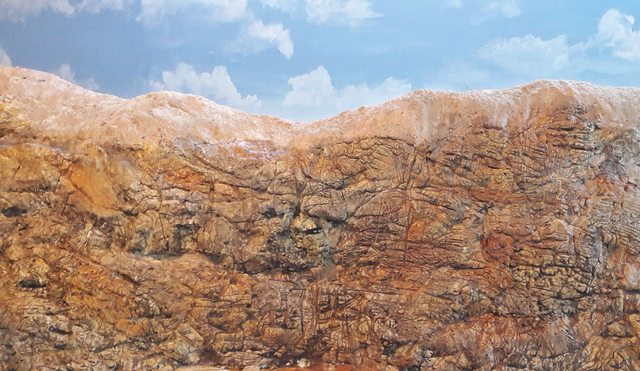
I cut it down a couple of inches and finished the rockwork.
The top got Sculptamold on it as it will be grass, gravel and some trees there.
The Sculptamold is homemade. I mix plaster of paris with cellulose insulation material.
Roughly 3 cups of insulation to 1 cup of plaster.
Works nice!
I colored the mountains with WS pigments and some acrylics before spraying it with diluted Modpodge matte. The last step was a black/raw umber wash.
I will drybrush the rocks with a light beige paint tomorrow.
I do have a lot of them to do... In total about 60' long and 1.5' to 2' high.
So, I had started on the mountain behind my town, it also works as a view block for the staging.
I wasn't sure about the height, so I waited to see how I would like it before finishing it.
I cut it down a couple of inches and finished the rockwork.
The top got Sculptamold on it as it will be grass, gravel and some trees there.
The Sculptamold is homemade. I mix plaster of paris with cellulose insulation material.
Roughly 3 cups of insulation to 1 cup of plaster.
Works nice!
I colored the mountains with WS pigments and some acrylics before spraying it with diluted Modpodge matte. The last step was a black/raw umber wash.
I will drybrush the rocks with a light beige paint tomorrow.
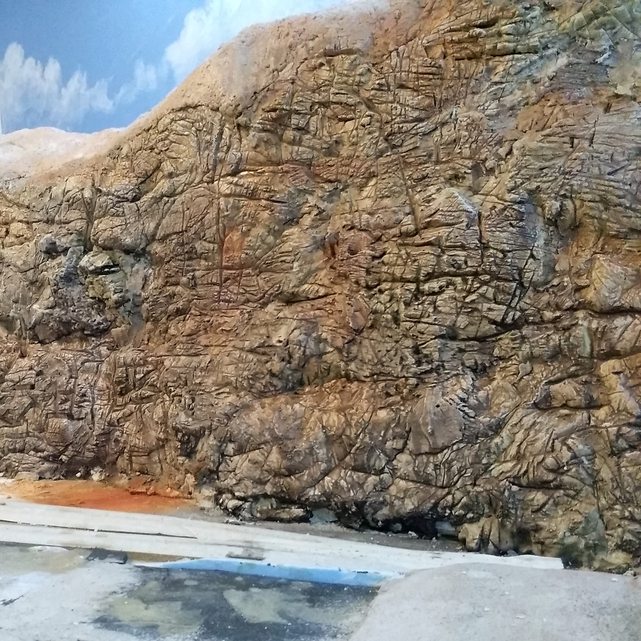

Amazing, Michael! Your colors look "spot on".
I'm going to take notes from your posting:
What is the insulation material that you mix with the plaster?
I'm going to take notes from your posting:
What is the insulation material that you mix with the plaster?
