
You are using an out of date browser. It may not display this or other websites correctly.
You should upgrade or use an alternative browser.
You should upgrade or use an alternative browser.
The Blackwing and Western division
- Thread starter twforeman
- Start date
twforeman
Certified Great Northern Nut
Yesterday I found the article I had been looking for with the plans for a Seed and Feed store. I ran across it when sorting my MRR magazines a while back but did I write down which issue it was in? No.... So I finally decided to bite the bullet and looked through my collection until I found it.
It was in the Feb 2012 issue.
Today I whipped up a mock-up of the building with foam core to see how it fit on the layout. I think it looks pretty good.

Of course I'll need to re-work the sign so it doesn't say "Wisconsin" on it...
It was in the Feb 2012 issue.
Today I whipped up a mock-up of the building with foam core to see how it fit on the layout. I think it looks pretty good.
Of course I'll need to re-work the sign so it doesn't say "Wisconsin" on it...
Burlington Bob
Well-Known Member
Nice work and progress! I just started reading this thread this morning and I will say, you made me jealous! Keep posting as you build, I'm looking forward to more!
twforeman
Certified Great Northern Nut
The residents of Blackwing now have somewhere to go get a nice greasy burger and a hot cuppa joe!
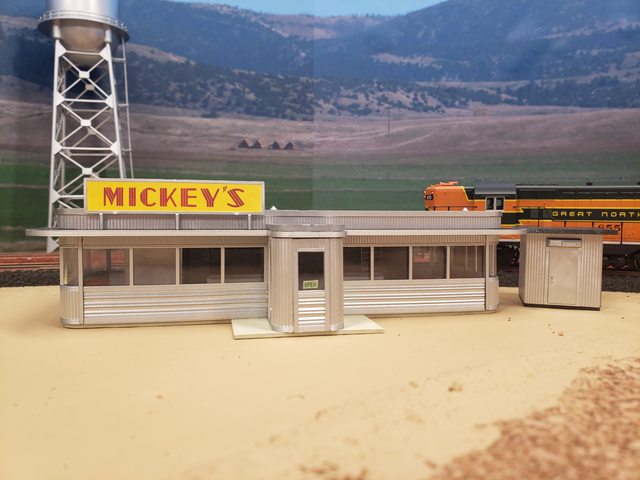
This is the "Bettys Diner" kit from Walthers. It goes together alright, but I've built much better designed plastic models.
I left the roof unglued so I can add lights and people in the future. Needs more signs, some kind of HVAC unit on the roof, probably some gravel on the roof, and some weathering. But it's all assembled now.
Hard to see it, but it has a full interior with booths, a counter, and even a malt machine.
I named it after a local diner and made the sign from a photo on the internet.
Last edited:
twforeman
Certified Great Northern Nut
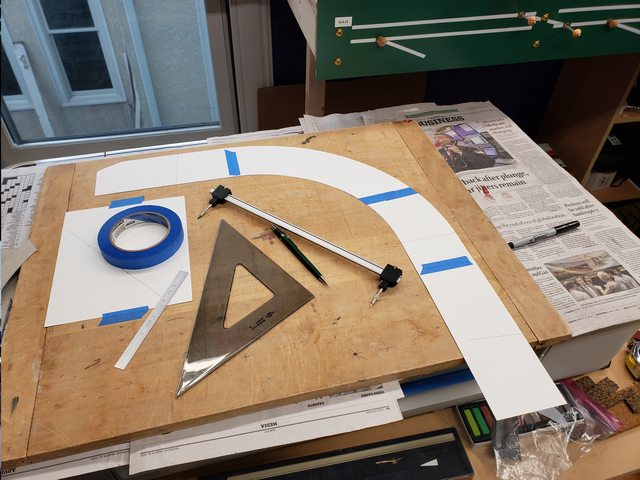
In addition to building rolling stock, eateries, and water towers, I've been working on the layout. In the past two days I've been working on extending the road around the corner and to the bridge.
The first step was to use my beam compass and lay out the lines for the sides of the road and the hump. I used two layers of box board totaling about .040" thick to make a 1" wide strip down the center of the road to add some camber. This is gluing it down and putting weights on it to hold it.

Next I made a paper template to cut the foam with. I carefully fit it to make sure it would line up with the previous road section and butt up against the crossing.

Speaking of crossings, here is gluing down the crossing.

Finally I cut out the foam.

And glued it down. I used Tacky glue along the edges.

It will be interesting to see if I can match the paint job I did on the first section of road...
The first step was to use my beam compass and lay out the lines for the sides of the road and the hump. I used two layers of box board totaling about .040" thick to make a 1" wide strip down the center of the road to add some camber. This is gluing it down and putting weights on it to hold it.
Next I made a paper template to cut the foam with. I carefully fit it to make sure it would line up with the previous road section and butt up against the crossing.
Speaking of crossings, here is gluing down the crossing.
Finally I cut out the foam.
And glued it down. I used Tacky glue along the edges.
It will be interesting to see if I can match the paint job I did on the first section of road...

Alcomotive
Grandson of an ALCO Builder
In addition to building rolling stock, eateries, and water towers, I've been working on the layout. In the past two days I've been working on extending the road around the corner and to the bridge.
The first step was to use my beam compass and lay out the lines for the sides of the road and the hump. I used two layers of box board totaling about .040" thick to make a 1" wide strip down the center of the road to add some camber. This is gluing it down and putting weights on it to hold it.
Next I made a paper template to cut the foam with. I carefully fit it to make sure it would line up with the previous road section and butt up against the crossing.
Speaking of crossings, here is gluing down the crossing.
Finally I cut out the foam.
And glued it down. I used Tacky glue along the edges.
It will be interesting to see if I can match the paint job I did on the first section of road...
Oh looky there! Look at dem silva bars! Whoa! There's silva in dem hills there boys! Yeee ha! Silveer rush! lol


M
MHinLA
Guest
The tracks themselves look great..Is it ME ? What code, 70 and/or 40 ?🛤🏕
twforeman
Certified Great Northern Nut
The tracks themselves look great..Is it ME ? What code, 70 and/or 40 ?🛤🏕
Thanks. It's all ME code 83. Some got better paint than others.
")
twforeman
Certified Great Northern Nut
I think you mean "Welcome to Leadville."Oh looky there! Look at dem silva bars! Whoa! There's silva in dem hills there boys! Yeee ha! Silveer rush! lol
M
MHinLA
Guest
Thanks. It's all ME code 83. Some got better paint than others.
Wow, I'm surprised ! I guess because their simulated spike heads look near if not to scale, makes it look 70 ! 🛤 🏕
trailrider
Well-Known Member
I would be willing to bet that if those lead weights were turned over, they might say "Lyman" on the top side. Might be pure lead, might be 1:16 tin:lead; #2 alloy. For this application, doesn't matter, however!I think you mean "Welcome to Leadville."
twforeman
Certified Great Northern Nut
You would be right. They are #2. I have too many hobbies, and I bet you can guess what one is.I would be willing to bet that if those lead weights were turned over, they might say "Lyman" on the top side. Might be pure lead, might be 1:16 tin:lead; #2 alloy. For this application, doesn't matter, however!
Alcomotive
Grandson of an ALCO Builder
You would be right. They are #2. I have too many hobbies, and I bet you can guess what one is.
Yupper! re-load baby ! Yesh my other hobby too. I still categorize this as precious metal too!
trailrider
Well-Known Member
Some lead alloy .45-70-405 bullets painted grimy black, inside empty hopper cars, also weathered with grimy black definitely improves tracking ability.I find that lead bullets make great weights for cars.

twforeman
Certified Great Northern Nut
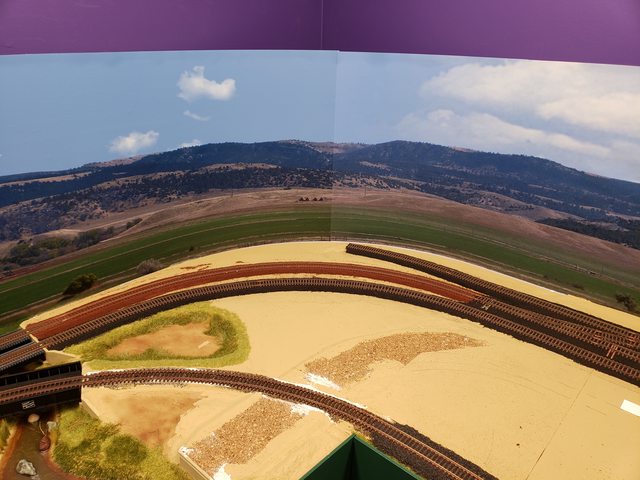
Well, I haven't updated this build thread for a long time. And there is a reason for that. My hand built turnouts are giving me troubles and I got disgusted and stopped working on the layout.
If you see my other posts you'll see I didn't stop railroading, I just switched over to building freight cars and trucks for a while (still need to get back to that garbage truck build.)
This weekend I finally bit the bullet and repaired the three broken turnouts. The problem I'm having is my point rails keep coming unsoldered from the throw bar. I bought some Tix silver solder to see if that would be stronger, but I could not get it to adhere well at all. It melted and flowed but as soon as it cooled it would break loose. Maybe the remains of the regular solder were contaminating it? I don't know.
So I made new throw bars, cleaned them really well, fluxed them, and then installed them with regular solder. I also had to repair a couple of the Bull Frog switch machines that weren't glued very well when I built them.
But now all my turnouts are working - mostly. They don't all throw completely all the time, so you have to help them along a little. I'm still not sure what that's about.
But at least I can start working on scenery again now. And I ran my trains around for a while last night, so that's good.
The three year plan has us moving to a different house and the new house will have a larger train room. I didn't think I'd miss having a complete loop to run the trains on, but sometimes I'd just like to watch them run, so the next layout will have a complete circuit.
And I'll take more care building the turnouts.

