Snow Diorama


Railrunner130

Well-Known Member
About a year ago, I decided to build a winter diorama. The purpose was to come up with something I could use to serve as a backdrop for my growing collection of buildings. I decided that this particular module would be winter themed because I wanted to be able to showcase some track clearing equipment I had purchased. I wanted something a bit different, the likes of which you just don’t see on a model railroad layout. (I’m going to get bombarded with photos of winter layouts now!) It’s ok. That’d be cool. No pun intended. The module took me about two months to do. For the record, my permanent layout is still years away from being started, as the kids have that part of the basement cluttered with toys. This took so long to post because my dutiful, four legged assistant got sick and passed. And of course, the Photobucket debacle.

I was inspired to build this diorama by a photo posted by Jim O’Conner (HOexplorer). This particular diorama was Z-scale and intended for a customer. http://www.modelrailroadforums.com/...ing-the-Pinacle-Creek-Mining-amp-Timber-Co-RR Page 419, post 4186. I had been thinking of a winter diorama for a while, but hadn’t applied much brain power towards the subject. When I saw the photos Jim posted, everything clicked. Vision realized, I decided on some ground rules.

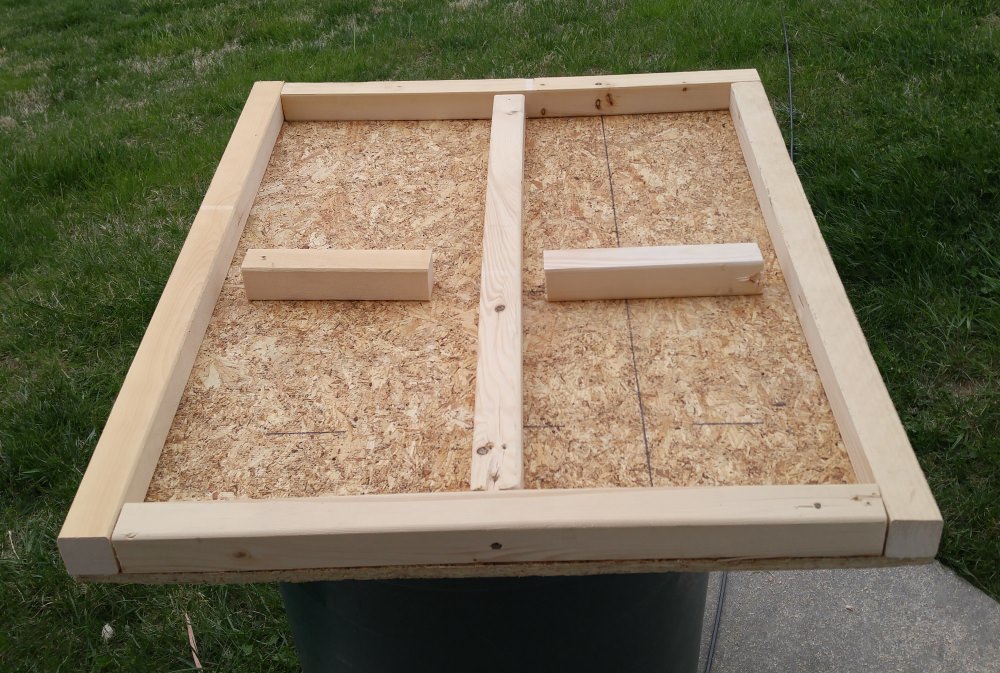
1. Use as much existing supplies as I could. I actually made it about ¾ of the way through before I had to buy anything.
2. The purpose was to try some things and apply what I’ve learned over the last few years. Win, lose or draw.
3. There should be adequate space to photograph at many angles.
4. There should be space for buildings and trains to be photographed.
5. The diorama needed to be portable, since outdoor lighting looks best.
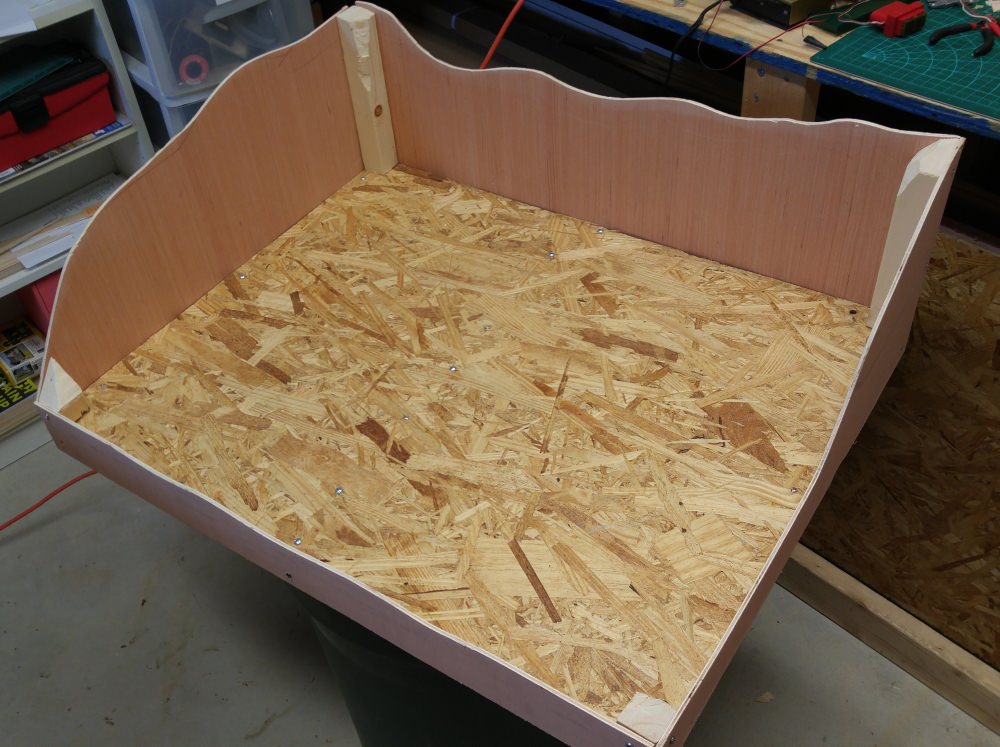
6. The diorama would be a winter scene. This meant that the back had to be high enough to block my neighbors’ trees.
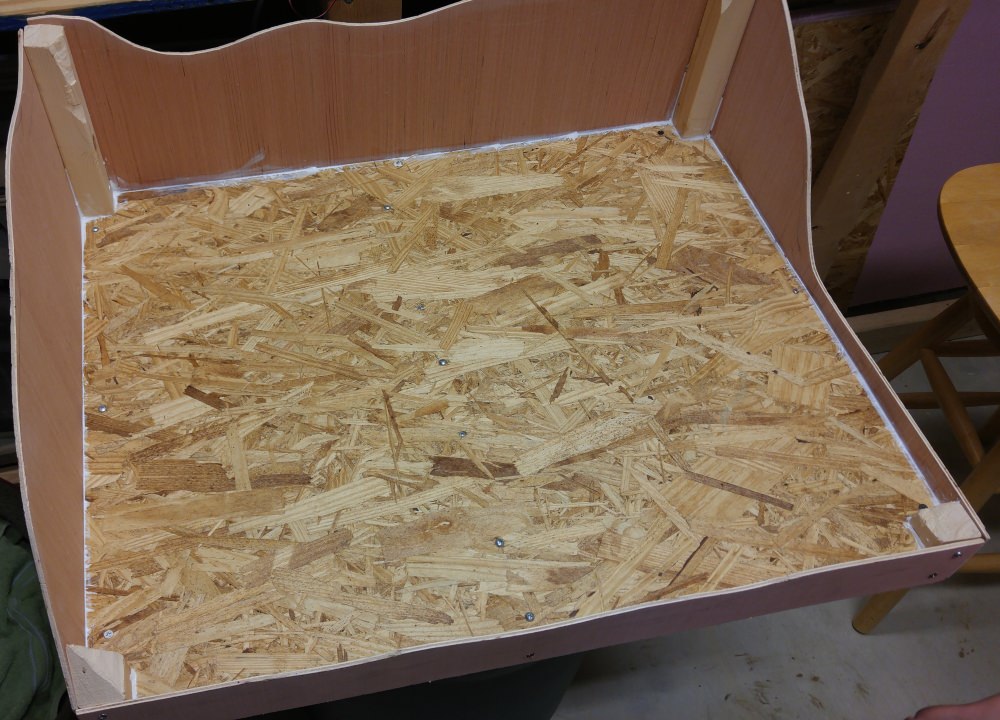
7. There should be some flexibility. Trees didn’t need to be permanently installed and the snow levels adjusted.

In the spirit of Jim's original thread I decided to document the whole thing.
 
Last edited by a moderator:
To start with, I had a piece of 1/4 inch plywood MDF laying around. I also had some 1X1 pine that I had unsuccessfully used to build a module. I pulled out some screws from the screw jar and went to work, building a frame for the underside. I added some extra pieces so that the diorama would be supported when placed on top of a 35 gallon trash can. The trash can being my main support structure outdoors.

bvncmXl.jpg


9iQ2r83.jpg


I had purchased a few sheets of thin poplar plywood for building modulars, but had never used them. I cut four sections off the sheet with my jigsaw and screwed them into place. As mentioned previously, the back and tunnel side would need to be high so that I could hopefully mask my neighbors’ trees during photo sessions.

upjrGvL.jpg


I had decided to utilize Woodland Scenics Snow. This meant I needed to form a tray so snow can be captured and recycled in a dynamic environment. I cut down some more 1X1s for the corners. This added stability and covered up some of my inferior carpentry skills. Before installation, I chopped off the edges to make the mountains fit better. Also because of the snow, I decided to seal the corners with clear bathroom caulk. During this project, I developed an unhealthy like for bathroom caulk. I wasn’t eating it or anything. I’m just really happy with what I was able to accomplish with it. Sealing the base wasn’t a bad idea, but I’m not sure it was necessary.

JlWk3l2.jpg
 
tLb2G1w.jpg


Next it was time to form the mountains. I used newspapers, a little bit of cardboard and blue painters tape. I had tons of painters tape to use- a product of formerly owning an old house that had needed lots of work. The tape didn’t hold well. I’d recommend that you either use new tape and seeing if that does the trick or stapling it at critical points.

i1NtY2P.jpg


MaaLPY7.jpg
 
8EaLg09.jpg


Next, I cut plaster cloth sheets, dipped them in water and build the mountains. It took a little getting used to. The smooth/flat side goes down and I had a difficult time identifying that at first. In the process, I ended up using more plaster sheets than necessary. However, I realized that I had a shelf about 1/3 of the way in from the right. This would allow a small cabin or other small object to be photographed.

XTnuVPU.jpg


VBv4ahK.jpg
 
hMQl17W.jpg


I had come across Magic Water Preformed Ponds at a train show and picked up a set. This particular set had several ponds on it. I chose the one I thought would fit best in the spot I had chosen and cut it out. I used the jigsaw to cut a hole where the pond would sit. I also cut a hole for the snow to be collected and reused.

Having read the directions afterwards (of course…), I built the pond wrong. Here’s what I did. Figuring the pond would be frozen, and frozen ponds are dark grey, I painted the inside grimy black. I stopped painting it below where the waterline was going to end. The plastic piece I used was, in fact, a mold. The correct way is to pour the resin into the molds and remove the newly formed pond when complete.

8OqF5uI.jpg

This shot shows the pond after several cycles of pouring and letting it dry. I added some WS Lichen and Poly Fiber to the edges to simulate water grasses. This photo skips ahead in that I also added a twig (too early because it sank too much) and Sno-Tex to the edges to cover up the grasses.
 
Last edited by a moderator:
mihXUaX.jpg


After the plaster dried, I cut a hole for the tunnel entrance. I had decided that to simply stop a train before it entered the tunnel wouldn’t look real. The tunnel entrance piece was one of the first things I had purchased when I got back into the hobby, about five years ago, from a hobby shop that was going out of business. I thought it was a concrete piece, but it turned out to be wood. No big deal.
Also at this stage, I applied Elmer’s Spray Glue to the surface. I then applied Woodland Scenics green foliage. Followed by Elmer’s again. I wasn’t impressed by the gluing power of Elmer’s. My intent was to simulate bushes and uneven terrain. The foliage didn’t seem to stick to anything and you may notice decreasing amounts of it as I continued to build.

8z3Fs82.jpg

The cork roadbed came next. In looking back at Jim’s photos, I probably should have done some layering and boosted the roadbed some more. This would have elevated the tracks to a spot more in line with a camera. As is, I’m not sure the camera height matches up with the camera height of a scale person. I test fit the roadbed and then proceeded to apply some bathroom caulk underneath. By this time, I had found some nice wood decking screws (I don’t know where they came from). But I did use them to secure the roadbed. Any spots that popped up got weights in the form of 2X4 pieces.
 
I like the fact that you have made lots of pic to show the progress.
Looking forward to more.
Wisht I had a name to go with RR130?
 
g2ChgFG.jpg


To clarify a previously mentioned idea regarding the snow base, I planned to use the WS green foliage with a coat of glue to provide the natural bumps you’d expect to see in the snow from larger plant life and other things in nature that would stick up after a good snow base. Once that was in place, a coat of white spray paint was to be applied to make the situation look uniformly covered in snow.

Once I realized that this wasn’t going to work, I began to look for a snow texture product. The only one I found was a slightly chunky, thick plaster product called Sno-Tex. I went through four small cans of it before I found a large can. Application took several weeks and was used throughout construction, due to life and shipping.
 
Thanks!
My posts are on hold pending the delivery of a new laptop. Third one in a row dead. None lasted three years. The document containing the narrative is on that hard drive. I'll continue when I get back up and running.
 
Lesson of the month- if you don't have time to wait for your computer to show up, call whomever you're buying from and ensure they actually have it! I wasted two weeks waiting for XOTICPC to decide they didn't have my computer in stock. Ridiculous...

snGZ6nH.jpg


I used some plaster to cut the road. Next time perhaps I’d use a piece of cardboard and cover it with plaster.


I built a box for the tunnel out of 1X1s, balsa pieces and the poplar plywood. I started by building a base and cutting sides, a back and a roof. After cutting, the base was installed, cork glued down and painted as was the rest of the box. It doesn’t look the greatest, but it does the trick. The inside of the box was painted flat black.

Next, came a piece of Atlas Flextrack being glued into place and nailed in a few spots. The roadbed was covered with bathroom caulk before the track went down. I added some ballast while it was still wet. My ballasting skills need work, but for this particular application, they weren’t really required. I ended up cutting up the plastic cap from a can of spray paint to use as an applicator. I forget exactly how I cut it- I think just a single hole in the middle. Mental note- invest in a good ballaster. I used Elmer’s Spray Glue to seal the ballast in place. Once again, I wasn’t impressed with the Elmers. I did attempt to scrape the glue off of the tracks because these tracks would eventually be powered. After that, I applied some trusty cut pieces of 2X4 to sink the track into the caulk and let it dry overnight.
 
Last edited by a moderator:
Yeah computers and business' ... one reason I buy the components and build them myself.

Anyway ... a snow scene, really? When all we want is to see the sunshine? :) Nice job on the diorama though, it looks good.

In so far as ballasting goes, do it by hand and use a mix of elmers white glue and water from one of those plastic ketchup bottles you see in restaurants to "drip" the glue onto the ballast you have laid. That way, it stays all neat and tidy and no glue etc gets on the rails. Personally, those ballast applicators you see are a waste of money and time.
 
My narrative got a bit jumbled somewhere along the way. Here are photos of the tunnel.

I decided to wire the track in the event that I wanted to hook up my Digitrax Zephyr to power lights on locomotives and rolling stock. I also decided to cut the tunnel out and build a box so that rolling stock, etc. would look more realistic by coming out of it.

snGZ6nH.jpg


KbwkXk4.jpg


OYHXApV.jpg


iAcNpDv.jpg


Tony, yes! You'd be amazed. I took some photos on an 80'F day and needed a blanket when I edited them. Thanks for the tip on the applicator bottle. That sounds perfect.
 
If your interested, I did a "how to" vid of the way I lay ballast. It may not be the best way but it works well for me. If you are interested I'll dig it up and post or just send it to you.
 
No problem mate, just keep in mind it is only how I ballast. I'm not suggesting it is the best way but it does work for me.

Here is the link to the video that runs about 8 minutes:


The second part covers doing the "outside of the rails":


Hope it helps or at least gives you some ideas.
 
Here's a great U-Tube video of a snow scene and the weathering of the equipment is perfect.


Good audio as well.

Greg


Back
Top