post your model RR tips........


i have used sawdust as a woodchip load in a kitbashed woodchip car also aluminum pot scrubbers cut up with scissors for scrap metal loads in gondolas
 
years ago i leaned that 4 aught (0000) steel wool placed in a glass bottle with vinegar and left to sit 3 to 4 days makes an excellent stain for wood also a teaspoon of india ink in a bottle of 50 0/0 isopropyl alcohol also is a good wood stain when building with wood
 
Puddles after the rain.

Clear matt varnish in small holes in the scenery.

Cover with a thin piece of clear plastic

Hide the edges of plastic with 'debris'

IMG_1933.JPG


With some clear varnish paint surrounding areas to give a wet ground look. Leave areas untouched to give the appearance of the ground drying.

IMG_5197.JPG


Cost. The price of a small bottle of varnish. I got mine from the Art Store. The plastic was 'free' from the 'spares box'.

David
 
If you get an HO train set, or an HO locomotive, switch out the couplers that come with it with high quality, metal Kadee couplers. The default ones are often not too durable and wind up stuck in unfavorable positions, causing your trains to come apart in motion. At least at the hobby shop I have bought at, HO rolling stock is often old and comes with some strange F shape coupler. Make sure the rolling stock is designed so that you can replace those couplers with Kadee couplers. My advice might be well-known but why not post it again to ensure duration.

I have once soaked my tubular track in vinegar. Fully submerged, this did get the rust off of the track after 12 to 24 hours. Be prepared for a potentially annoying, or even shocking, backlash. After I soaked the track and it was done dissolving the rust, I took the advice of dissolving some baking soda in water and thoroughly rinsing the track in that. Then I put the track in the oven to dry at 200 degrees, and this is where things went very wrong. The track flash-rusted within minutes. The resulting rust layer was very shallow of course, but it was still there and I needed to ultimately use aluminum foil scrunched up to sand off the new rust so I could use the track, but ultimately the track wound up looking worse than it did before I did the treatment to begin with. It looked, well, rustic. This might have a weathered appearance but I like my track smooth looking.

WD-40 is not ideal for use in lubricating engines. In fact, it can hurt them. But WD-40 is perfect for protecting steel tubular track from rust, it is good for cleaning track, and it is good for cleaning some components of your engine. There may be better products than this out there you may want to get your hands on, but I like the easy availability of WD-40 for cleaning if you need to get the job done sooner than the 4 days it takes to order stuff online.

The last one is actually my creation and not just something I heard passed down. PVC pipe makes great trestle/support pillars. A few feet of pipe, a cheap handheld pipe cutter, and you can design a trestle system to your liking. I am utilitarian and simply used duck tape but you can use whatever else to design the look that you want. Perhaps a flat grey to make concrete pillars. The project may turn out to cost maybe 60 per cent of the cost of pre-made trestle sets, and thats if you need a lot of the pipe. Tape or glue can be used to join multiple pipes together for width.
 
Last edited:
WD-40 is not a lubricant it is a coating and a cleaner, when used on moving parts it acts as a cutting oil and will cause premature wear on moving parts it will also chase moisture so can be used to clean electrical connections...
 
I've seen various techniques of making corrugated metal but haven't seen this idea yet. One issue with standard aluminum foil is that it is very fragile and easy to damage and aluminum can is to thick to make corrugations vary easily (thinking HO scale).

Spray 1 sheet of foil with 3M Super77 adhesive spray and then apply another sheet to it. The 2 ply foil is still thin enough to easily work with and shape but is significantly more durable in my opinion.
 
If your models are 'too shiny' and want to dull them down use old make-up powders the wife/girlfriend discards. The mix of different browns dulls the models down.

A parcels van

IMG_5072.JPG


A newsaper van

IMG_5494.JPG


Consett Iron Co. hoppers

IMG_5783.JPG


Road vehicles

IMG_2479.JPG


David
 
Numbering Fleet cars.
I have a fleet of hoppers for the mine and several log skeleton cars for the logging operation.
All cars are custom decaled for the business. When applying the car number decals I used a number
on one side and a number 100+ on the other side. Example; hopper is numbered 106 on one side and 206
on the other side (172 & 272) and so on. (Good way to use up left over numbers.
My logging car fleet is smaller so I use 1 & 2, 3 & 4, 5 & 6..... changing the brake wheel on one side also adds to the uniqueness.

Maintenance tracking is no problem since the last two digits are what's important.

Your car fleet magically doubles in size.

Weathering can be unique to one side rather than the whole car.

Best part - nobody will ever know...................
 
A tip I have is for most of the detailed locomotives. With the detail and plows on the front of most locomotives makes standard Kadee couplers (#5's & #148's) semi-difficult for a proper coupling of gladhands of freight cars and fronts of other locomotives. An answer I tried and found some sucess with is either using a #146 or #156 long shank that stands out and allows a proper coupling and no interference of the gladhands
 
Kadee HGC trucks: I orderd a half dozen of these in HON3. Carefully following the directions some frustration ensued as the whole thing would fly apart before I could get the bushing in place. The solution was to insert the bushing first rather than last to hold the truck together before inserting the axels. They are flexible enough to easily insert them in the side frames.
 
pine trees by the 100,s........

Fake Christmas trees make great pine trees. For HO scale I cut mine 2 to5 inches, trim to a point and cover with green and a little brown ground cover. You can make tons from just one tree.
Got one from a co worker and one when my mom bought a new one. Keep your eyes open
Greg
I was going down my road about a week after Christmas & found a 9ft tall fake Tree & took it home for the Tree's the same way you did. Mine had twisted wire for the branches & I cut about 300 w/bolt cutters for my layout. Painted them different colors of green & brown & pushed a pointed all into the mountains & planted 300 pine tree's over a 3 month period. Pine Cones also make nice evergreen tree's in different sizes. I also get the after Christmas sales at Dollar Tree & Walmart & Thrift Stores for the already made tree's.
 
"Loads in, loads out," and it's a layout planning and operation planning tip, not an actual model building tip. This is hardly my own idea, as it's been around for years, but a lot of layout designers probably don't know about it. I'll credit master layout planner John Armstrong for the idea, but it might just as easily have originated further back, with John Allen or even Frank Ellison (who is probably the guy who originally pitched the idea of staging all our trains in first place). Way, way back in the day, Frank....

The idea, if you are planning something like coal operations in particular, is to take your hoppers loaded with coal into...say...a power plant running in one direction--to the powerplant and from the mine--on one track, and then pull empty hoppers out of the other track back to the mine. As though the two trains were actually just one, running loaded and then unloaded, depending on the direction.

The "hidden part of the idea" is that you connect each of tracks in such a way that the loaded trains run one loop--back to where they started, but unseen...and the empties do the same, but in reverse, also unseen. Basically you run the trains on two parallel loops, with each running the opposite direction.

If you want to trick it up a bit using just a single track between say...a mine and a powerplant, you can stage one of the trains (hidden) in the back on one track while the other one runs the loop going the other way. A bit more complicated, but probably more convincing too...if you are trying to make the two trains look like just one.
 
Glue pictures of trees to the backscene. Stick all the picture down. Add extra layers of pictures of trees gluing only at the bottom.

IMG_3054.JPG


When satisfied with the result add the foreground


IMG_3055.JPG


Seeing the view from the control area.


IMG_2945.JPG


Then carry on with the process.


IMG_1969.JPG


Happy Railway Modeling

David
 
Last edited:
How about everyone posting some free or low price things you use on your RR.
I'll start with a few of mine:
Take tin foil and cut into about 4"x4" and roll it into a ball then use pliers and keep pinching until its a square. you can paint with rust color paint and fill a gondola car. Looks just like recycled cars smashed into squares.
Another tip I use is PVC caps from home depot. use different sizes for tanks at a chemical plant. Put decals and even use leftover spruces from old models as pipes.
Your turn. come on post some tips everyone
Greg
I'll have to try the foil thing but the PVC caps are a good idea as are the spray can tops for the same purpose. I like the spray can tops because I've already paid for them and will only throw them away. Cut them down if they are too tall for you.
 
The roots of small trees dug out of the garden make great scale trees.
If you live in the South where palm trees grow you can get the seed pod branches of the trees after they pop their seeds. The many little branches offer unlimited numbers of trees big and small to which you can stick ground foam for trees. I'm watching two trees near my home for the seed branches to die and dry.Eventually I'll have some pictures for you.
 
The small plastic cups that lunch box size servings of fruit or jello or pudding come in make great disposable mixing cups for 2 part epoxy, Envirotex, mixing latex paint colors for scenery, small batches of plaster, or anything else. When you're finished just toss them away. Popsicle sticks and some of the stronger coffee stirrer sticks make great mixing sticks and are free also once the ice cream and coffee is gone.
Go to McDonadsand buy a medium milk shake and drink it. It's good. Rinse out the cup and the cap and use it to keep all your pins in. When you need some pins just shake the container like a salt shaker and out pops a few pins through the large hole at the top of the cup. Keeps you from sticking pins in your fingers when you reach into other containers to get one or two pins.
 
Don't lick X-Acto blades.
HA! That's funny.
Just a few i have:

Save the old telephone wire. Strip it and you will have a lifetime supply. Can be used to wire layout as well as make handrails.

In o scale i have used spaghetti to make ladders, fences and fire escapes. White glue works best.

Never bought track ballast. Got sand from the beach and sifted out the size i needed.

Timesavers is a company selling clock parts but they have sheets, tubes and wire in brass as well as lots of small hardware and oils.

Over 90% of my railroad is built from free lumber picked up on the side of the road on garbage day.

Never throw out old electronics (TV, recorders, vcr, computers) without stripping out the wire inside and hardware. Good source for small flex wire.

Bob
Good for all kinds of electric motors too. Use the transformer in the machine to run them.
 
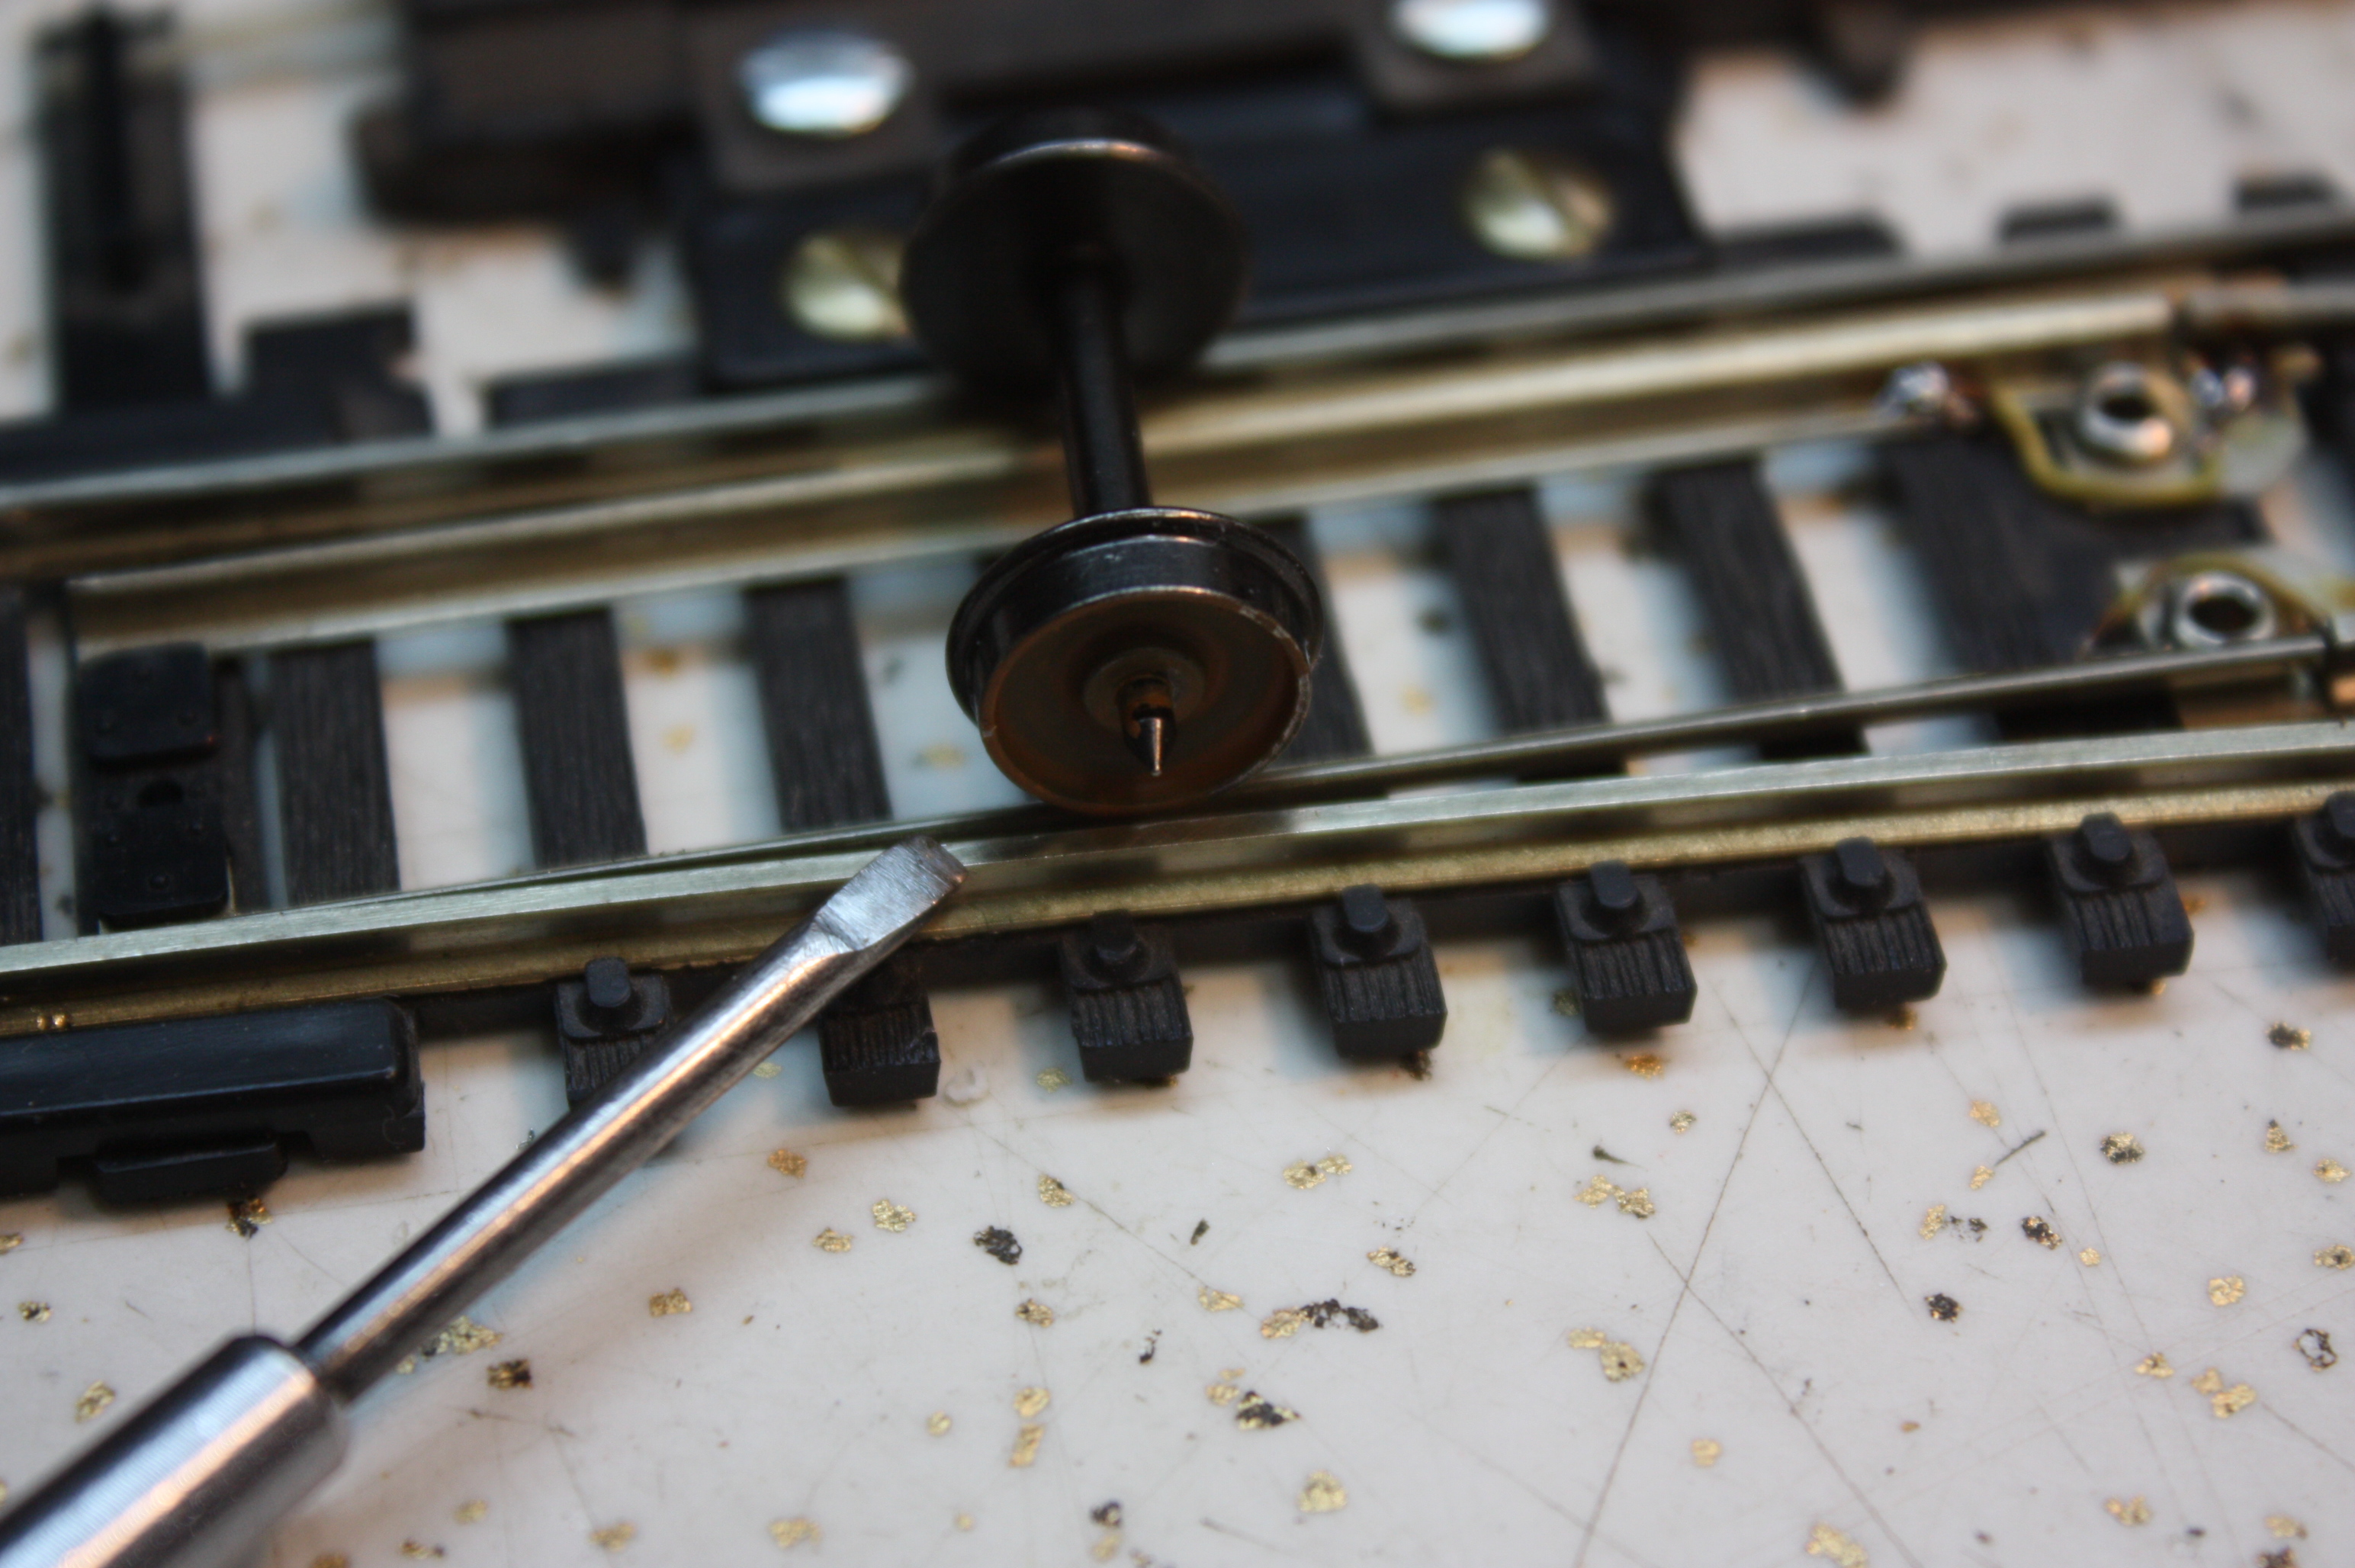
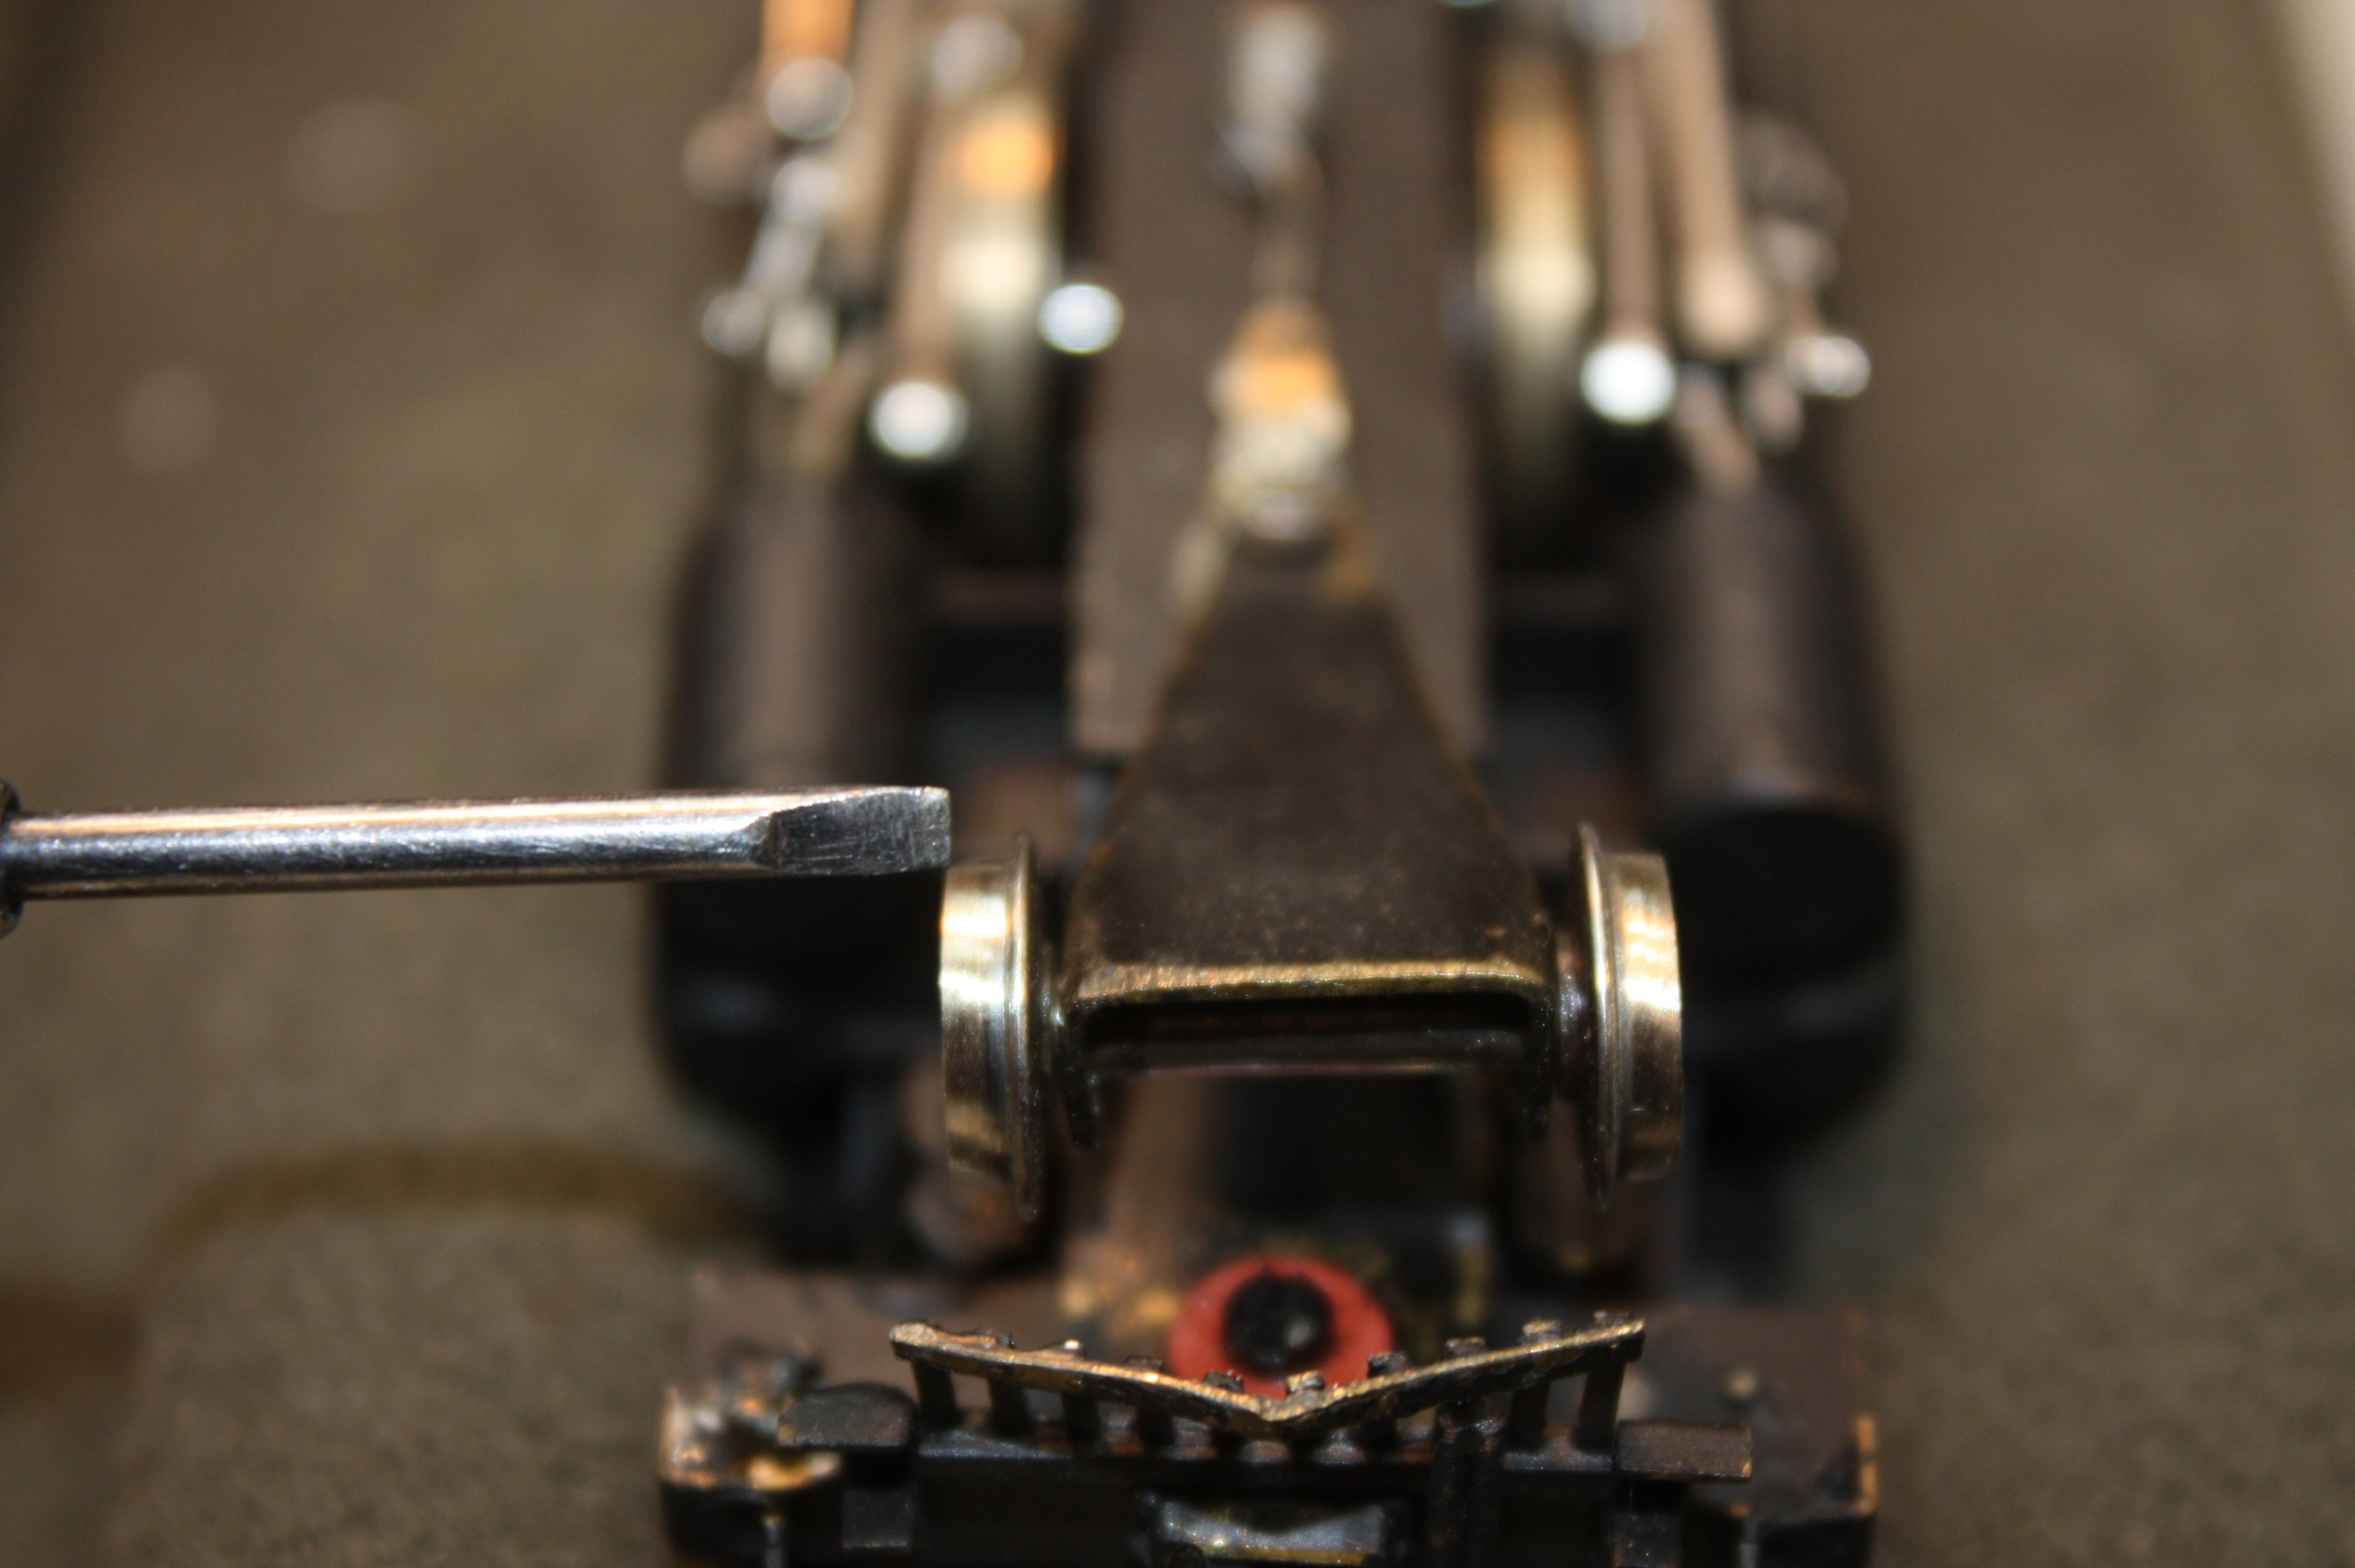
If you have fought with a steam engine that continually derails at turnouts, try this. I have found that the wheels of the lead truck are sometimes flat across the tread. When they come to the points the outer edge of the tread is still resting on the main rails and they fail to follow the diverging route.

fJW4ZX3.jpg


Using a Dremel, grind the tread so that it tapers toward the outer end. This will ensure that the weight is carried by the diverging route rails.

q8fJhi2.jpg


Back
Top