You are using an out of date browser. It may not display this or other websites correctly.
You should upgrade or use an alternative browser.
You should upgrade or use an alternative browser.
My first Layout - a 5' x 9' Modern BNSF Freelance
- Thread starter flyingtiger
- Start date
flyingtiger
Member
goscrewyourselves
I'm the one
Great looking layout and darn, this is your "first layout" ? Your kidding right?
Cheers,
Cheers,
RustyTrain
New Member
Very nice layout
rodney mcgiveron
Member
G'day Flying tiger , Congrats....I LOVE YOUR WORK....Superb....I'm just starting my second attempt at a BNSF freelance layout myself set from late 1990s to present day.based on double stack intermodal and general freight ... Going to run a series of ES44ACs , and SD70ACe's mostly with a few old SD40-2s..as the layout won't be strictly prototypical..Maybe a 9-44CW here and there too...How long have you been building this great set-up..? If mine even comes within 50% of yours I'll be happy..Thanks for the inspiration...Cheers...Rod (Australia)...
Bridgeliner
Member
Flying Tiger, absolutely beautiful layout. I am in the process of working on some of the road system on my layout. Your roads are great. What did you use for the yellow stripes? I know you said dry transfers and you also used pin stripe. Where did you get the pinstripe? Did you just free hand the patch marks and crack fill with black paint?
flyingtiger
Member
About to upload more pics, FYI.
flyingtiger
Member
OK, here are some pics of the new yard area. It's not huge by any means, but you have to remember that this will primarily be used for switching the 5x9 layout and about 3 more customers on the expansion. Consider this a smaller city yard that gets cars from the main hub yard through transfer runs (or something like that). Obviously, it is meant to appear larger via the mirror under the overpass at the end. But with 5 tracks, and a total capacity of 30-33 cars, it will do the job. It will also be the hangout for my GP-38.
I still need to add a backdrop, move the billboard from the main layout to next to the overpass and extend the support, add more details and weathering, finish the auto-loading area along the wall, and then start working back from there to the rest of the layout. Lots of "work" to do, but hey - that's the hobby and the fun!
Enjoy the pics.
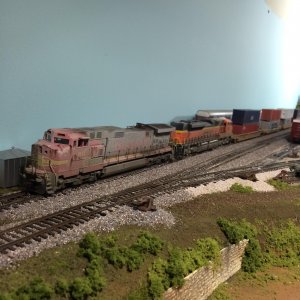
That wall down there needs some help. The area near the bottom is unfinished. This is not a great picture. The foliage isn't finished and the track does not look great here. More work to do.
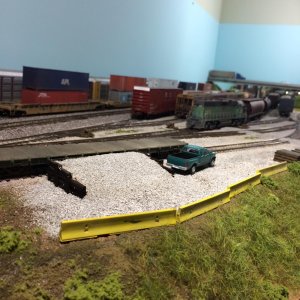
I saw this loading ramp at the MN Commercial Yard in St Paul and really liked it. I decided it would look good on the layout. I need to weather the ties that it is made of. That grassy hill on the right does not look good photographed close up, but looks much better in person.
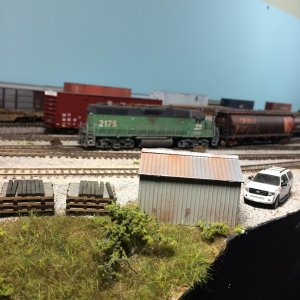
Just a small tool shed and some cross tie piles. It's the little things like that that I think really make a scene seem more real. Need to add some electric poles and lights as well. That will really help too.
I still need to add a backdrop, move the billboard from the main layout to next to the overpass and extend the support, add more details and weathering, finish the auto-loading area along the wall, and then start working back from there to the rest of the layout. Lots of "work" to do, but hey - that's the hobby and the fun!
Enjoy the pics.

That wall down there needs some help. The area near the bottom is unfinished. This is not a great picture. The foliage isn't finished and the track does not look great here. More work to do.

I saw this loading ramp at the MN Commercial Yard in St Paul and really liked it. I decided it would look good on the layout. I need to weather the ties that it is made of. That grassy hill on the right does not look good photographed close up, but looks much better in person.

Just a small tool shed and some cross tie piles. It's the little things like that that I think really make a scene seem more real. Need to add some electric poles and lights as well. That will really help too.
flyingtiger
Member
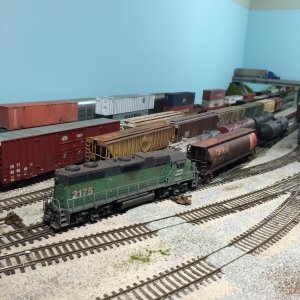
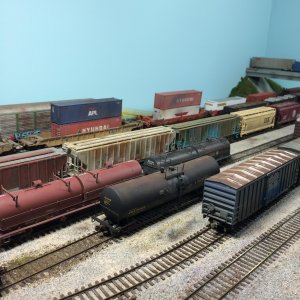
Here you get more of a feel for the yard.
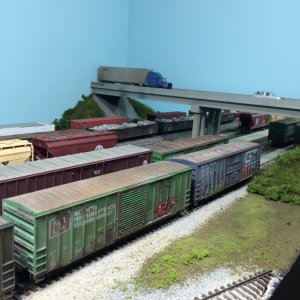
My first attempt at using a mirror. Overall I am pleased, but like anything the first time, it was a learning experience, and you can clearly see where the mirror is by looking at the abutment under the blue big rig. I got impatient and lazy and just thought, "That's good enough." It isn't now. Again, the foliage and grass in the foreground has more work coming it's way. This is basically the first "layer."
flyingtiger
Member
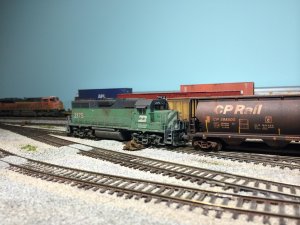
Side view. I plan to weather the rails more. I just saw a trick somewhere that I tested and it works really well. You just brush rust chalk powder directly onto the rail. It looks really good. So, that is on my list. Those rail joiners look huge in pictures! And the ground throws need better weathering as well.
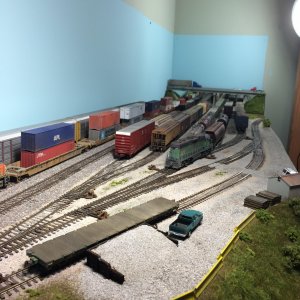
Here is a good overall view of the yard area. It certainly is fun to finally have my own yard. This was the main thing sorely lacking on the 5x9, for obvious space reasons, and it really hampered the operation of the layout in my opinion, and is the main reason I decided to expand.
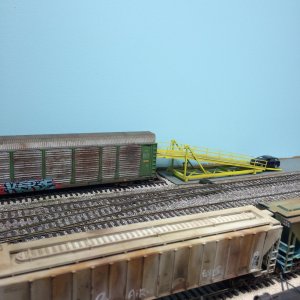
A shot of the autorack unloading area. Lots of work left to do there.
So, it is nice to have an area of the expansion mostly looking complete. The yard is the first thing you see when you enter the layout room, so I felt I needed to finish it first. I would love to hear suggestions on how to improve the look of a yard to add realism, and what types of details you would add. Beyond what I have already mentioned, I plan on adding rusty rails either along the ground or on some K-barriers, which I have seen in yards, and possibly a porta-potty. Cause, hey, ya gotta go when ya gotta go. I look forward to any comments! Thanks for looking.
flyingtiger
Member
Rico, where do you find a scientific mirror? I did get a front reflecting mirror, but I didn't line up everything perfectly to be flush against it, otherwise I think it would have been more seamless.
Rico
BN Modeller
There's a glass supply house near here, it's not cheap stuff but worth it.
A front reflecting mirror, not sure if that's a regular mirror or a scientific mirror?
The way to tell is to hold something up to it, like a credit card. One side of the mirror will have a little gap between it and the image and one side won't have any gap.
A front reflecting mirror, not sure if that's a regular mirror or a scientific mirror?
The way to tell is to hold something up to it, like a credit card. One side of the mirror will have a little gap between it and the image and one side won't have any gap.
flyingtiger
Member
Yeah, they may be the same thing. The vast majority of mirrors are rear-reflecting, by just painting the back of glass with a special silver paint. The front-reflecting costs more as it is a bit more difficult to create is my understanding. And yes, you can tell by the method you described. Thanks!

