Michigan Central UNLIMITED


That's what I did was more or less free forming as I went, but I did have a good idea of what I wanted to accomplish. I would suggest staying away from sectional track and use flex track. This way you won't be licked into a set radius. Flex track can be reused if need be or moved. With the dimensions you just posted, you could end up with a fairly long main line run. If possible, you could widen the end of the table just at the end and increase the minimum radius. That's what I did here. I ran it out to 68 inches to allow me to keep a 32 inch minimum radius.

attachment.php
attachment.php


Large modern diesels will looks so much better on a large radius, and your big boy will also look a lot better. It's your layout so you don't have to set a particular time period. You can do anything you want. I chose my time period and location because this is what I was familiar with. The locomotives that would have been running in that period as well as the industries that would or could have been in operation at that time. Although I am freelancing, I chose to start as close to prototype as possible. I do have locomotives from the Milwaukee Road and Northern Pacific which I connect to and made sure that they were spot on for the period.

Again, you can do anything you want. A lot of people prefer to have power from numerous railroads on their layout. It's their choice. You have a blank slate to work with. You can also consider having hidden staging tracks that you can park long trains on when they're not in use. I keep a few inbound trains hidden to bring "on stage" to deliver to industries along the layout and then send outbound trains there, which will turn into inbounds.

I would hate to see you just throw track down just to get trains running without some sort of planning. This could get expensive some time down the road.


Those pics say it all! (really Great!)


THAT is 'the look' I would like to see in about a generation! Exactly the kind of thing that I envision in the 'end'! LOL!
 
Fresh sawdust seems to be an excellent sweeping compound as it appears to really soak up the gypsum dust left over from the drywall process, even after intense and multiple sweepings and a vacuming, some did remain and this is just pulling it up out of the concrete!
 
I know what it is to do nothing. It isn't easy. I tried to retire a number of years back and got bored stiff. May try it again sometime. I agree with the sheet rock dust also. Putting up with it myself.

I would try to stay away from the tight curves. I can remember watching Eric's video of the nice looking locomotive he got from Terry. There is a lot of overhang on large modern diesels and this can easily cause derailments. Tony also had to tear out some tracks and increase the radius on his layout. Also large diesels look a bit goofy on tight curves. You have a big boy too. It won't like tight curves and will also not look too cool either. I do have a few tight curves, maybe 15 inch radius or so, but they are in industrial tracks and would have a smaller locomotive operating on it, like a switcher. There's nothing more frustrating than having derailments.

I wouldn't get too carried away with grades either with the exception of industrial spurs such as a mine or logging industry. On my main line I purposely have a 2% grade. This was to limit the lenght of a train that a single locomotive could pull. This also helped me set the length of passing sidings. Coming up out of one of my hidden staging tracks, I had to increase the grade to just over two and a half percent. This sometimes can be a pain. A decent size inbound train could require two or more locomotives. Learned to live with that. I have a log loading spur which has a 5 % grade. That is very steep for model railroads. A decent pulling locomotive, a shay or SW type switcher is lucky to pull three cars up the grade, EMPTY. To have a grade on the main line may come back to bite you in the a$$.

If you have a branch line or a mine, this could be fun, but not on the main line. I am talking from experience on this. A friend of mine that I visit regularly in Missouri slightly exceeded a 3% grade on his main line, a very large layout and ended up having to tear out the grade and make the grade more gentle. He thought it would be fun, but it wasn't when he wanted to run long trains.

Ya, I'll burn myself a bit before I find my 'limits'! Three power blocks planned for the space. Extra long and extra flat will be my mains for the 'record setting' I'll be doing on myself for 'longest train possible' with different Loco's and consists. Frontwards and backwards of course!
 
I don't know if you ever saw this layout, so here's a link to Kens layout. It could give you some ideas. He starts off like you with a bare room and has one fantastic layout. He learned from previous experience and I think he really hit the nial on the head with his layout. I have been following it for years.

http://www.modelrailroadforums.com/forum/showthread.php?24509-The-D-amp-J-Railroad-From-Scratch

If I ever get to that part of the country, I sure would like to stop by and see it in person.
 
New Guy,

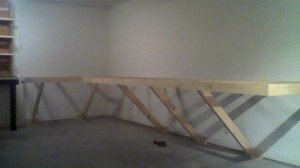
Looking good, wish I had have done bench supports the way you have with the angled bracing instead of doing "legs" as such.

Thanks, my searching for the 'right' design was more difficult than shopping for Loco's! From the start, legs that get kicked was something I wanted to avoid at all costs! Again I must thank 'my' builder, this thing is solid! I can sit my skinny 180 pounds on the corner!
 
I don't know if you ever saw this layout, so here's a link to Kens layout. It could give you some ideas. He starts off like you with a bare room and has one fantastic layout. He learned from previous experience and I think he really hit the nial on the head with his layout. I have been following it for years.

http://www.modelrailroadforums.com/forum/showthread.php?24509-The-D-amp-J-Railroad-From-Scratch

If I ever get to that part of the country, I sure would like to stop by and see it in person.

I take my 'mud hat' off to THAT job! OY! My setup is a pale imitation of that but it inspires me no end! Now I have a pretty good idea of what a layout of these proportions requires and a series of pictures like that construction phase sends a shiver. I will have to admit my finish will never be up to that quality! His layout video's are among the best! I think he may have even posted one on you tube about "drywalling" that I studied!
 
That is one inspiring layout. I can see why he calls it his dream layout. One of my friends in Missouri has his complete basement for his layout, about 2,400 square feet. I have seen it progress over the years just like Kens, but only got to see it perhaps once or twice a year and didn't get any photo updates like Kens posts. Each visit was like Christmas. He had been working on his for about ten years, but did have quite a bit of help from other modelers in the area. Most of the scenery was completed about five years ago and now he is working on getting more details into the scenes. A few years back he finally got working signals in like on Kens layout. They really come in handy during formal operating sessions when there can be up to a dozen or more trains running at a time.

He too learned from his mistakes that unfortunately cost him money and a lot of time in some instances. He also models the transition era, but during a formal operating session with other area modelers, anything goes. You can see an ES44 passing an old consolidation doing local switching. I'll have to take my video camera the next time I visit and post some videos of his layout.
He is an old friend I knew in the Navy and we have shared model railroading for over 40 years. He is supposed to be up visiting us next summer when they go to Yellowstone Park, which is about an hour south of us.

I guess this could be considered my 'dream layout' never thought I would ever have a 4x8 a year ago! The whole thing kinda fell together.

Have not worked out the square footage yet but from our drawings it looks like it will take 16 4x8 sheets, cut various ways, to cover it. The final 'thing' will be measured out closely. This will be a 'kitbash' of every layout I ever wanted. A little of this and a little of that.

I enjoy that others might enjoy what I'm up to, this is an unexpectedly happy byproduct of getting into this hobby.

I would love to have been able to stay in touch with a few of the folks I met in the service but I am blessed with two good friends, one from about 1st grade and another from my teens who will be able to share in the fun when I 'git er done'!

I'm treating this as a MRR 'Laboratory', mistakes are part of what passes for 'my plan'. I KNOW they are waiting so that makes it not quite a shock when they happen. (I'm SUCH a 'newb'!)
 
hmmm...31 posts in 2 days, must be a record!!

The only thing I am going to suggest at this point is painting the walls above the benchwork blue at the very least. Of course, you could get fancy here, but this simple step will assure you some nice pictures right out of the starting gate!!!
 
16 4 x 8 sheets???? That's exactly the size of mine which I should be starting in a week or two. This is great, we can help each other out.
Enjoy
 
It WAS nice while it lasted and it never got started, the water heater took a dump and there goes all my money. so no train table for me. see yaround.
 
It WAS nice while it lasted and it never got started, the water heater took a dump and there goes all my money. so no train table for me. see yaround.

Man that sucks - sorry to hear that! I've been thru a few situations myself where my mrr plans got sidelined because of unexpected expenses. S**t happens. It may take a little longer than you expected, but I'm sure you and your friends will figure out a way to get that benchwork built at some point.
 
I do not know where the luck is coming from! The water heater is only 4 1/2 years old and the company is going to swap it out for a new one for just labor! How cool is that? I think if just one thing was wrong with it we would not be so lucky, but there are at least three major malfunctions going on with it.
WIN_20150929_221552.JPGSo another 7' of shelf appears!
untitledpours.pngOK!
 
Wow you better get out there and buy a lottery ticket pronto!
Our heater came with the house and that was fourteen years ago... it's about due to poop out.
 
Wow you better get out there and buy a lottery ticket pronto!
Our heater came with the house and that was fourteen years ago... it's about due to poop out.

Imma save this luck for when the table is fini and I break out the Loco's, hoping they are all good runners with not too many problems.
 
Weren't you going to build around the heater, if so, then it's an even greater bit of luck, imagine if it had failed afterwards.
 
Weren't you going to build around the heater, if so, then it's an even greater bit of luck, imagine if it had failed afterwards.


LOL! Nope that's not me, the heater and the furnace are all in 'front' this house was built in two pieces a 'regular' house in 1924 and an addition in 1994 that is as big as a house by itself, the 30x30 basement I am building the layout in is under the new bit far removed from the sewer drain and the furnace and water heater.
 
I knew someone was, just couldn't be B*****d going back through all the posts to find out. It's good that all that stuff is well out the way. Someone else on here's got a cleanout for his drainpipe sitting right above his tracks.


Back
Top