Make your own crushed ballast


MoPac_Eagle

Well Known Member
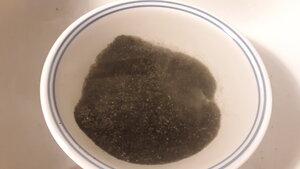
This will be a work in progress tutorial on how to make your own ballast from real rocks. This is should work for all scales, but I model HO scale, so you may need to change some things. It has been about 3 months since I last did this. I will probably be changing somethings as I work through it again. If you have a better idea of how to do something tell me, and I can try it out. Also, feel free to ask any questions you have.
You will need: (some are left blank for the future)
1. Lots of time
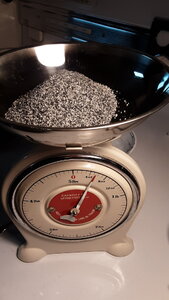
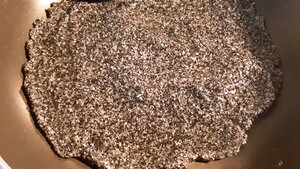
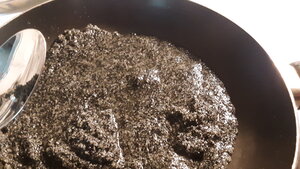
2. Real ballast (found at your local railroad)
3. Lots of buckets (eat more ice cream 🙂)
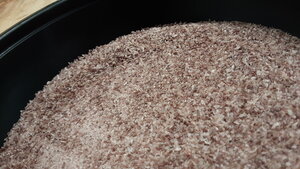
4. A stainer for your size scale ( I am in HO scale)
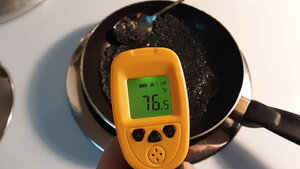
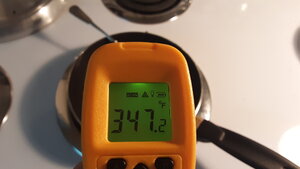
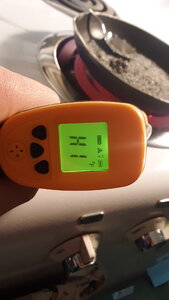
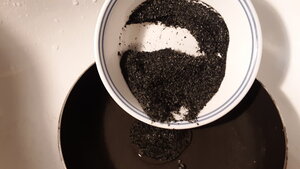
5. Heat source
6. Pan
7. Mallet (not the steam engine)
8. Solid chunk of metal (like an anchor weight or an anvil)
9. Gloves, eye protection, and a mask
10. Big paint brush (to clean off weight)
 
Last edited:
First, you should wash your rocks off. That way you don't have any unwanted dirt or other junk in your ballast later. Then let them air-dry. You should also wash any containers now too. This is as far as I can get tonight because I am writing this as I go.
 
Luke, will be looking forward to this process. I wanted to make the ballast for my logging railroad out of red cinder. I found the cinder butte that had been leveled to furnish the road bed for the GN when it was build through my area. Rail was still sticking out of a pile of cinder in the bottom of the pit.......
 
Luke, will be looking forward to this process. I wanted to make the ballast for my logging railroad out of red cinder. I found the cinder butte that had been leveled to furnish the road bed for the GN when it was build through my area. Rail was still sticking out of a pile of cinder in the bottom of the pit.......
Red would make an interesting color ballast. I would like to see that if possible...
 
I started with 15 oz. of rock and after one hour of crushing all of it, I was left with 6 oz. of ho scale rock. After it went through the wash I was at 5 oz. of rock.
 

Attachments

  • 20201217_122508.jpg
    20201217_122508.jpg
    440.2 KB · Views: 186
  • 20201217_203951.jpg
    20201217_203951.jpg
    336.4 KB · Views: 171
  • 20201217_213328.jpg
    20201217_213328.jpg
    323.5 KB · Views: 169
This is the step by step run through. I had to post it in two parts as I exceeded the maximum amount of attachments. I will attach the photos in order.

First, wash your rocks. (This is optional)

Second, put your weight into a big bucket, find two smaller buckets, and a mallet. The big bucket will catch all the ballast as it is broken. The first small bucket will be used for rejects (stuff too big for your scale). The second is for the rock that is your scale.
2.jpg

Third, put the rock on the metal weight and start crushing with the mallet occasionally cleaning off with the paintbrush so you don't over crush the ballast to sand.
First 3.jpg
3.jpg


Four, once you are done crushing the ballast put your strainer over one of your small buckets. Pour from the big bucket (don't forget to take the weight out) into the strainer (pour a little at a time to get the best results). Then shake the strainer. The rejects in the strainer should be put in a different small bucket.
4.jpg
Also4.jpg
Another#4.jpg
Fourth_4.jpg

Fifth A, repeat step three but with the rejects or new rocks.
 
Part two. This is what you can do inside.

Fifth B, pour into a bowl and "wash" to get rid of the dust and dirt that has accumulated. I find it best if you have a separate sprayer on your sink that you can turn at an angle to remove the dirt while carefully stirring the ballast.
5b.jpg
5b also.jpg

Sixth, slowly drain the water from the bowl. You don't need to get rid of all of it.
6.jpg

Seventh, put wet ballast into a pan and spread out the ballast to a nice even coat. Then turn on your stove. It should be noted that you want the stove set on low to medium because the surface tension from the water will pull the ballast with it when it begins to boil and will get all over your stove. The water will still boil when on the lower setting but much slower, giving it a chance to steam first. You will want to cook your ballast, so you don't have to wait for about four days to let it dry. Please be VERY CAREFUL not to burn yourself, see below temperature readings.
7.jpg
7 boiling bubbles .jpg
Also 7.jpg

I used an infrared thermometer to record the temperature. If the screen reads HI it means it has exceeded 999.9 degrees Fahrenheit. The left is room temperature, the middle is burner temp, and the far right is the rock temp when the middle temp was recorded.
Room temperature after wash.jpg
Burner heat 1000+ degrees Fahrenheit .jpg
Rock temp.jpg

Eight, now that your ballast is dry let it sit a while to cool off. Once cool, pour into a storage container and use later to ballast your railroad.
Finished .jpg

Nine, relax, and run some trains.😁
 

Attachments

  • Room temperature after wash.jpg
    Room temperature after wash.jpg
    229.9 KB · Views: 163
  • 5b also.jpg
    5b also.jpg
    194.8 KB · Views: 167
  • 6.jpg
    6.jpg
    184.2 KB · Views: 155
  • Rock temp.jpg
    Rock temp.jpg
    175.4 KB · Views: 158
  • Also 7.jpg
    Also 7.jpg
    681.3 KB · Views: 172
  • Burner heat 1000+ degrees Fahrenheit .jpg
    Burner heat 1000+ degrees Fahrenheit .jpg
    236.2 KB · Views: 180
  • 7 boiling bubbles .jpg
    7 boiling bubbles .jpg
    492.8 KB · Views: 189
  • 5b.jpg
    5b.jpg
    214.8 KB · Views: 180
  • 7.jpg
    7.jpg
    289 KB · Views: 165
  • Finished .jpg
    Finished .jpg
    667.9 KB · Views: 174
Way to go, LUKE! Just a word of caution - I hope that you did not wash that in the sink?
The tailings will settle in the "P trap" under the sink - they will not go down the drain.

Your ballast has a very nice size and color to it. Looks purrfect!
 
Sherrel- I usually run some water after I am done to clear the pieces out. They aren't that big anyway.

I also should have mentioned screening the rocks with a magnet to get any magnetic pieces of rock out. You definitely need to do this if you have sound engines with speakers in the fuel tank. You may be able to just put down a lot of glue.
 
A stainer for your size scale ( I am in HO scale)
Off hand, what size I'm I looking for?.......

I would like to see that if possible..
The Modoc Northern is the only line left were you can still see the red cinder road bed. Although, with UP's major tie replacement on the Modoc last summer, they covered up about fifty more miles of cinders with dumping new ballast (gray colored,) to facilitate the tie replacement.
Anyway, getting to a section of the cinder roadbed is more difficult, since the easy access points, has all gray ballast now, and were they stopped with the new ballast, the ground is now too wet to venture off the pavement, (or good graveled road.)
Right now I can show you a fill with cinders....this is about 200 ft past the end of the gray ballast. Center of pic.
IMG_20201219_153239421.jpg

IMG_20201219_153235717.jpg

That's a crappy picture.......
Anyway Luke, here is some cinder that I have picked up, in anticipation of making road bed ballast.
IMG_20201219_164136043.jpg

IMG_20201219_164128622.jpg

IMG_20201219_164120198.jpg

As you can see the color varies so one can play with different shades, what ever might suite you.
I'm leaning towards the redder color for my logging RR.
I crushed some up so you could see the color/texture.
A mix of the light red & darker cinder. (mostly red)
IMG_20201220_022533592.jpg

Mostly all red cinder crushed up pretty fine.
IMG_20201220_022701388.jpg
 
Last edited:
Off hand, what size I'm I looking for?.......

Jerry-do you have any woodland scenics ballast? If you do find a strainer that lets those pieces through. You could use a window screen. If you have something with a screen, you could upload a picture, and I can see if it would work. That is some very cool ballast.


Back
Top