Gluing Rails to Ties


beiland

Well-Known Member
I have 2 situations I need advice on,...gluing rail to polystyrene ties,..and gluing rail to wood ties. In both cases I am talking about NS code 100 rail.
Gallows Turntable Bridge
I have this previously used gallows turntable bridge that had brass track nailed to the wood ties at 3 locations along the rail's length. I want to replace the brass track with NS, and I am not so sure I can get a good firm grip on the rail with those older tacks. In which case I have considered some sort of adhesive,...maybe just a few spots along the 9" length of the rail?

What might be the best adhesive for metal rail to wood ties?

Walther's Double Track Bridge
I just recently assembled this Walther's bridge that came plastic tie strips that accept ones own rails, both the main lines and the safety rails. It has very small tits that assist in locating the track rails very exactly, BUT do not assist in holding the rail down,....it needs to be glued down.

The ties as well as the whole bridge is styrene plastic, so what best glue to use here?

I also intend on painting the whole bridge, and unfortunately I have already glued in the tie strips. So I am guessing I need protect that spots where I would be gluing the rail to the plastic, OR take that 'painted condition' into account when I consider glue type for the job?
 
Pliobond has lots of fans. Another possibility, and I hope you won't laugh (keep an open mind in this hobby if you want success), but Parr Bond, the clear gel goop you use to seal seams on a roof or anywhere you want to keep rain out, can be teased easily into a thin bead with a toothpick, a drop or streak made on ties, and press the rails into place. You will need some temporary track nails beside the rail foot to keep the rails in the geometry you want, whether tangent or curved, but they can all be removed later when the Parr cures. It comes in a blue, black, and white squeezable metal tube, like many volatile glues do.
 
The traditional way to use Pliobond is to put it on the bottom of the rails, let it dry some, then put it in place and heat the rail with a soldering iron enough to soften the Pliobond and make it sticky again. One could also use Walther's glue. A gap filing CA could be used because the rail lengths are short so expansion and contraction is minimal.
 
I built my layout starting in 2014. I used the Central Valley Models styrene tie strips. I glued code 70 ME weathered rail to the ties. I used the suggested Barge Cement/MEK mixture and swabbed the bottom of the rail with the mixture. As that dried I placed a drop of the mixture on each tie plate for the amount of rail I was laying, usually 3‘ or 6’. Until 1/2021 the rail held up. I cleaned the rail mistakenly with too much mineral spirits on the cleaning cloth. Of 84’ cleaned mainline rail 3 sections of 3’ separated off the ties.

Since MEK is so toxic and possibly dangerous to inhale I switched to a thin CA for the repairs. I just took the CA added into a syringe and applied a bead along the rail and tie plates. The thin CA seeps under the rail and I had a joint again In seconds. No issues since 3/2021.

My layout is in a environmentally temperature controlled insulated room kept at 68f degrees and kept around 25% humidity. The framework is 1/2” plywood cut to 1”x3” strips with 2” foam insulation board glued to the frame.

Best to you and have fun
 
The Pliobond method works well, and it's proven itself well over time. It's been done, too, with Walther's Goo. But it CAN require heating the rail to awaken the "adherence" of the glue (you could try it, too, without heat). You can't apply much heat with plastic ties, or if you do, you can probably only do it once...because styrene melts.

Perhaps a low-temperature activation contact cement might be in order: A cement which is applied to both surfaces, allowed to dry on both, and which are then carefully placed and pushed--into contact with one another--thus completing the bond. "Rubber Cement" ideally works this way, although grade schoolers usually just slather it on with the brush which is attached to the lid. It still works, and the bond can be undone without much force.

For that matter, you could even apply double stick tape to the bottom of the rail (carefully trimmed along the edges with an X-acto type blade) and then simply push the rail down in place.

You might laugh at that ^^^ last idea, but that's exactly how golf grips are "stuck" onto golf shafts--using double stick tape...and the forces which act on those clubs are a lot higher than you will see from any model locomotives.

-------------

Or...you could even try--wait for it--white glue. I know, I know: White glue doesn't stick to steel, or brass, or nickel silver rail, let alone styrene...but it still might do the job and be removable too (by applying a paper towel wet with water and letting it sit...and soften the glue). White glue is often recommended to apply flex track to a roadbed--cork, for example--and it works well. Moreover, the bond can usually be undone again by soaking with white glue. I use this method myself for laying flex-track in N scale.

Glues, as with solvents, can conform themselves to the irregularities in surfaces--the cast in wood grain of the ties, for instance--and thus find suitable mechanical adhesion...and stay in place well enough to get the job done. When laying flex-track, the mechanical bond is the ties themselves from underneath.

================

Back to golf clubs: Golf clubs on professional tours are often altered on very short time frames, using quick set epoxies. The so-called "five minute" epoxies.

They work, and can take the forces of a golf-to-ball-to-ground impact after a very short "cure time" (aka a "drying time," if it's a glue) because the steel to steel parts are scuffed up, scoured up enough that a mechanical lock is formed between the parts. It's the mechanical interlocking between the filed, scuffed, worn metal parts which allow the epoxy bond to work at all.

You aren't going to be applying forces anywhere near those levels.
 
I have 2 situations I need advice on,...gluing rail to polystyrene ties,..and gluing rail to wood ties. In both cases I am talking about NS code 100 rail.
Gallows Turntable Bridge
I have this previously used gallows turntable bridge that had brass track nailed to the wood ties at 3 locations along the rail's length. I want to replace the brass track with NS, and I am not so sure I can get a good firm grip on the rail with those older tacks. In which case I have considered some sort of adhesive,...maybe just a few spots along the 9" length of the rail?

What might be the best adhesive for metal rail to wood ties?

Walther's Double Track Bridge
I just recently assembled this Walther's bridge that came plastic tie strips that accept ones own rails, both the main lines and the safety rails. It has very small tits that assist in locating the track rails very exactly, BUT do not assist in holding the rail down,....it needs to be glued down.

The ties as well as the whole bridge is styrene plastic, so what best glue to use here?

I also intend on painting the whole bridge, and unfortunately I have already glued in the tie strips. So I am guessing I need protect that spots where I would be gluing the rail to the plastic, OR take that 'painted condition' into account when I consider glue type for the job?
For rail to wood, specifically, I would try Walther's Goo. A Goo bond can be undone without smashing up the ties.

I saw your previous thread, re: the turntable. One thought then was that I hoped you weren't contemplating gluing that section of flextrack atop the wood ties. That would have been something of a crime, as whoever built the TT in the first place put some work into it.

Without benefit of those photos, I recall I would have suggested you keep the angled ends, removed a couple of ties from the middle section at each end, and put it back together. I know you would have faced the problem of the upper tension rods being too long too--I think the attachment points would have been too far out toward the ends, then, and would have to have been moved in toward the center of the TT.

Another thought too--while I'm thinking of it--is that your section of flextrack in that one photo implied a lot more than taking just 1/2" off each end. I hope you haven't done that?

I should probably go back and find that thread, instead of killing the dead horse all over again here, but it's late. .D Just one eyeball is still open <<<.
 
Last edited:
The Pliobond method works well, and it's proven itself well over time. It's been done, too, with Walther's Goo. But it CAN require heating the rail to awaken the "adherence" of the glue (you could try it, too, without heat). You can't apply much heat with plastic ties, or if you do, you can probably only do it once...because styrene melts.

Perhaps a low-temperature activation contact cement might be in order: A cement which is applied to both surfaces, allowed to dry on both, and which are then carefully placed and pushed--into contact with one another--thus completing the bond. "Rubber Cement" ideally works this way, although grade schoolers usually just slather it on with the brush which is attached to the lid. It still works, and the bond can be undone without much force.

For that matter, you could even apply double stick tape to the bottom of the rail (carefully trimmed along the edges with an X-acto type blade) and then simply push the rail down in place.

You might laugh at that ^^^ last idea, but that's exactly how golf grips are "stuck" onto golf shafts--using double stick tape...and the forces which act on those clubs are a lot higher than you will see from any model locomotives.

Isn't Pliobond some sort of a rubberized product?

That dbl-back tape idea merits consideration,..and maybe re-moveable if I screw things up??

BTW, I did NOT have to alter the length of that turntable I had. And the flex track lying on there was just for visual mensurement,..I had no intentions of modifying the original track/ties arrangement other than replacing the brass rail with ns.
 
Re the TT. I'm glad you didn't shorten it. Dunno if you bought it second hand, or not, but I had assumed you would not shorten it casually. That sort of thing often leads to regret, as I'm sure you know.

Pliobond is, indeed, a rubber adhesive. I have the idea Pliobond joints can also be undone with a bit of heating...but I'm going back many years. I can't tell you with any level of certainty that I'm even talking about Pliobond. Walther's Goo was quite similar. In both cases the adhesive bubbled up along the bottom of the rail under heat (soldering iron).

There are many others here who can offer more update advice. Most of what I can offer dates from years and decades back.
 
Late to the show, but I will kick in that I came upon a product on E-Bay that is very much the ssame as Goo. It is called ZAP GOO ... may be manufactured by the same company? (I did not want to pay Walthers "shipping" for a cheapo order)
 
Last edited:
Hi Brian, .... For the bridge track I'd likely use thin CA to hold the rail in the formed "spike" saddles, there won't be much shear stress on the joints so a little CA flowed onto the joint should be enough. It seems that contact cements would be messier and hard to clean up while thin CA can just be wicked up with a tissue and then painted over....DaveB

I'm tending to think this method as well.

I did a little experiment yesterday and found that the cheap CA from Harbor Freight worked fine holding the track to styrene plastic.

I'm thinking I place the track in place, then wick the CA under the track. The tits on the bright ties are so small it would be easy to get things out of alignment with instant acting glue, unless it was already aligned before applying the glue. I think I will go ahead and apply the track prior to painting the bridge, and coat the very top of the rail itself to make it easier to remove the paint coating.

BTW I am attempting a rather unique application of a long length of bridge rail,... in combination with sections of re-railers at either end. ( I am a real believer in having rerailers on either side of my elevated bridge rails crossing my entrance-way)

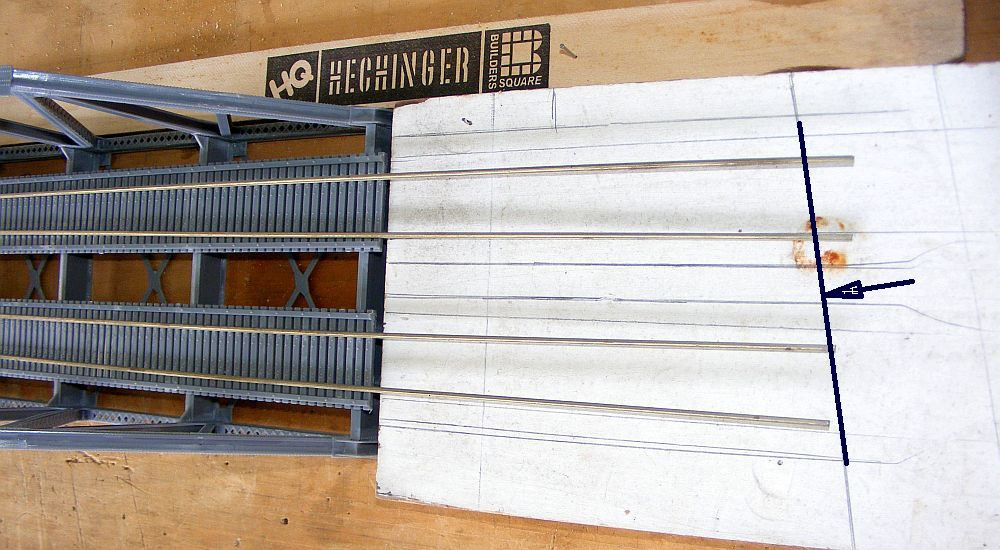
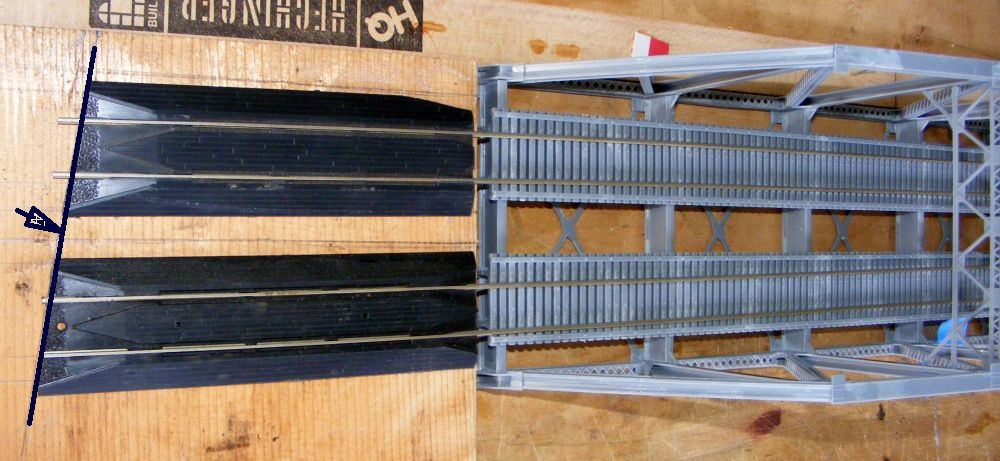
My bridge structure by itself does NOT span the entire width of the lifting section,..but rather there are two short sections of plywood deck on either end before the actual cut-off gaps. Those cut-off gaps are illustrated here,..
DSCF8147, with cutoff line.jpg DSCF8148, with cutoff line.jpg
As you can see there is approx a 6" space between the end of the bridge tracks and the cut-off lines. I want one half of the rerailer in that space (the other half will be on the other side of that cut-off gap).

I wanted to see if I could install that short piece of rerailer WITHOUT using any kind of rail jointer between it and the actual bridge tracks,....just make it one continuous track section. This involved removing the rails from the Atlas rerailers, then sliding those onto the ends of the extended bridge rails. This was quite an operation! In the photos above you will see I have done one side, and today hope to finish the other side.


Back
Top