Dave's Layout v. 4.0


Ah! They are a different type to the ones I get, mine are 3 wires, 2 with pre soldered resistors and 1 earth, the hole I drill is just large enough to let the resistor through which is also the same size as the base of the lamp.
check out the pic on post 189, several items came with each lamp"

- The lamp has a 5/32" threaded shaft with nut. I don't use the nuts but put JB weld around the threads and stick it in the 3/16 hole that I drill.
- there were resistors for each lamp, I attached one to the short wire which is connected to the DC accessory line
- notice there are short sections of wire with just a plug on one end (the wire with the resistor). That one I connect to my DC accessory line which is just hot and ground
- I run the lamp wire through the hole and stick the lamp, with the JB weld, in there. There is some wiggle room so I can get the lamp perpendicular and hold it there with stuff till it sets up
- then plug the two parts together and boom, let there be light!

There is another package to the right with just bulbs, these also from China. These have the resistor built in and I will use them in a couple buildings, I think. I used them on the old layout and also was able to put one in one of my locomotives where the headlamp did not work. I think the pack had like 20 in there so I have a lifetime supply.
Nice I've seen those, we call them "plug and play" lights here, I was thinking of using them, but decided that it wasn't practicable for my layout as I need to be able to work under the table, so in order to do that I need to lift it up, which would mean removing them or they would be crushed, so I can;t have them fixed, if I had the space for a permanent layout where I wouldn't need to do that I'd certainly use them, these are the ones I use, you can see where I've added the thicker wire to the resistors, just need to add another one to the ground wire, it also gives me some slack under the table so I can just pull them up and lay them flat when I need to work under without disconnecting them.

20220920_204109.jpg
 
Thats a great idea, Smudge!


You may be surprised but I do not own a soldering gun. Nothing soldered on my layout. Wrap wires around a couple times and seal with some expensive electric tape which stretches real well and grabs like a crab. When I tore down the old layout these were hard to take apart.

These lights came with 2 part wires and a plug connector, so the wire to the feeder is easily connected without being attached to the lamp, then plugged into the lamp.

Those really skinny wires I sometimes use the razor blade to sever the insulating sheath, often use my teeth (big no no but thats how I do it) to strip it off. I have a stripper/cutter tool sometimes works on 20 ga or 22 ga wire.
Dave: teeth? You might try just using your finger and thumb nail to pull it off. Even though I have adjustable strippers it always seems that one wire is not at what the stripper is set at.

Good looking layout shots.

And ... This is probably out there, but. Saw an 86 Burb the other day that was panelized. Don't remember if they make such a critter from the factory or not. Talked with the guy that had it and he fit metal over the back side windows, welded them on and did all the cosmetic stuff to make it look good. It did look good. Didn't have camera or cell with me so no pix; sorry. Your wife needs a panel truck, right?
Being a smoker, I find using a flame often works quite well, as long as I'm quick :D
 
Dave: teeth? You might try just using your finger and thumb nail to pull it off. Even though I have adjustable strippers it always seems that one wire is not at what the stripper is set at.

Good looking layout shots.

And ... This is probably out there, but. Saw an 86 Burb the other day that was panelized. Don't remember if they make such a critter from the factory or not. Talked with the guy that had it and he fit metal over the back side windows, welded them on and did all the cosmetic stuff to make it look good. It did look good. Didn't have camera or cell with me so no pix; sorry. Your wife needs a panel truck, right?
Thanks, Todd;

My fingers do not work well, just barely good enough to do some of the stuff, often use tweezers; I have that finger numbness you get from running the chainsaw too much, the early ones that didn't have the suspension system (homelite XL-12). Now I have the nice Stihl saws with the superior anti vibration features.

Panel truck idea a good one, however since all my windows are in really good shape will stick with them,

I would really like to do a little body work but the key component I need is on back order everywhere, wondered if people make the stuff out of aluminum flashing ever, I considered doing that. It is the passenger side rear wheelwell that could use some attention.
 
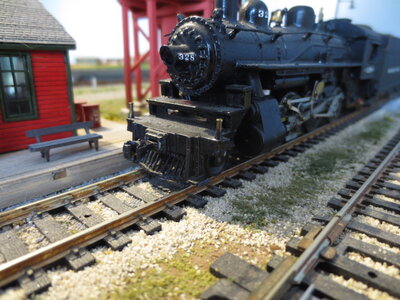
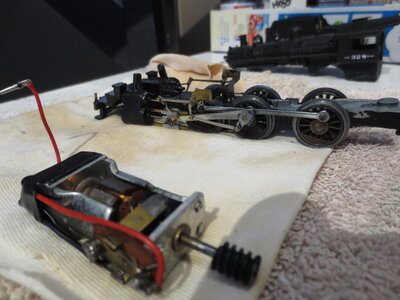
Time for another update, I had a good weekend in the train room; took the old Varney apart again found another removable plate, got the drive wheels cleaned up and lubed, really smoothed out the operation:

IMG_2685.JPG

also put on a dummy coupler on front, which actually works!

IMG_2701.JPG

Made this video of the loco before got the new lube work done, you can see she is pulling a heavy load and the section of grade is a little steep:


made the little cover for over the lift out handle:

IMG_2698.JPG

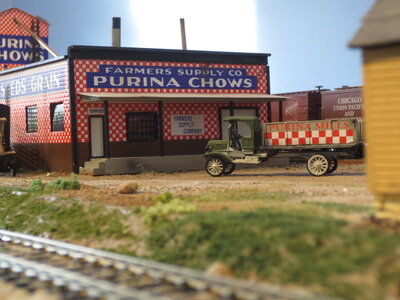
took this pic of the feed mill:

IMG_2684.JPG

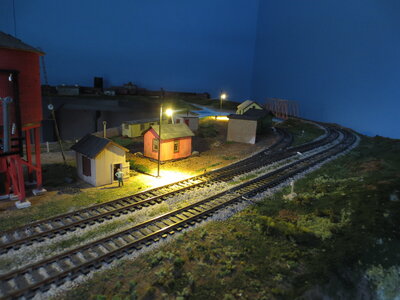
Here is a night shot of Groningen, shows some of my new lighting:

IMG_2675.JPG

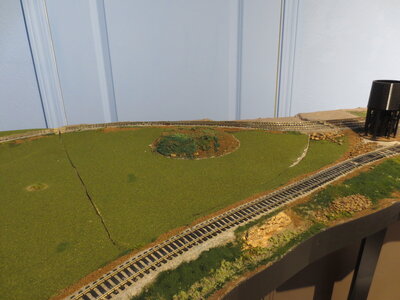
Also got a large view pic of more of the layout:

IMG_2700.JPG


Leave a comment,

Thanks for Looking!! Dave LASM
 
Time for another update, I had a good weekend in the train room; took the old Varney apart again found another removable plate, got the drive wheels cleaned up and lubed, really smoothed out the operation:

View attachment 152368

also put on a dummy coupler on front, which actually works!

View attachment 152369

Made this video of the loco before got the new lube work done, you can see she is pulling a heavy load and the section of grade is a little steep:


made the little cover for over the lift out handle:

View attachment 152370

took this pic of the feed mill:

View attachment 152371

Here is a night shot of Groningen, shows some of my new lighting:

View attachment 152373

Also got a large view pic of more of the layout:

View attachment 152372

Leave a comment,

Thanks for Looking!! Dave LASM
Wow, you've been busy, I love the lighting, makes me want to crack on with mine, maybe do some more tonight when I get home.
 
Thanks, Lloyd, it is good to hear from you again!!

Curt, Thanks!

Chris - the postage was actually pretty small since it fit into a mailing flat, and the guy at the Sandstone post office was so pleasant that I don't want to muddy up the whole transaction with having to take a check to the bank :D
 
Thanks, Lloyd, it is good to hear from you again!!

Curt, Thanks!

Chris - the postage was actually pretty small since it fit into a mailing flat, and the guy at the Sandstone post office was so pleasant that I don't want to muddy up the whole transaction with having to take a check to the bank :D
Ok, one of the reasons I use PayPal, makes it easy when getting anything from the US, but as long as your sure, if there's anything you see from my side of the pond you want, just let me know, ok
 
Well I made some progress on the water feature, have it broken up into a couple different sections, here is what I am using in addition to dry sand and small particles:

IMG_2729.JPG


The field grass will be used for the rush's that line the shoreline in shallow places. Was not what I was expecting, was going to use this elsewhere but it turns out to be perfect for this use

IMG_2730.JPG


This little pool I did in a lighter blue, wheras the main body is much darker, still not ready to post

There will be trees eventually, but want to get all my ground work done before trees are planted.

THANKS for looking, Dave
 
Well I made some progress on the water feature, have it broken up into a couple different sections, here is what I am using in addition to dry sand and small particles:

View attachment 152937

The field grass will be used for the rush's that line the shoreline in shallow places. Was not what I was expecting, was going to use this elsewhere but it turns out to be perfect for this use

View attachment 152939

This little pool I did in a lighter blue, wheras the main body is much darker, still not ready to post

There will be trees eventually, but want to get all my ground work done before trees are planted.

THANKS for looking, Dave
That looks very realistic, unfortunately I have no patience to even try doing that, my biggest downfall I think, that and my big mouth 🤣


Back
Top