Building the Pinnacle Creek Mining & Timber Co. RR


joed, You're in! No problem. I think most of these little contests are fun.

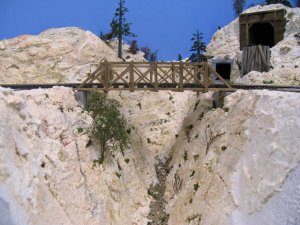
Back to the canyon. Here is a photo showing progress on the unfinished canyon. I generally pour the 'water' in near the last of the building of the scene. Still more planting and configuring rocks. Jim:)

IMG_5981.JPG
 
Last edited by a moderator:
Jim, I have been following this thread from the beginning. You are one heck of a layout builder. I am just getting back in to n scale after 30 years or so. Always had layout but never bothered with scenery. You have inspired me to try it out on the new layout I am starting. Keep on teaching, as I am sure you have opened a few eyes and minds with your modeling. Jim.
 
Jim, Good to hear someone is brave enough to start at the beginning! Thanks for the kind words. Below is an N photo from my previous layout. Show pretty well that all these techniques work in scales other than HO. Jim:)

Mogul Sunrise3.jpg
 
Last edited by a moderator:
wonbat, Thank you.

Some progress today before the Super Bowl. Weights holding down the track and bridge while the glue dries. At least 8 hours if your curious. I, as almost always, use Woodland Scenics Foam Tack Glue. Jim

IMG_5984.JPG
 
Last edited by a moderator:
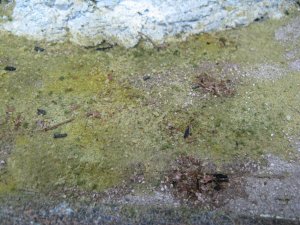
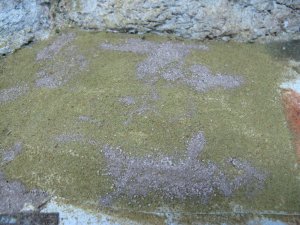
If you want to take the simplest scene to the 'next' step try this: Add some patches of different soil and rock mixes to your basic grass scenery. Go outside and look at a field somewhere and it will see that a wild field is just a mixture of different conglomerations of things. Mine is a transition from SW Colorado to SWestern desert. My mix is soil and tiny rocks to show a drier climate.

IMG_5982.JPG

Of course this photo just shows the Low Desert Soil from Arizona Rock & Mineral Co. on a base of ground cover. I let this desert soil dry over night because to take away the rough look we see in the above photo we have to blend it in and I think putting the final ground covers on the next day brings out the dry desert soil enough to be noticed for what it is, dry burnt out dead patches. Like this:

IMG_5983.JPG

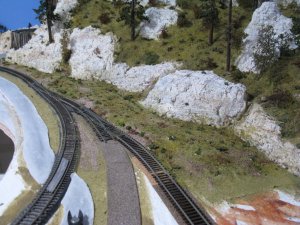
I like this look for covering those 'empty' spaces we can find on our layouts. Below is the area that needed this work. I will put a few trees and stumps in but I think is looks pretty good.


IMG_5986.JPG


So take that extra step, which comes before the last steps, and give some extra to your scenery. Jim:)
 
Last edited by a moderator:
Jim, I am intrigued about the depth and steepness of your ravine/gully, I think I really like it and it is typical of that terrain. Generally, what makes a difference between an ordinary layout and a good layout or an outstanding layout is the scenery. Taking that extra step or steps really makes a difference. In your case, that's what its all about. - Chris
 
And to quote a old movie favorite of mine, "I thought you was dead" because I read the date wrong. I'm happy you are posting and doing well. You've helped inspire me back into the hobby, abet in a smaller, much smaller way than I left it.
 
Got an email back from the Hobby shop that sold those cars and truck to the Gold Coast club (belatedly 'cause Hotmail had stuck it in the junk folder). They haven't any at the moment but hopes they can when they go to a trade fair in 3 weeks. Shop's name is Christmas Every Day, email sales@christmaseveryday.com.au
 
Thanks Toot for sure. I will look them up later this month.

Jim, Not dead yet. Only my back is hurting the most. Keeps me out of the layout room sometimes.

Thanks Mike.

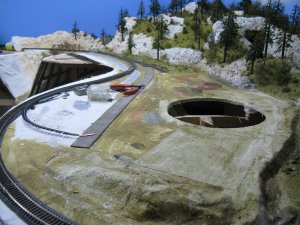
Here is a progress photo taken about 3 minutes ago. This gives a general area look of what is left to be done. With my back the turntable hole may be there for awhile! Jim:)

IMG_5988.JPG
 
Last edited by a moderator:
Jim do you use a static grass applicator ever? Your scenery skills are top notch as it is so I'm guessing you probably can do without one and acheive the same desired effect...

Obviously you are currently doing low line areas as you stated in your previous post but what are your thoughts on them? They come in handy for certain situations
 
joed, Did you check out Post 1955? I answered your measurement questions about the canyon.

Yes, I built a perfectly good static applicator and I have only used it once for a simple test to see if it worked. I've not used it because generally my layouts wouldn't look 'right' with grass sticking straight up. Nice for fields and parks but that is not what actual grass looks like on a hillside in a rainy climate like the first PCM&T Co. layout. Grass would be all matted down and every which way. Now I am putting in some logical places for electrified static grass. I actually thought about doing some around the turntable area. More out of curiosity than anything else. The applicator has be sitting here unused for 7 years! One important part of using static grass is to mix in different lengths of grass. Especially on this layout. That means another purchase from Scenic Express. Not high on my agenda right now. So who knows? My way of applying static grass is to shake the container vigorously making my own electricity. This is good for the hills, maybe not for flat lands. Jim:)
 
Last edited by a moderator:
I know we passed this topic some time back, but I came across a really good picture of a "A Frame Gallows Turntable. The photo was taken at Nevada State Railroad Museum.turntable02.JPG
 
As mentioned before I am using Sculptamold for this layout. It is a fun material and I've never used it before. I did discover something about it however. I have been mixing acrylic paint into the mix with water. No problems. But, when it dried the rust and reddish colors faded out a bit. Most of my recent photos show up much lighter than I want them to. Remember starting on the right side of the layout is grey rock and on the left will be much more reddish. So I've decided to leave out the paint in the mixing stage and simply paint my Sculptamold rocks with acrylics after application to the layout. Here is a recent photo of the canyon showing more 'red' color. More like I wanted it to be. I have actually painted the colors in the canyon. Jim:)

IMG_5989.JPG
 
Last edited by a moderator:
Chris, I will continue to add some Rust and Yellow Ocher to the basic mix. I don't want white rocks, as some will always show on a cliff side. The best reason not to try and compensate the fading by over coloring is that we can make mistakes. Getting the right mixed over a 14 more feet of layout will be tough as well as expensive. One of the ideas of this thread is to use readily available products from your LHS, Michael's, ebay, etc. I also go across the street to Mission Trails Park to get supplies. If I paint the rocks after drying I can control the color much better. Jim:)


Back
Top