Building the Pinnacle Creek Mining & Timber Co. RR


And don't forget North Cascades NP in Washington State. No flat land at all. I believe it is the most 'mountainous' park.

In the photo below I have to make a canyon in the original 7 year old bench work. I did have to move the front right hand 2x2 leg a few inches to the right.
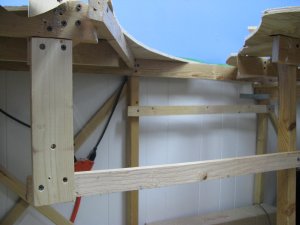
IMG_5791.JPG

I then built this frame for the canyon. Notice the brace in the back is higher than the one in the front. Water goes down hill etc.
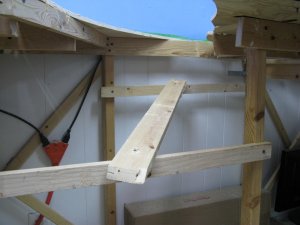
IMG_5792.JPG

Then I screwed in a 'bottom' of the canyon. It is slanted because of the angle but that is not a problem. When I attached the cardboard lacing I can make the 'bottom' right.


Jim :)
 
Last edited by a moderator:
That is going to be one steep canyon, Im guessing you will use some kind of wooden bridge? How wide is this gap? Doesnt look very wide but sure looks deep, unless its the picture. Keep the pictures coming, looks nice, im glad your doing another layout...

Quick question, have you ever modeled modern day, i know you have had numerous layouts, if not, have you ever thought of going modern, jw?
 
Just got back to your new build and noticed the 'grade' discussion. http://www.pattinson.net/wjp/rr/index.html has a bunch of calculators including grade. 2.5 degrees works out to a 4.37% grade, and 2.8 deg is 4.9%.

Computation for degree to grade is:
#deg / 0.57 = %grade
%grade * 0.57 = #deg

I'm not sure average grade is all that useful if sections are too steep to be traversed. Just a thought.
 
Thanks Walt. Seems simple enough.

joed, I guess the answer about modern day modeling is a no. When I was 6 living in Spokane, WA I was two blocks from an overlook down onto the railroad tracks. Probably about 150 ft above them. All that summer I watched the steamers come up the tracks along the river approaching Spokane. I was such a regular that I could recognize engineers and firemen and always got a wave. One day a new sound approached. A low rumble. A strange loco appeared. No waves from the invisible crew, nothing but a box that made strange noise. Too much of a disappointment for me. I've never been a railfan after that experience. The year was 1950 I guess. So I guess modern locos and rolling stock are not what thrilled a 6 year old boy that summer. When it came time for this hobby only the long lost dreams of a young boy would do. Jim :eek:
 
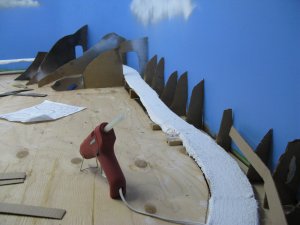
I've added some carboard to get an idea of what this little hill side may look like. Jim:D

IMG_5796.JPG
 
Last edited by a moderator:
Sherrel, Go back to Post 15 in this thread. It is plaster cloth. Dip it in water and lay it on anything. I beats dipping paper towels in plaster believe me. Jim:)
 
Sherrel, Everything sticks better to plaster cloth than to wood. I will actually paint it Woodland Scenic Earth Color, glue down foam roadbed, then the track, then the ballast. The Earth Color paint gives a nice cover up of the white under scenery items. Some folks paint the plaster cloth with cheap latex paint, but in my testing I've found the earth colored foams have a more bright lifelike quality to them when applied over WS Earth Color. Just me. Jim :)
 
... All that summer I watched the steamers come up the tracks along the river approaching Spokane. I was such a regular that I could recognize engineers and firemen and always got a wave. One day a new sound approached. A low rumble. A strange loco appeared.
Wes Harrison does vocal sound effects and touched on that on one of his albums here. This guy is amazing! And hilarious!

Here's more of his train expertise. I highly recommend listening to more -- especially his Duck Hunt. There are a couple versions, each just different enough to warrant listening to...
 
Walt, Amazing all the things I don't know!

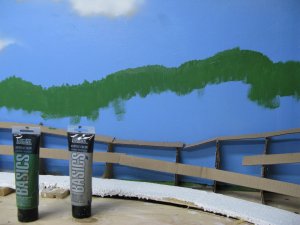
Here we have some background hills on the backdrop. The last layout didn't have any far hills because the steep terrain 'hid' them and the viewer just assumed they were there. With lower relief something has to be added. I've shown the two basic colors for the far hills. Remember hills will be lighter the farther away they are. Jim:)

IMG_5797.JPG
 
Last edited by a moderator:
Jim, you know that you are a pretty good artist as well as an excellent model layout builder.
Those look like a real forest!
 
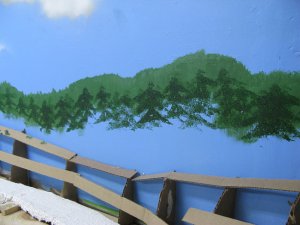
Stoker this is only the farthest away forest. Colors are lighter the farther away they are. I wasn't finished with the scene. I just showed that I painted from 'back to front.' I let the paint dry between hills. You are correct about adding black, but not on the far hills. How about this current photo?

IMG_5800.JPG

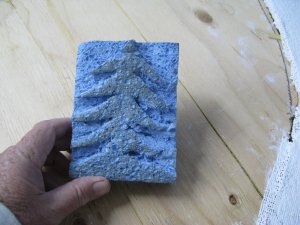
You all will see much darker trees, I added black to the green. I also tried a new technique. While the paint was wet I sprinkle ground cover on the front trees to make more 'dimensions.' The close trees I made from a sponge. I like this technique and have used it many times. Get that old crappy sponge under the sink that is hard and dirty. Carve your tree and paint on the green or dip the sponge in a proper size container.

IMG_5799.JPG

Let me reiterate, I am not in the group that thinks backdrops should be a major focal point of a layout. I know a guy who paid an artist $2000 to paint his backdrop. Result is great backdrop and mediocre layout. I think backdrops should portray in a reasonable way that there are hills, mountains, and trees in the distance, but the layout is the thing in my book. So if this is not your idea or my backdrop looks 'wrong' that is a good thing because the layout is the thing. Jim :)
 
Last edited by a moderator:
looks great jim, just wondering on average how many hours you put into your layout daily? I like your trees by the way, thats definetly one easy way to put trees on the backdrop, im gonna have to use that idea, thanks;)
 
joed, I used to spend around 3-4 hours per day. With my back issues I'm down to around an hour and a half of actual working. I do spend 15 minutes each day sitting in my chair, with my cat in my lap, staring at the layout and planning the next steps. This is the most valuable time of these projects for me. Then I can get to work and 'do' my plan. I make changes to the layout all the time as a result.

As far as this backdrop is concerned I have decided in addition to the phony ground cover tossed on it, I have more tree 'types' to add. When finished I hope it looks good as this will be another new technique. For me anyway.

As far as techniques goes I will admit to reading all the scenery manuals and how to manuals ten years ago when I started model railroading. Like most things I do my studying then never go back for a refresher look. I don't want my work to look like a copy of all the guys who do scenery or how to manuals. I gladly took what was available 10 years ago and I went my own way from there. Jim:)
 
New guy here. I looked at the first 10 pages of this thread and am in awe at your modeling skills particurlary with that waterfront tipple and the mountains. I look forward to reading/viewing the rest of the thread.
 
Borntman, Welcome and thank you for the kind words. This thread has been called a gold mine and maybe worse, but the price is free and I just enjoy helping out where I can. Spend some time going through it and I'm pretty sure your modeling and photography skills will improve. I've been asked many times to create a Blog. I'm not cut out for that I guess. This thread, if read carefully, is a blog wherein folks can chime in or not with their own views. Allowing this gives more meaning to the thread even if the page count increases.

Now that the Southern Division has started the thread gets longer and harder to follow. Unless you live alone with no responsibilities to the outside world, I would suggest skimming through until something pertinent shows up. If you have the time then by all means read every word. Someone last month said it took him two days! Many folks besides me have offered good comments and ideas here. It is all about learning or getting better with the skills we already have. Jim:)
 
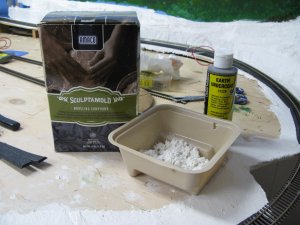
I did a couple of tests during the summer using Scultamold. Jury is still out. It is a strange mix of powder and some fiber. When mixed with water it all turns into an easily handled paste.

IMG_5805.JPG


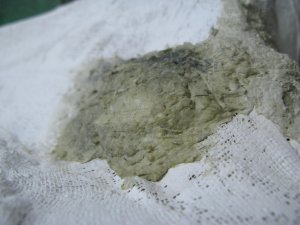
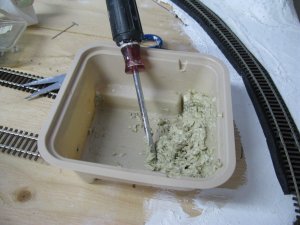
Scultamold is basically off white. I've added some Woodland Scenics Earth color to tint the mix. I didn't like the color so I added WS Black. I like the new color better.

IMG_5808.JPG
attachment.php


I did all this stuff yesterday. Just a few moments ago I carved a bit on the drying Scultamold test area. I notice, depending on original wetness it takes a couple of days to cure. While this practice 'rock' not the color I wanted I can still add more Scultamold over it. Jim
 

Attachments

  • IMG_5806.JPG
    IMG_5806.JPG
    247 KB · Views: 259
Last edited by a moderator:
Interesting!
The color is like a lot of the western scenery that I see in the more arid areas, unless you are aiming more towards the reddish sandstone colors.
Can, or will it take additional coloring such as dyes after setting up?


Back
Top