You are using an out of date browser. It may not display this or other websites correctly.
You should upgrade or use an alternative browser.
You should upgrade or use an alternative browser.
Building the Pinnacle Creek Mining & Timber Co. RR
- Thread starter HOexplorer
- Start date
Yes, we may not celebrate the holiday down here but we can give thanks to you, Jim, for sharing your modeling expertise and the scenes you create.
Silverton
Member
Jim, I also just found your thread and it really is awesome. Pictures are wonderful and you taking the time to explain everything, really is helpful. I do have a quick question about your caspia conifer tree. I read your other tutorial several times and still have one question. On either the shorter or taller HO scale trees, at what point do the branches start for the most realism? Would you say 30% up from the ground, more or less?
HOexplorer
Well-Known Member
Thanks guys. Your comments are much appreciated.
Silverton, 30% is about what I use before I start drilling the holes. By the way, I drill from top of the tree down. I use my right-angle Makita for all drilling even the delicate tree tops.
Also, remember that all conifers are not created equal. Some will have branches touching the ground. They don't usually grow taller than trees with bare trunks. So you can get by with with modeling prototypical trees either way. Good luck, Jim
Silverton
Member
Jim, thank you for the answer on branch height from the ground. I have one more quick question that I should have ask with the other thread. That is the hole size for the branches, you had said, drill bit # 54. How does that translate into 1/16 or 5/64, am I close on the size of drill bit? Thanks again.
Chris
Chris
HOexplorer
Well-Known Member
Chris, Good question. I held the bit up to my 1/16" and it looks like the next size smaller. When I bought it at the LHS the bit only had a two digit number and not an inch size. I will say that 1/16" is too big. If you have a LHS they should be able to show you the right bit. Hope this helps. Jim 
Can I have #54 in metric?


LotoQuestions
Member
#54 == 1.397mm == 0.055in
#54 == 1.397mm == 0.055in
almost exactly halfway between 1/16 & 3/64
real easy to look up online
,,, ken
#54 == 1.397mm == 0.055in
almost exactly halfway between 1/16 & 3/64
real easy to look up online
,,, ken
Last edited by a moderator:
#54 == 1.397mm == 0.055in
almost exactly halfway between 1/16 & 3/64
real easy to look up online
,,, ken
Sorry, almosts won't do. No passes for that answer.
HOexplorer
Well-Known Member
You guys crack me up!
LotoQuestions, Welcome. #54 does seem to ring a bell. I believe my smaller bit is a #60. Thanks, Jim
LotoQuestions, Welcome. #54 does seem to ring a bell. I believe my smaller bit is a #60. Thanks, Jim
Silverton
Member
So let’s see: 1/16 is 4/64 – so half way in between 3/64 and 4/64 would be 3.5/64 or 3 ½ / 64ths. I’m starting to get a headache. I did find a little drill set that I must have picked up a long time ago, but it has bit sizes from #61-#80. But I also found a bit for a Drimel tool that says 1.5mm – even closer. Probably a little too large a hole would still get covered up after all the glue or all the ground cover.
Chris
Chris
7/128ths (approximately)?
I like that - 7/128ths, very clever. I can see going into my local hardware store "excuse me sir, do you happen to have a 7/128" drill bit". and then add, "I'm making trees"!!!!
Chris
You mean you don't already get funny looks when you tell people you're a model railroader.
You mean you don't already get funny looks when you tell people you're a model railroader.
Once drill bits get down in size they go by #. So all you have to do is go to your local hardware/lumber store/Lowe's/Home Depot and ask for a #54. Nothing odd or strange about it.
Kevin
HOexplorer
Well-Known Member
Yep, bits by number.
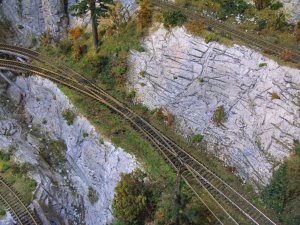
Here is a photo that shows the reason for having to shortened the main track and the siding. To get to the new ore tipple location I had to back to back two turnouts, thus some track reworking.
If I had the final vision of the PCM&T in the first place this would not have been necessary. I guess like the saying goes, 'layouts are never finished.'
Jim

Last edited by a moderator:
Even with all the fore planning in the world, there is always something that you realise could have been done better. And it will annoy the hell outa you if you don't change it. At least your rolling stock will negotiate it without trouble and it's not out of keeping with the railroad type. Don't think my 89ft's would like it much.
HOexplorer
Well-Known Member
Toot, Exactly. Many times over the last six years I've had that feeling. It really bugs me. After a couple of nights awake in bed thinking about it I make the jump to action. I'm sure some modelers don't change their "problems," but I think it is good mental medicine if nothing else. Jim 
HOexplorer
Well-Known Member
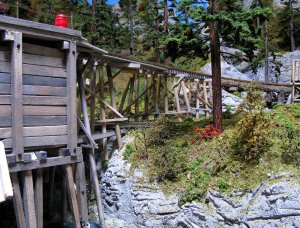
So I've been wondering what the little petry dish full of lumber sitting on my workdesk was all about. I took a great photo the other day to post here and it seemed a little to 'clean.'

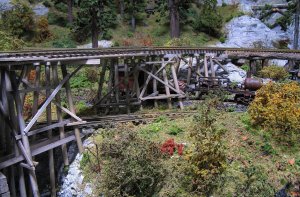
Right! Lumber missing from the trestle bridge. Idiot. For two months I've stared at that dish wondering why it was there. This trestle is supporting a 15" radius curve with two tracks going beneath it. I remember now that I wasn't in the mood to solve the geometry problem then and forgot about it until the photo above. The bents are sometimes 45 degrees to the next bent and took some extra thinking. Here's the finished bridge.

If I only had a brain! Jim

Right! Lumber missing from the trestle bridge. Idiot. For two months I've stared at that dish wondering why it was there. This trestle is supporting a 15" radius curve with two tracks going beneath it. I remember now that I wasn't in the mood to solve the geometry problem then and forgot about it until the photo above. The bents are sometimes 45 degrees to the next bent and took some extra thinking. Here's the finished bridge.

If I only had a brain! Jim
Last edited by a moderator:

