Brawa Container Terminal


CMMR

Member
Ever since I saw the Heljan container terminal for the first time I thought it would be a great addition to my layout. Unfortunately, every one for sale that I have come across has gone for stupid money.

I thought a good compromise would be the Brawa version. While not as cool as the Heljan, it is still motorized, and a little more compact. The thing is these have started to go up in value as well. When you factor in the fact that I live in Canada and our dollar has tanked lately compared to the US greenback, I didn't think it was going to be possible either.

Then one day I came across this one on Ebay. It was advertised as for repair or parts, but it had the controller. Also it was located in Canada, so shipping costs were reasonable as well. I bid a little above the starting bid, and fortunately there were only 3 bids, with mine being the highest.

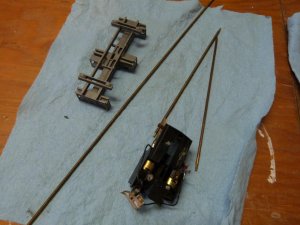
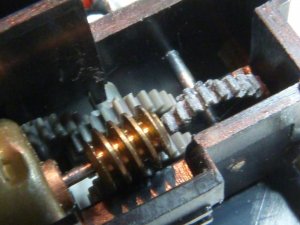
I just received it last week, and the seller wasn't kidding about the repair part. The lower platform is missing half, the upper platform has broken off, and one of the gears is definitely stripped. The controller box was being held together with electrical tape. and when I removed it half the cover came with it. On the plus side, all 3 motors appear to work.

My plan is to restore this. One of my coworkers just purchased a 3D printer, so I am going to try and model all the broken parts in SolidWorks and get him to reproduce them.

Wish me luck!

P1020586.jpg


P1020607.jpg


P1020598.jpg
 
Last edited by a moderator:
Just finished modeling up the new controller cover. I modified it slightly from the original, as I won't have some of the limitations of injection molding.

Tomorrow I'll run it by my coworker and see if it is doable on his printer. If it works out ok I'll model up the rest of the replacement parts.

Cover.jpg
 
Last edited by a moderator:
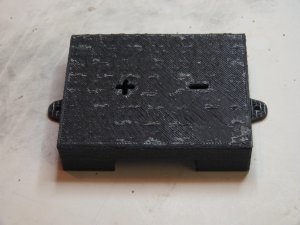
My co-worker made the cover from my file over the weekend. He is still learning about the printer and the process, so there were a couple of issues, but nothing that a little sanding won't fix. He has a Flashforge Creator II printer, which goes for about $700 US. It's printing area is 8.9 x 5.7 x 5.9 inches.

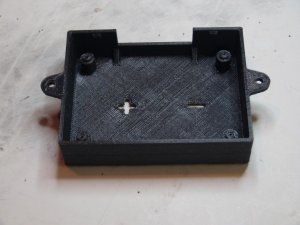
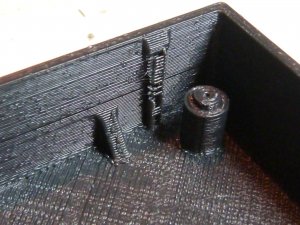
For those of you who haven't seen a 3D printed part, here is what it looks like right off the printer. This part was done at a low resolution, which is quicker to make but offers less detail. The material is ABS. All the lines you see represent all the different layers as they are built up.

P1020613.jpg
P1020614.jpg


He is still working on the support part of the processs, which is why the area between the tabs and the top is filled in. You have to figure out beforehand what orientation you want to print the part in.

P1020615.jpg


I am currently working on the CAD file for the new lower deck. If I get it done before Christmas hopefully he can run it over the holidays, along with the new gear.
 
Happy New Year!

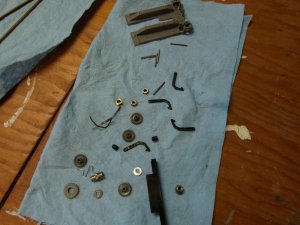
I have disassembled as much of the crane as I can. The motors all snap-in and are soldered to resistors, so I don't want to attempt to remove them.

P1020675.jpgP1020677.jpg


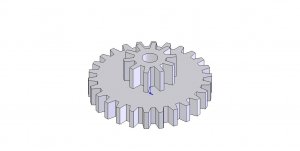
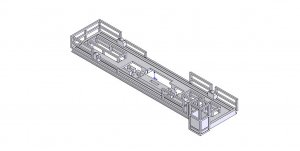
I have also finished modeling up the lower deck and the stripped gear.
All of the other gears were good, and fortunately they were the same size as the stripped one, so I used them as a template to model up the new one. I hope it is not to small to run on the 3D printer.
Gear.jpg


The lower deck was originally made out of two pieces, but I made them into one, seeing as I am going to print them. I did my best on modelling what I thought the cab and other half of the deck would look like, as the were missing when I got the crane.

Lower Deck.jpg


I will give these files to my coworker when I get back to work for him to print. I still need to model the raising arm, as it was broken as well.


I also finished sanding and painting the control box. I was going to try and transfer the original decal from the original over to the new one, but it tore when I tried to remove it. I guess I will have to come up with my own.

Once I get the 3D printed parts back I intend to reassemble and test fit everything. If everything works out ok I want to modify it by raising it high enough that it will clear a double container stack.
 
Great work and looks like a fun project.
I hope the gear turns out well.

Have you looked on the internet for the gear?
May have one you can make fit by opening the hole a little.

Keep us posted.
 
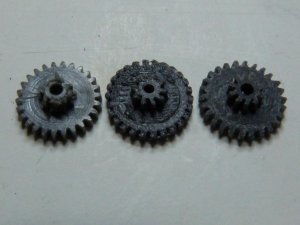
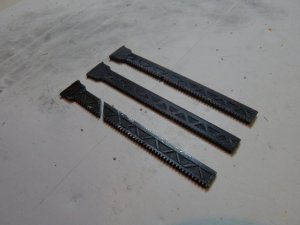
Jonathan, my coworker, ran 5 of the gears and 2 of the lifting bars on his printer. The pictures below show the original parts, the 3D printed parts as they come off the printer, and the cleaned-up parts. I used a sanding disc from a Dremel tool to clean up the areas between the teeth on both parts. Unfortunately, I took one of the teeth off on one of the lifting bars.

We'll see how long the plastic lifting bar lasts. The teeth are really small! The nice thing is I can always get him to print more.

P1020692.jpgP1020710.jpg


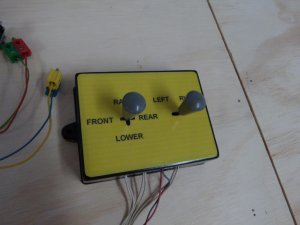
Here is the finished controller. I sanded down the cover, painted it black, then designed a new very basic decal for the top. I printed the decal on our inkjet printer using Testors decal paper and applied it. I then gave the finished cover a few coats of Krylon clear satin acrylic paint.

P1020717.jpg
 
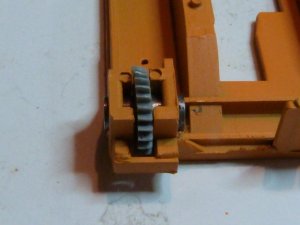
Here is the motor/gear box painted and reassembled. I used one of the existing gears at the lift bar location because it takes more abuse. The gear at the far right is the 3D printed one.

P1020699.jpgP1020703.jpg


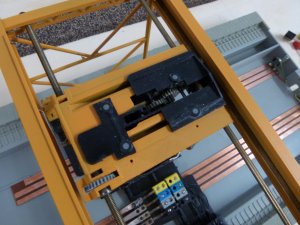
I also painted the main structure. Here is the motor/gearbox housing re-installed. The four grey circles are whats left of the mounting feet of the upper deck that had broken off.

P1020720.jpg


I still have to make new mounts for the upper deck, and Jonathan still has to print the lower deck. Once those items are done I will paint and re-install them and hopefully everything works!
 
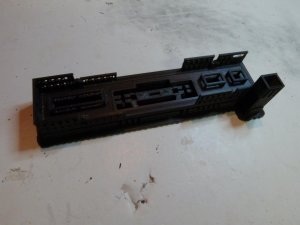
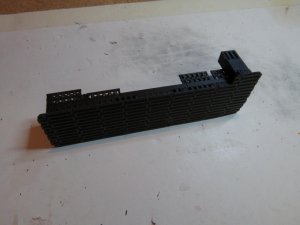
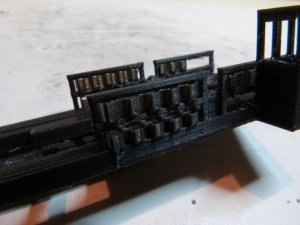
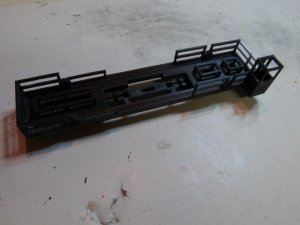
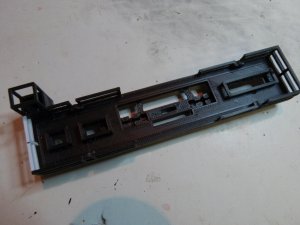
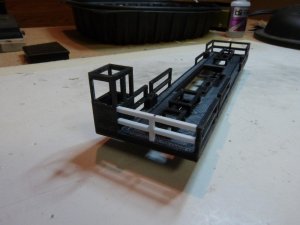
Here is the lower deck in ABS as it came off the printer. Notice the support material at the base and between the railings.

P1020721.jpg
P1020724.jpg
P1020728.jpg
 
And here is the lower deck with the support material removed. For some reason the railing didn't print on one end, so I cut some pieces of 0.060" styrene strip and glued it in place.

P1020729.jpg
P1020733.jpg
P1020731.jpg


Next step is to prime and paint it as well as a few of the other pieces. Then it's time to reassemble everything and see if it works!
 
I have the crane all painted and reassembled. I still need to add some decals and a figure or two.

After getting it all back together, I can see why the plastic gear stripped. In order to open the arms that hold the container you have to raise the lower platform till it bottoms out against the underside of the upper deck. This forces a metal channel down and opens the arms, but also puts stress on the gear. Then to close the arms you lower the deck till it hits the top of the container. This forces the channel up, releasing the arms so that they grab the sides of the container (in theory). Again, it also stresses the gear.

After about 6 cycles of trying to pick up and lower a container, the replacement gear stripped, and the teeth on the lifting arm are pretty worn as well. I may have to look at getting them printed in steel.

Next I am going to cut a hole for it to reside on the layout.
 
Last edited by a moderator:
I installed the crane on the weekend. To install it on the layout I had to recess it so that the track would be flush with the top cover. First I located it and marked all around with a pencil. Next I removed the existing roadbed.

Then I moved the auto reverse module that was located directly underneath where the crane is going to go and cut the 3/8" plywood with a backsaw. I purposely located the crane so that it would be supported on each end by the existing layout framing.

I put the crane in place and measured the distance from the top of the cover to the roadbed. I then notched out the framing that distance so that it would end up flush.

The crane is bowed pretty good...

So I placed a piece of 1 x 4 between and flush with the two frame members to support the crane in the center.

In position and screwed down.

Finally I mounted the controller and connected all the wiring. I also relocated the auto reverse module to the underside of the new 1 x 4.
 
Last edited by a moderator:
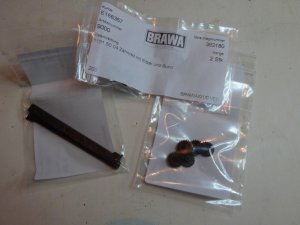
So it turns out you can still order replacement parts for this crane directly from Brawa. I guess I should have checked into that first! Oh well, the lower deck turned out fine and I got to learn a few things about 3D printed parts.

P1020918.jpg

It's not the quietest thing in the world, but it gets the job done!
 
Last edited by a moderator:


Back
Top