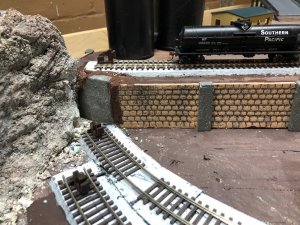
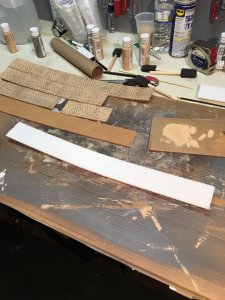
Block retaining walls


Well, you could use the old 'wire screen covered with plaster' method, and carve it the way you see fit...
Wood posts are installed vertically every, say, 5-7 inches apart to whatever height you need. The screen or chicken wire is stapled to them and then covered with plaster..It dries, you score surface and way you want, then add dyes, inks, or latex of diff hues/tints.
 
The Pennsy in Pittsburgh? That's my home town!

Meanwhile, I may have an answer for you. These are O scale. I'm guessing you're modeling HO, since you didn't specify. However, in this case, that would be a good thing! It would make the blocks even larger, like the walls you mention.

1586385718533.png

 
wall.JPG
making walls.jpeg

I made this "stone wall" with foam core. 1. Peeled off the paper on both sides of the foam, 2. Cut the foam into desired width and length,3. Score vertical and horizontal lines on the foam with a pencil, 4. "Pock mark" the foam by pushing wire brush bristles on to the face of the stone, 5. Paint the wall with dark brown paint, 6. Paint the scored lines with a gray or cement color, 7. Dry brush a light beige paint on the "stones" in the wall creating the "mortar" affect between the stones in the wall. I added the cement columns in this photo by cutting/carving them out of green 3/4 insulation foam from Lowes. The hardest part of this process is getting the scored lines straight on the foam.
 
The Pennsy in Pittsburgh? That's my home town!

Meanwhile, I may have an answer for you. These are O scale. I'm guessing you're modeling HO, since you didn't specify. However, in this case, that would be a good thing! It would make the blocks even larger, like the walls you mention.

View attachment 46193
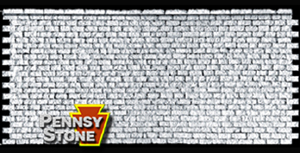
I'm not in Pittsburgh any more, lived there up until 2018, what you suggest look workable to me. Thanks I'm an HO guy.
 
View attachment 46198
View attachment 46199

I made this "stone wall" with foam core. 1. Peeled off the paper on both sides of the foam, 2. Cut the foam into desired width and length,3. Score vertical and horizontal lines on the foam with a pencil, 4. "Pock mark" the foam by pushing wire brush bristles on to the face of the stone, 5. Paint the wall with dark brown paint, 6. Paint the scored lines with a gray or cement color, 7. Dry brush a light beige paint on the "stones" in the wall creating the "mortar" affect between the stones in the wall. I added the cement columns in this photo by cutting/carving them out of green 3/4 insulation foam from Lowes. The hardest part of this process is getting the scored lines straight on the foam.
Thanks
 
Well, the BIG lesson I learned was...there is something called a Pennsylvania RR wall! Having grown up in Pittsburgh it did seem all the walls were constructed of the same style and materials. The walls lined Liberty Ave, Carson St and the stone work in the arches for the bridges over Washington Blvd pictured here.
Screen Shot 2020-04-09 at 1.22.30 PM.png
 
I made some stone block walls from 1/4-inch blue foam. I used a metal ruler to emboss the horizontal lines and a wide screwdriver blade to emboss the individual blocks. This was followed by painting and weathering. The photo below are test pieces for straight and curved walls.

1587339698695.png


1587339718139.png


Using this technique, I ended up making a very long wall for my N-scale layout. Here is a small portion of it.

1587341155252.png


- Jeff


Back
Top