
You are using an out of date browser. It may not display this or other websites correctly.
You should upgrade or use an alternative browser.
You should upgrade or use an alternative browser.
New Layout
- Thread starter Lynnb
- Start date
HO Scale MILW
A Normal, Regular, Train Fan
I'm still in the planning phase of my layout.
Lynnb
Well-Known Member
I’m a bit past the planningI'm still in the planning phase of my layout.
")
Lynnb
Well-Known Member
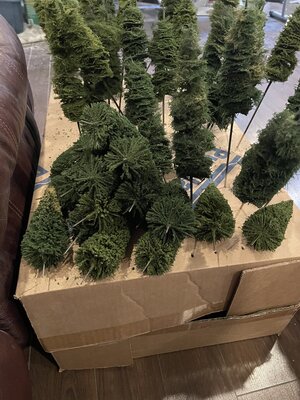
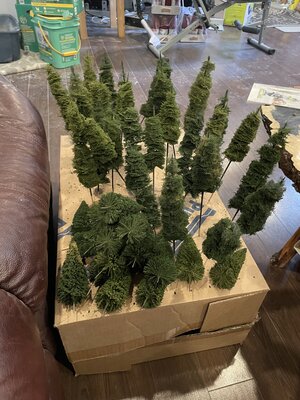
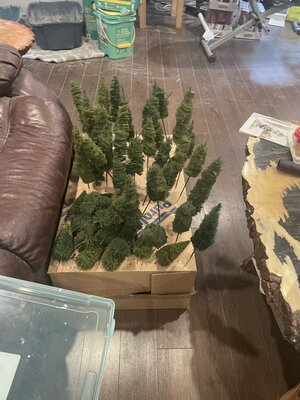
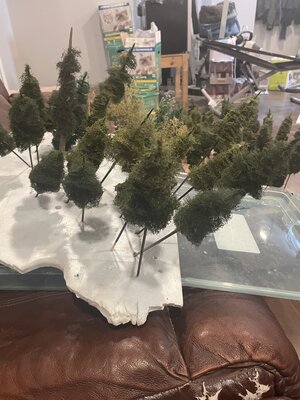
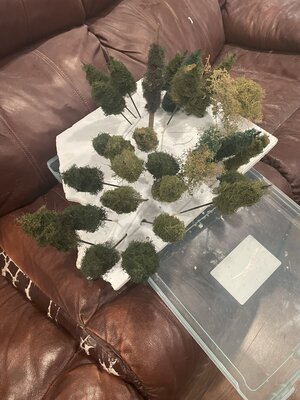
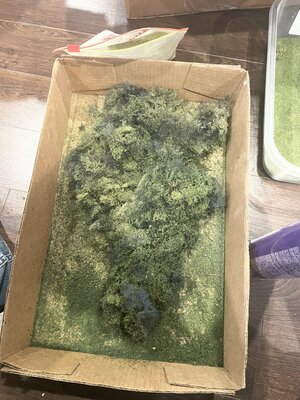
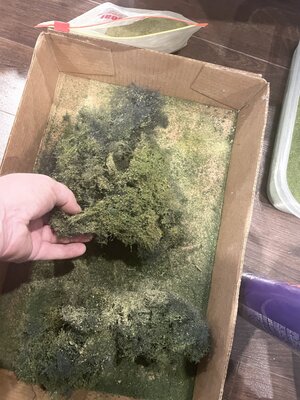
Did another 20 smaller trees , also included a shot of what I do with the furnace filter that I cut off from shaping the trees , I hairspray over top of it and add flock or whatever to it and pull pieces away to use for underbrush so no waste.
Attachments
-
 44349F0A-0BB9-4112-816C-1D66E168E8A2.jpeg612.6 KB · Views: 78
 -
 E92BF50E-F834-4759-8AA1-FB571ECAA0FE.jpeg600.7 KB · Views: 68
 -
 409B6854-2741-45DA-A84A-15523537BAF6.jpeg655.9 KB · Views: 74
 -
 50C59892-6138-4742-8725-8112EE34A131.jpeg847.2 KB · Views: 75
 -
 0402F4D9-7633-4510-ADA8-709602BFFABD.jpeg658.6 KB · Views: 72
 -
 F0D08A5D-F420-4EB4-B1B5-8C7A62B8B7BE.jpeg677.5 KB · Views: 62
 -
 2AAEB025-158B-4D01-9FD4-E400163595B5.jpeg673.9 KB · Views: 71
 -
 048D5FBC-6DA1-4B46-B71A-B31CBD8C48C1.jpeg677 KB · Views: 77
Sorry to be late to this party.Continuing with photos
Lynnb - after looking closely at photos on post 100?
I immediately took a sledgehammer to my layout!
Just simply fantastic modeling!

Lynnb
Well-Known Member
Thankyou , you’re too kind.Sorry to be late to this party.
Lynnb - after looking closely at photos on post 100?
I immediately took a sledgehammer to my layout!
Just simply fantastic modeling!
Lynnb
Well-Known Member
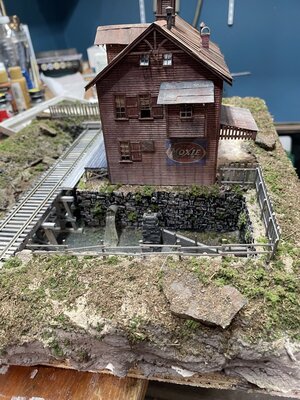
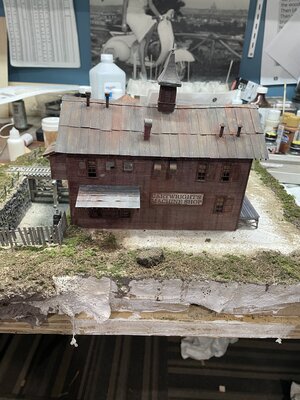
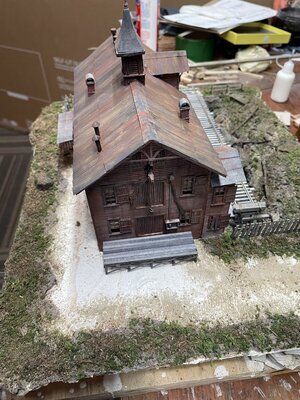
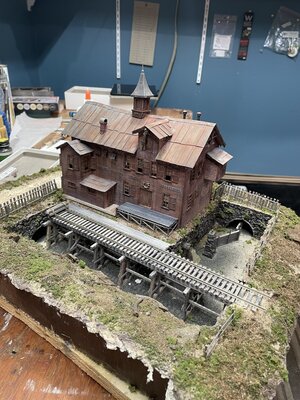
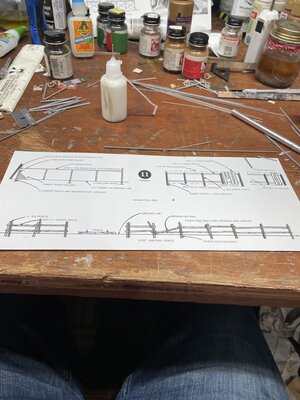
So here’s a bit of an update with what I’ve been upto, it’s a fsm Carters Machine Shop. I’m moving along slowly.
Attachments
-
 2DDC3A6F-130D-406B-AE3B-C77FFC6B13BE.jpeg764.1 KB · Views: 66
 -
 100D154B-7912-4105-BD65-1EEE2F5A83E3.jpeg820 KB · Views: 61
 -
 1ED93CC5-5C1B-4F7A-B493-F2AD4971EE08.jpeg722.8 KB · Views: 73
 -
 FA1CA4ED-D272-45CD-8C07-B1461E992EFF.jpeg765 KB · Views: 63
 -
 9AB58D11-FD7F-4467-9154-00B6EC87CA4A.jpeg802.9 KB · Views: 71
 -
 E924998B-783D-433C-984B-44A93702A29E.jpeg955.9 KB · Views: 72
 -
 FB33BED7-7ED1-459A-BED0-A7C837ABD508.jpeg835.6 KB · Views: 61
 -
 EDE9CFD3-ADC0-4312-9863-9A92CE7779BC.jpeg692.5 KB · Views: 64
 -
 650F3718-C3EA-4434-BA15-D7936DED24E4.jpeg498.6 KB · Views: 69
goscrewyourselves
I'm the one
Looks very nice mate and up to your normal high standards
Lynnb
Well-Known Member
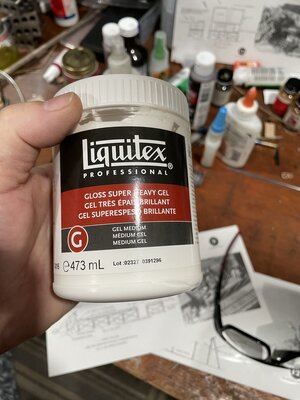
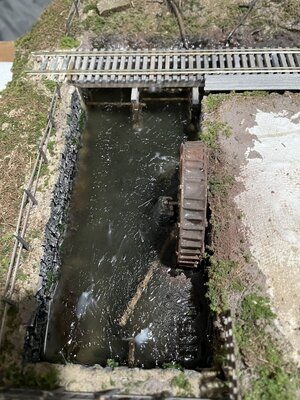
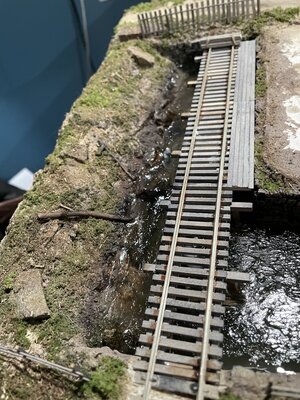
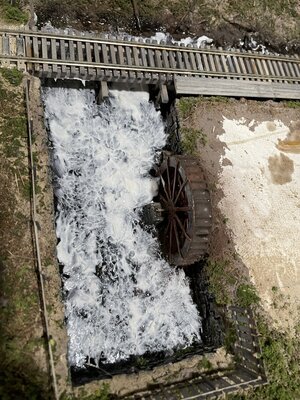
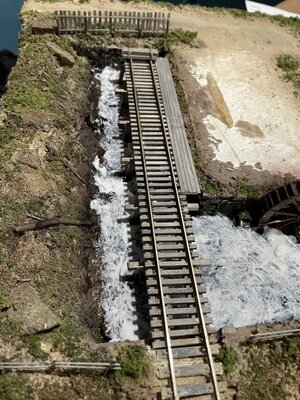
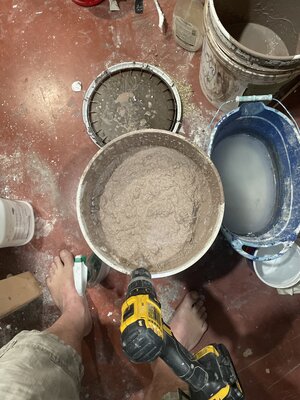
So I messed up a bit and yes it was me and not the product, I decided to pour the water for the canal and I believe I poured it too deep and it didn’t solidify. I know it was mixed right because what I had left in the measuring container I used over another waterfall poured area and it set solid. So I’m going to see if I use some heavy gel medium over the surface if I can at least get a top skin that won’t be sticky. I did one layer and some areas were dry so did another layer . You can see after the first coat how it’s transparent and showing the wood direction dam .
Attachments
goscrewyourselves
I'm the one
Other than the water Lynn - it does look great
goscrewyourselves
I'm the one
Let me down? Hey - just goes to show that your human mate ...
Lynnb
Well-Known Member
Wait what ??? LolLet me down? Hey - just goes to show that your human mate ...
Lynnb
Well-Known Member
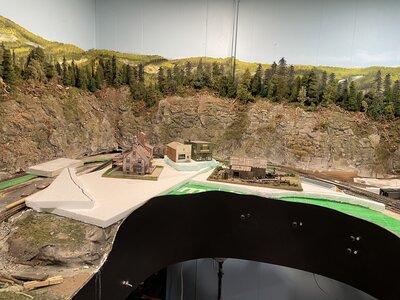
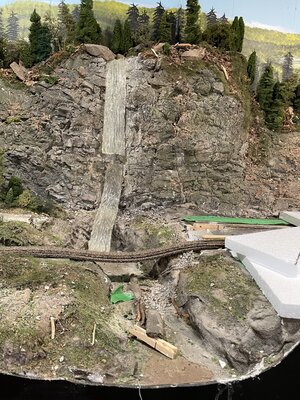
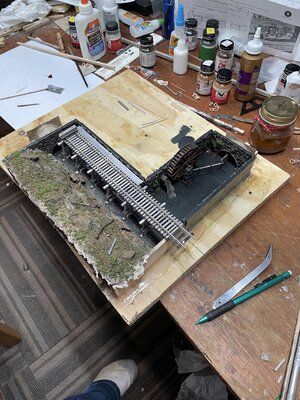
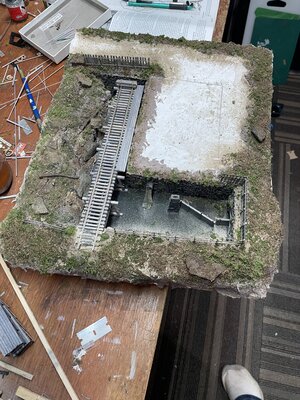
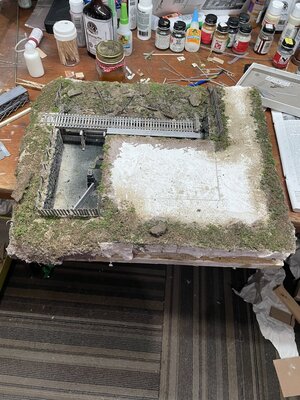
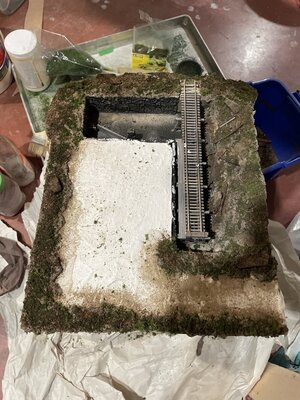
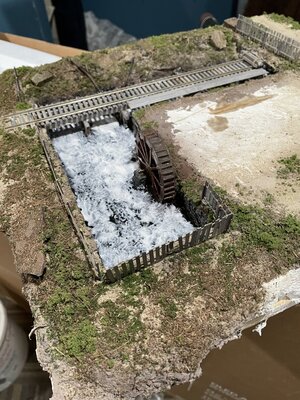
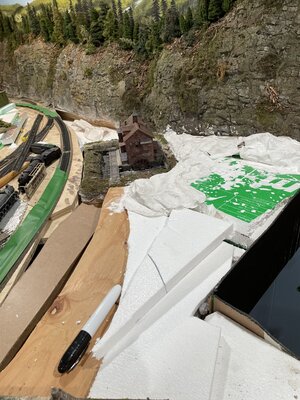
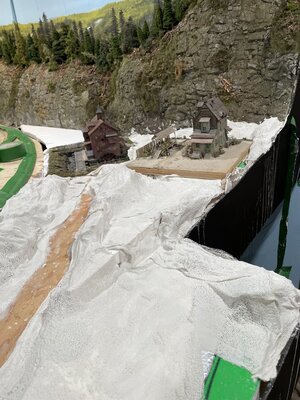
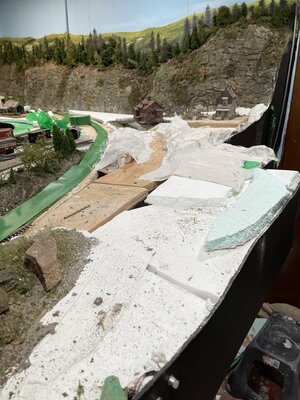
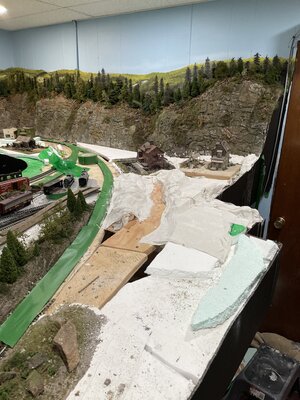
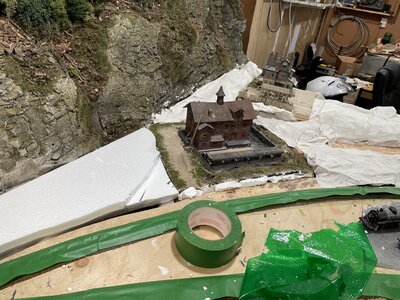
With my vision being crap I’m very limited to what I can do without destroying something so I figured I’d do some rough work on the layout and get some structures in place. There’s one thing I’ve learned is you can in fact fill in the holes on an open grid layout and add scenery hills whatever and down the road very easily cut and move scenery for more structures.
Attachments
goscrewyourselves
I'm the one
Nicely done mate and yep another PLUS for open grid bench work
Lynnb
Well-Known Member
Lol yep my eyes playing tricks, fixed that.Ground goof?
Did you make a mistake on the goop?
BigGRacing
Aka. Gary Russell
Awesome craftsmanship Lynn!With my vision being crap I’m very limited to what I can do without destroying something so I figured I’d do some rough work on the layout and get some structures in place. There’s one thing I’ve learned is you can in fact fill in the holes on an open grid layout and add scenery hills whatever and down the road very easily cut and move scenery for more structures.
