Foam on my new HO layout or just wood?


wdy77

New Member
Hi and I hope this is not a Question that I should have found.. I was online reading and watching Utube videos
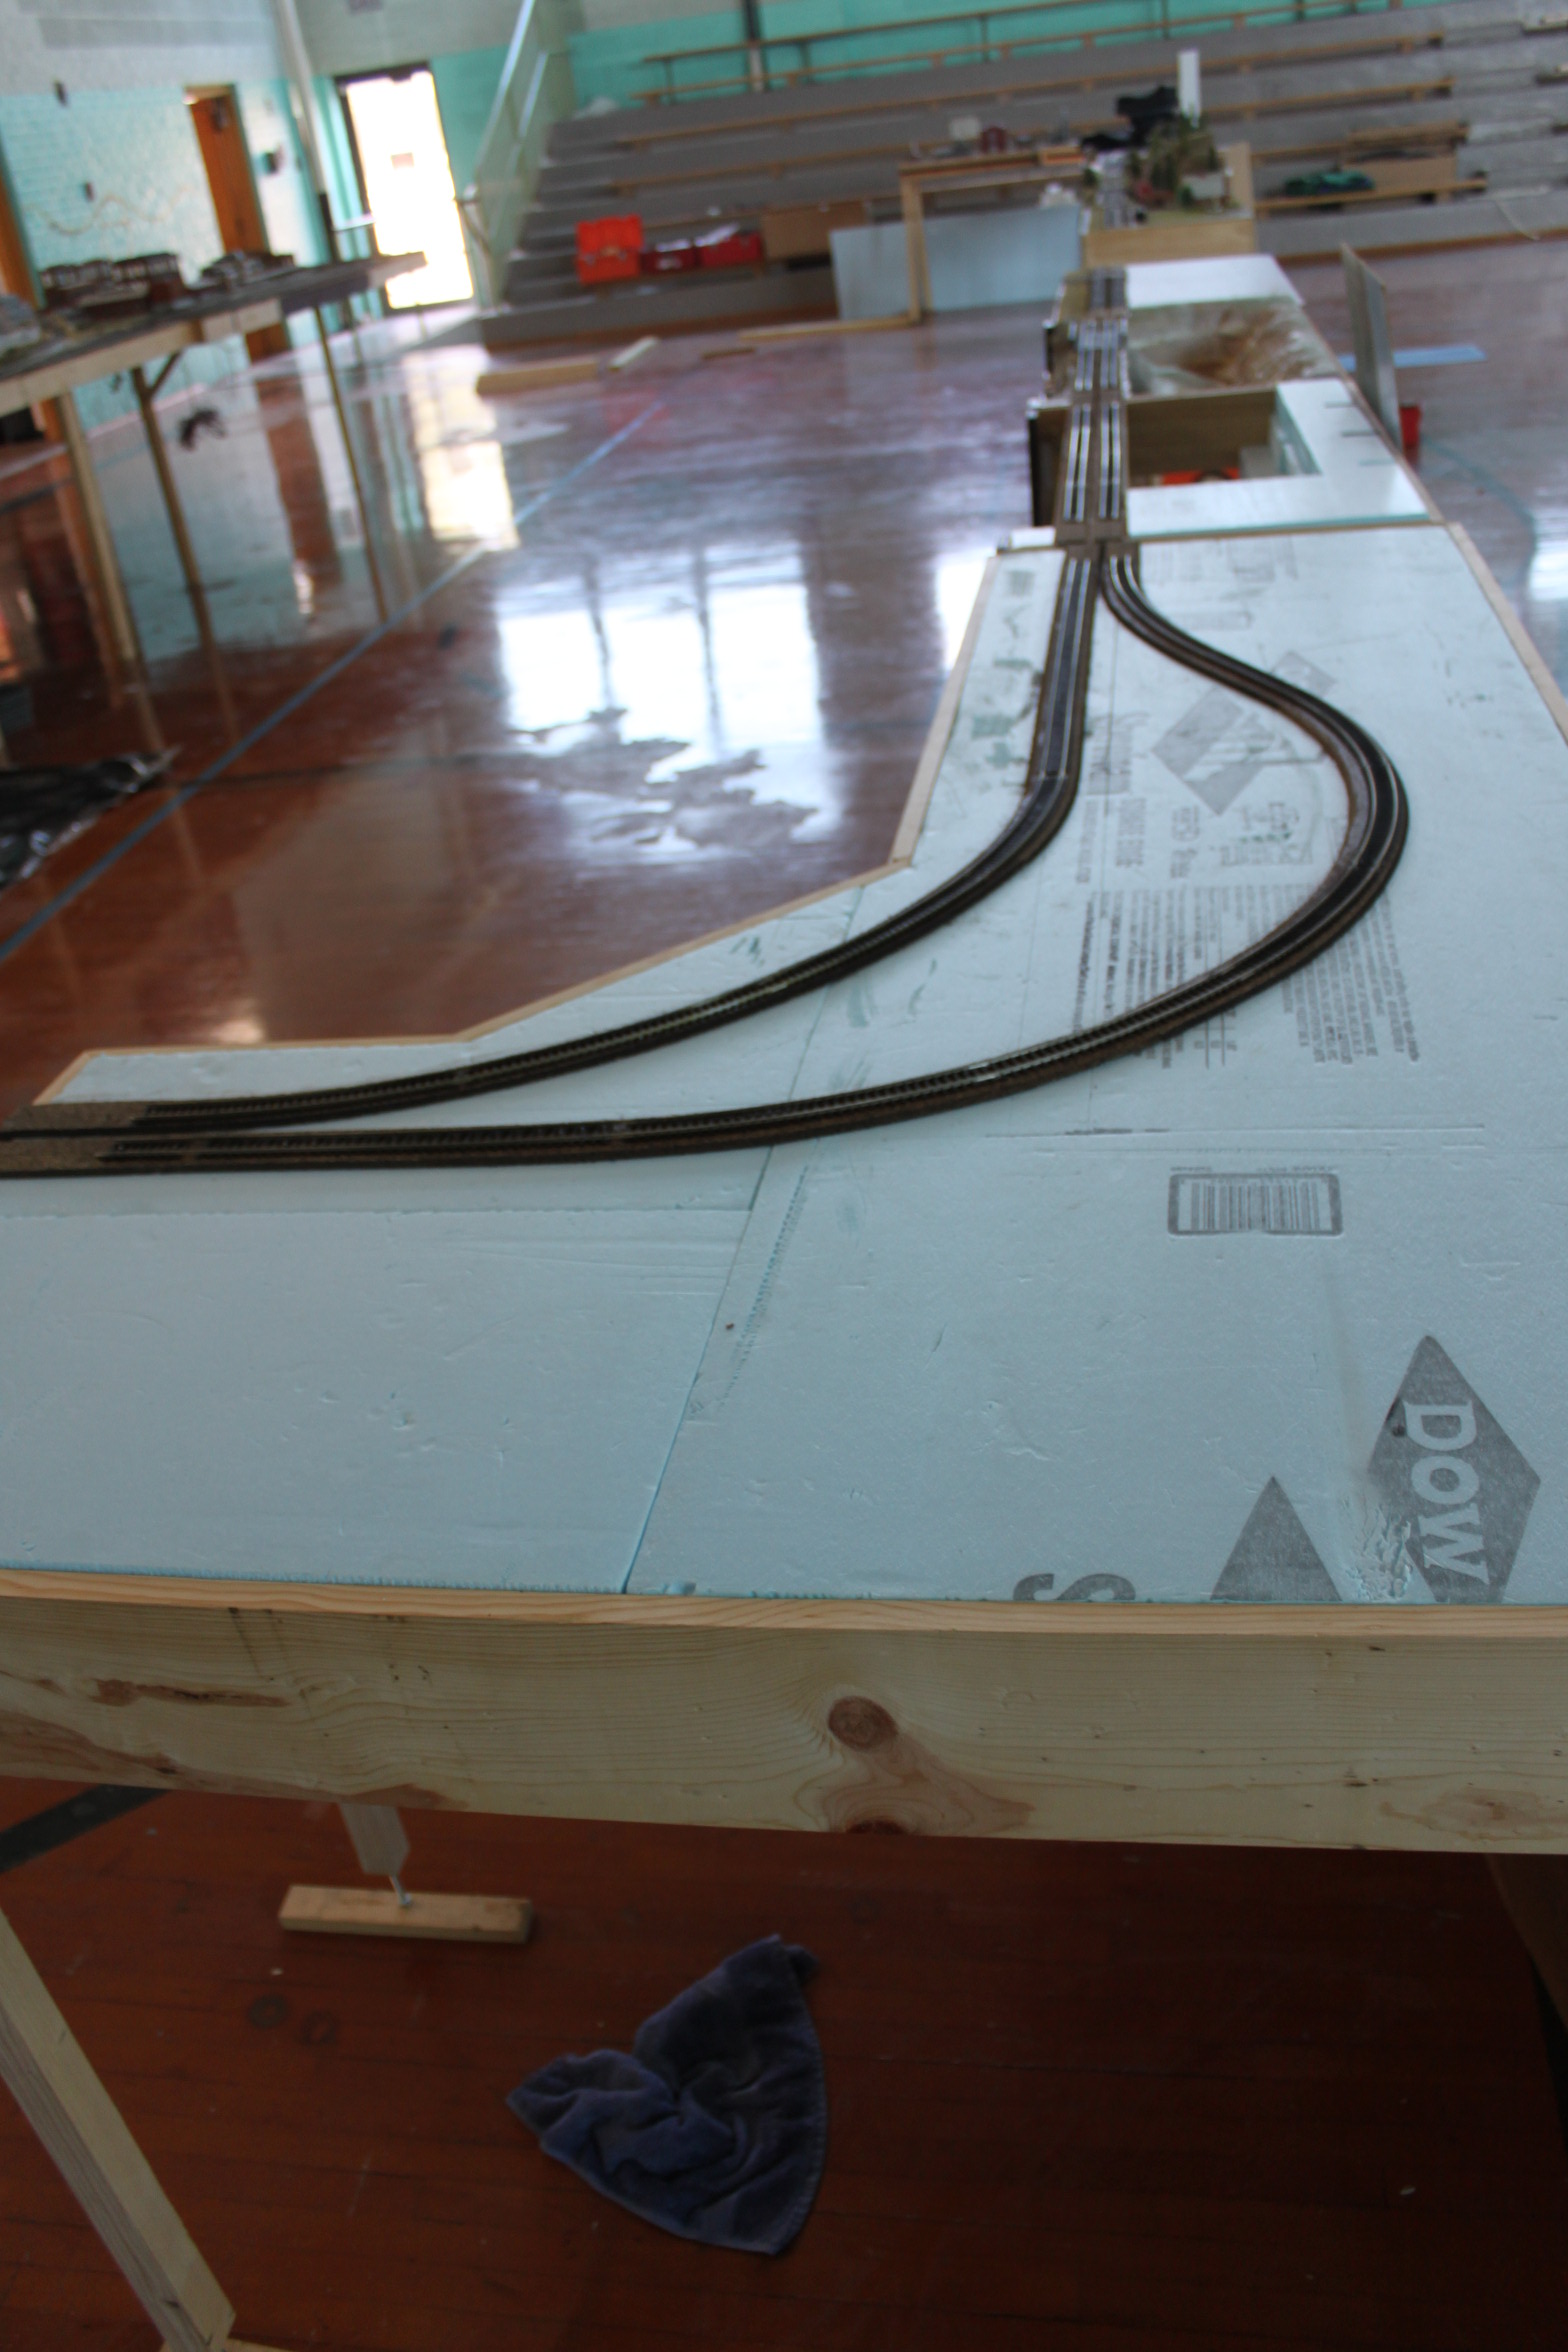
and I need to know if I should put foam down on top of my layout top or just leave it wood?.
I thought that if I put the track on the foam it may allow the track to move. The foam cant be that strong??<
So please give me some info on starting me HO layout and I will listen to all the help and tips.
Also I was thinking of changing my 4x8 idea to a 4x8 with a larger end almost like an L shape.
Do you think that is a good idea? I have limited space and The larger end is a way to have a little bit
bigger layout!! Thank you for your help!
 
If you're thinking of building a 4x8 layout, you really should check this out first! http://hogrr.blogspot.com/ There's a lot of good information for a nice layout with plenty of ideas on scenery and construction. Take time to read all of the information presented and see if this is something that interests you and that you could actually have a bigger layout than you thought.
 
The high density foam board that is used for sheathing and insulation is very strong, especially in two inch thicknesses. I intend to use foam board on my layout but because I will use sections less than two inches thick, I will put a piece of 1/4" luan plywood down first, then put the foam board on top of that. I probably won't have anything more than two foot in width so it doesn't take much to support scenery across a short span.
 
Here are four images of Dennis Ivison's (Garden Grove CA) foam modules w/ PVC legs. He used them for his On30 home layout & an On30 module club. Being 4" foam thickness don't think there's too much to worry about if they are bumped or tipped over. Probably can't take being hit by a 200 ton locomotive but then neither can a wood or steel frame module. LOL
BTW Dennis got most of his foam free at a construction site that was going to throw it away.
 

Attachments

  • 1 COMPLETE MODULE IVISON.jpg
    1 COMPLETE MODULE IVISON.jpg
    94.5 KB · Views: 209
  • 2 MODULE PARTS IVISON.jpg
    2 MODULE PARTS IVISON.jpg
    178.3 KB · Views: 284
  • 3 MODULE LEGS IVISON.jpg
    3 MODULE LEGS IVISON.jpg
    96.7 KB · Views: 252
  • 4 MODULE WIRING PANEL IVISON.jpg
    4 MODULE WIRING PANEL IVISON.jpg
    131.8 KB · Views: 214
Last edited by a moderator:
I tried 2" blue foam and 2" pink and was not happy with either. On one section I put down 1/4" OSB board for the ballast and track to adhere to, and used the OSB on top of the pink foam board for the same reason marriedshades did.

I have one curved section that I'm hoping to replace this winter because of track redesign project that is badly needed. I'm need to replace a jury-rigged bridge approach and tearing out the whole section and starting over will be much easier than a repair job.
 
I need to know if I should put foam down on top of my layout top or just leave it wood?.
Do you mean a big sheet of foam over the whole thing or do you mean foam roadbed like Woodland Scenics? http://www.amazon.com/Woodland-Scen...s=woodland+scenics+roadbed&pebp=1419047103089

I thought that if I put the track on the foam it may allow the track to move. The foam cant be that strong?
If you mean the large sheets of foam, I use it often. But always with roadbed.
modular_corner.JPG


So please give me some info on starting me HO layout and I will listen to all the help and tips.
Also I was thinking of changing my 4x8 idea to a 4x8 with a larger end almost like an L shape.
Do you think that is a good idea? I have limited space and The larger end is a way to have a little bit
bigger layout!!
That is a wonderful idea. One of my favorite 4x8 layouts with a "wing" is the Jerome & Southwestern.
200841791129_jerome.jpg
 
Last edited by a moderator:
wdy77,

I'll keep it short - use 2" foam over your wooden base.

A couple of reasons for doing so, firstly, it will quieten the layout down and secondly, will give you something to work with when you do your scenery if you want to put in rivers, lakes etc.

Even if you use foam, STILL use either a cork or foam road bed ontop of the foam unless you are using track that comes fitted with a roadbed of course.
 
Thank you to every one who has responded. Yes I was thinking of putting the sheet of blue foam on top of the hole
layout table. Do I glue down the cork road bed and then put the track down?? Still not sure..
 
wdy77,

Firstly, loose lay your track and trace around it to give you a template for the road bed. Then you need to glue the road bed down. You can use any suitable adhesive but I prefer Hard a Nails Project Adhesive.

When putting your roadbed down (cork or foam) you will see a line down the middle of it. Use a very sharp model knife and cut the road bed in half, following the center line in the road bed, that will make gluing it down easier and prevent buckling of the road bed in the curves.

Once the road bed is down, lay the track and either glue or nail it to the road bed. I think the preferred way is to glue the track down as nails have a tendincy to work their way out over time. You can use the hard as nails adhesive for fixing the track down as well, BUT only use a 'smearing' of it, you don't want the adhesive pushing up between the ties.
 
Yes I was thinking of putting the sheet of blue foam on top of the hole
layout table. Do I glue down the cork road bed and then put the track down??
Yes, one of the advantages of the cork is that it is split. So you can draw the center line of the track. Glue the one inside of the cork directly on the line. Come back later and do the 2nd half. Then, when that is all dry, you can align the track to the centerline of the cork.

On foam I use the really long stick pins to hold the track in place. I put weights on the track to down while it's glue is drying, then I pull the pins.
 
Here are a couple of illustrations regarding the use of cork roadbed.

As it comes from the manufacturer, the cork is partially split down the middle on an angle (Step 1). You can finish cutting it apart until you end up with two halves as shown in Step 2. You then re-orient the cork as shown in Step 3 before gluing down first one half and then the other half. The final configuration is shown in Step 4, where the profile of the cork creates a sloping edge on either side of the track, which helps to form the proper profile for the ballast you will add later.

cork_roadbed_four_steps.png


In the photo below, you can see how half of the cork roadbed is glued down and the glue allowed to cure before the second half is glued down. By gluing down only half of the cork at a time, it is easy to follow the curves of your track plan by positioning the flat edge of the cork against the center line of the track, as Iron Horseman describes above.

I use inexpensive latex caulk both for gluing cork to foam and for gluing track to cork.

cork2_big_a.jpg


- Jeff
 
Thank you to all of you for your Help!! My wife and I cant wait to get started but we are going to start on it after the holidays!!
We will have a small set up but Im sure it will be allot of fun and very nice. It will be a 4x8 or maybe a 4x8 with one larger end.
Merry Christmas and a Happy New Year to all!!
 
Yes, use some white glue (Elmer's All-Purpose or Elmer's School Glue is fine) under the roadbed. Not much, a thin stripe. Pin and weight it in place for an hour or two or 24 until it dries. After it is dry if you are using cork roadbed, ensure it is flat with a quick sanding with 120 grit paper. Then use spots of the same glue to hold down the track. Not necessary to slather it on, spots every 6 inches hold very well. Pin and weight the track until it dries.

I happen to use 1 1/2 inch T-pins driven in at an angle to hold the roadbed in place, then the track. It does not require weights because the T-pins at opposing angles really hold it down.
 
I wish I had remembered the pinning idea before starting on my outer loops yesterday.
Today in just a couple hours, using the pinning idea, I had my entire yard with 5 turnouts and 5 lines all roadbedded in happy short order (a few hours with breaks here and there).
It's only been some 40 years since I've done this stuff so I've long forgotten all those old trick.
What I did was to hook up the track as desired, slide the roadbed under and pin it in place.
It went just swimmingly!
Thanks for the reminder!!!
E.
 
It's only been some 40 years since I've done this stuff so I've long forgotten all those old trick.
Yeah, about 40 years for me too. I'm re-learning and inventing things to make it easier. Your idea of track first then slipping the roadbed underneath is new. That could work in certain circumstances for me. It is possible to glue the track and roadbed in one go with the T-pins; for me it is enough to get one thing correct at a time.

Things I have learned or re-learned about Ready-To-Run turnouts:
  1. Function over appearance. It is no fun if a gorgeous turnout hangs up or does not operate freely. Make whatever visual compromises you have to so the turnouts operate perfectly.
  2. Cut or notch the roadbed for clearance for the throwbar. That way, the throwbar is guaranteed to move easily and not bind against the roadbed. It does not have to be much, just file 1/4 inch wide and 1/16 deep. Or cut a slot through the entire roadbed if that is easier. I use a Dremel and cut-off wheel to grind a notch. Aside: the heat from grinding makes the cork and rubber roadbed stink.
  3. Under each throwbar, centered between the tracks, drill a 1/2 or 3/8 diameter hole through the roadbed and subroadbed. It is useful if you ever go back and install under-table switch machines. In the mean time it is not noticeable.
  4. I have to notch the sloped roadbed at the end of the throwbar to allow free movement of the throw wire. I use ground throws on the edge of the layout and long wires in tubes to reach each turnout.

More realistic roadbed:
Round off the top corners of cork roadbed before ballasting. The corners are abrupt and real ballast has a rounded profile. I round off that corner with a rough file or sandpaper. I happen to use sanding mesh intended for drywall, it looks like window screen covered with black grit. I try to shape the roadbed before I lay the track but sometimes I forget and it is still possible to work it with the track in place.

Hey that's a great idea! I know exactly what you mean about the mud sanding mesh stuff. Probably an 80 grit paper would be ok as well. That mesh stuff is made so all that mud dust falls away instead of glomming up the paper. I say that because I may already have some low-grit paper on hand - i.e. one less thing to buy for the time being. None the less, I'm glad you mentioned that. I haven't completely decided to ballast or not.
 
Not to hijack this thread, but I am (somewhat) closing in on clearing out the basement and building the benches, and I am thinking ahead to track.
How do you know that your track is "correct" and that it all works fine before you glue and tack down the roadbed and track?

e.g. Would you normally connect all of your track and make the trains run without derailing first, then go back and glue it all down, or as you say, loose lay your track and then fix it later? How do you fix it if you need to make big adjustments (for example, is it easy to tear up the roadbed and fix it?)

Thanks.

wdy77,

Firstly, loose lay your track and trace around it to give you a template for the road bed. Then you need to glue the road bed down. You can use any suitable adhesive but I prefer Hard a Nails Project Adhesive.

When putting your roadbed down (cork or foam) you will see a line down the middle of it. Use a very sharp model knife and cut the road bed in half, following the center line in the road bed, that will make gluing it down easier and prevent buckling of the road bed in the curves.

Once the road bed is down, lay the track and either glue or nail it to the road bed. I think the preferred way is to glue the track down as nails have a tendincy to work their way out over time. You can use the hard as nails adhesive for fixing the track down as well, BUT only use a 'smearing' of it, you don't want the adhesive pushing up between the ties.
 
Number9,

Loose lay your track first, test run it to make sure every thing is in working order with no power disruptions, warping of the track, derailments and so forth. Once you have ensured every thing is okay, and/or made any adjustments, trace around your track so you know where it goes back. Take it up and lay your road bed, following your tracing.

Next, I would loose lay the track again to ensure your road bed has gone down properly and isn't going to cause any issues. Once that is established, then fix your track down to the road bed.

Tearing up your track is not difficult, if you use the right adhesive for attaching it; however, it IS (from experience) a pain in the posterior. You are far far better taking the time to ensure your track work is right before adhering it to the road bed so you don't have to tear it up to fix a problem.

As has been said PPPPPP - Prior Planning Prevents Piss Poor Performance and nothing could be truer when laying your track.


Back
Top